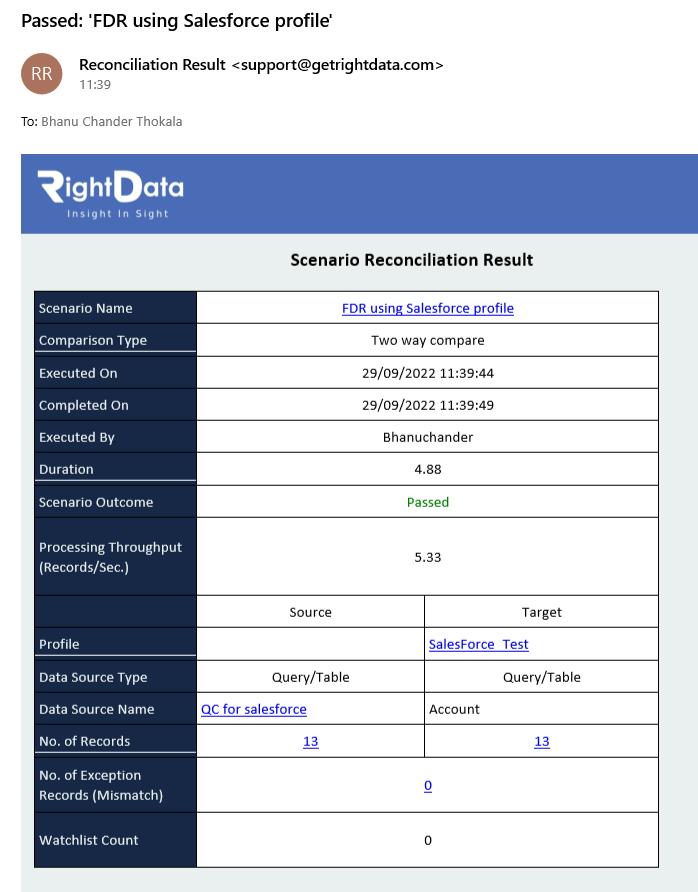
Using FDR, users can compare a pair of data sets (source and target) to the field by field level. Let’s execute an FDR using ‘Salesforce’ profile connection.
To learn more, let us walk through the below procedure:
- Click the ‘SCENARIO STUDIO’ module.
- Hover on the ‘Scenario Builder’ snippet from the left pane options.
- Click the ‘Functional Data Recon’ option.
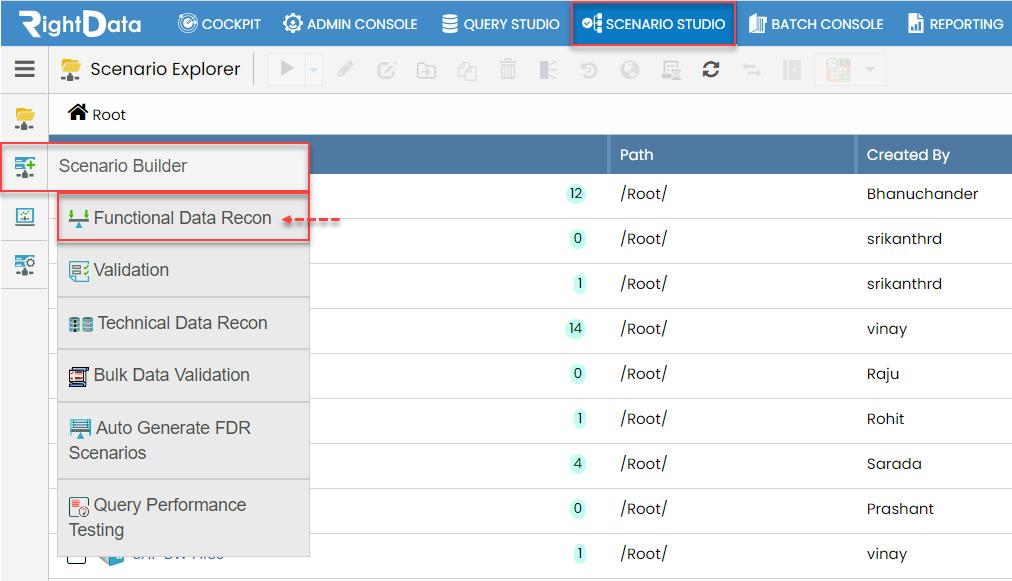
- The user is navigated to the FDR Session page in create and edit mode.
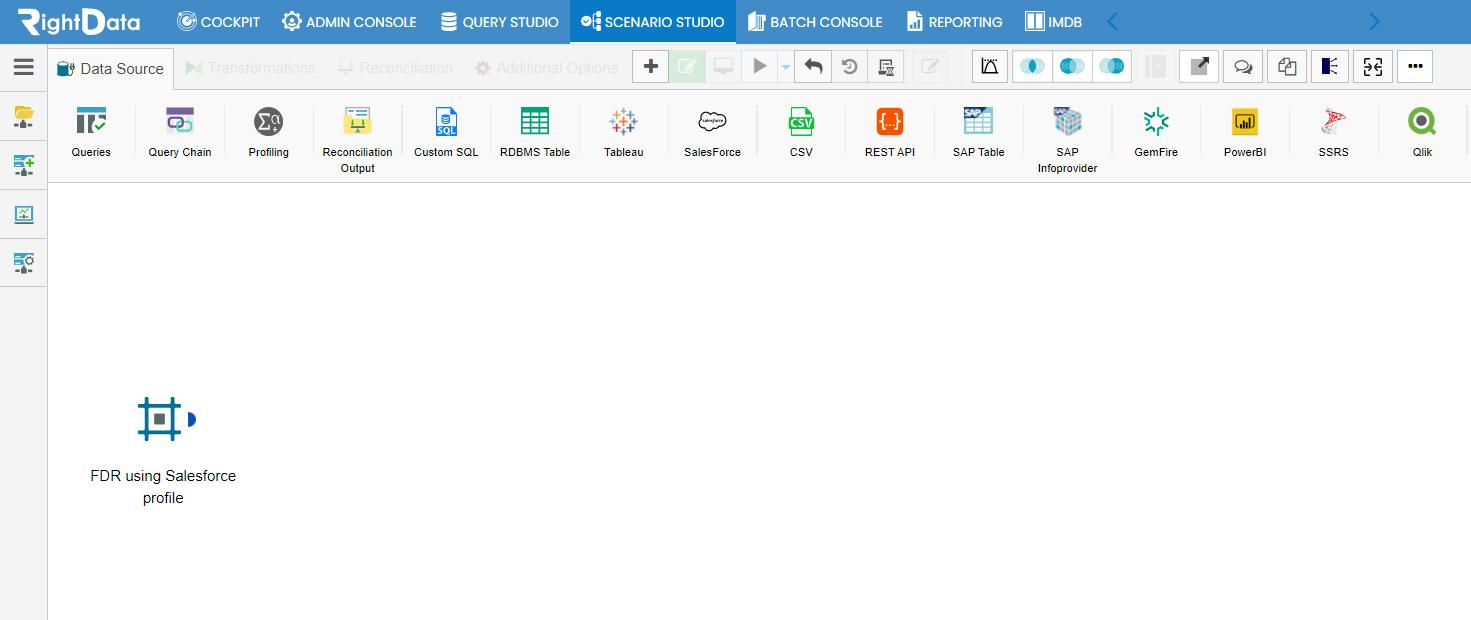
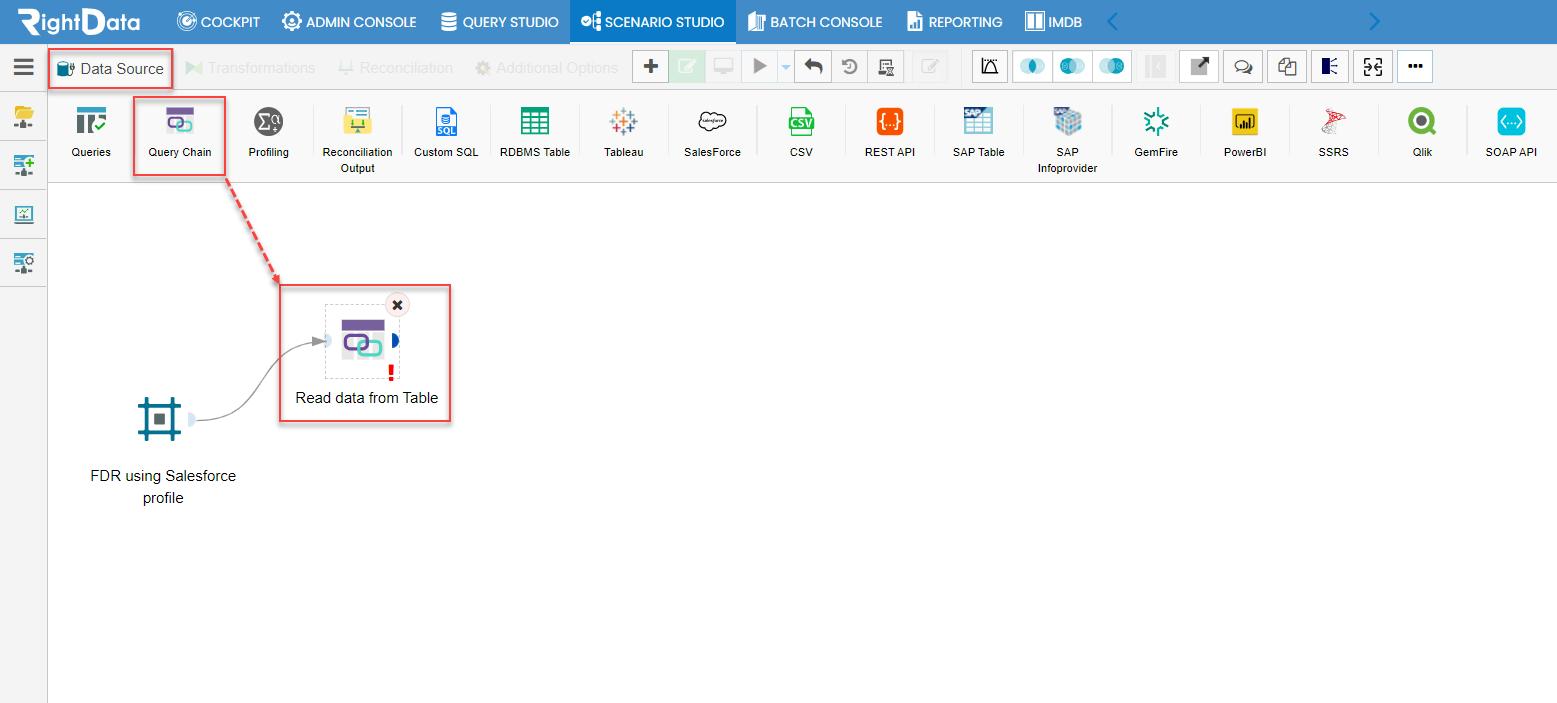
- From the ‘Data Source’ tab, let’s drag and drop a ‘Query Chain’ icon.
- Double tap the Query Chain (Read data from Table) widget.
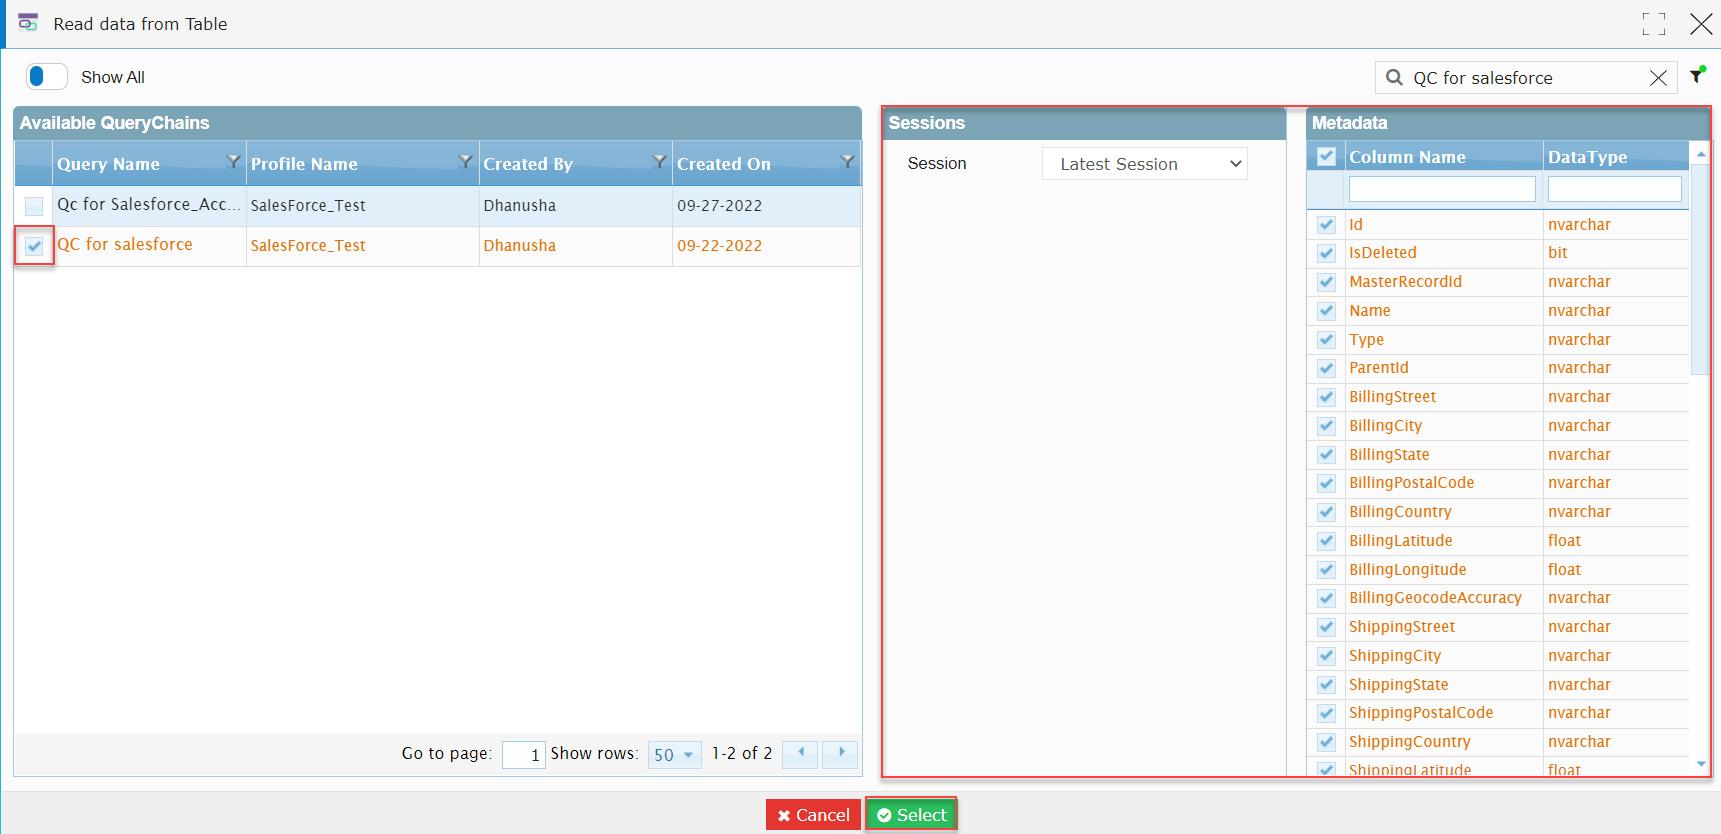
- A ‘Read data from Table’ pop-up window is displayed.
- Search ‘QC for salesforce’ within the ‘Searchbox’ text field.
- Select ‘QC for salesforce’ Query Chain.

- Checkbox ‘QC for salesforce’ Query Chain.
Note: ‘Sessions’ and ‘Metadata’ tabs popped up immediately as the user checkbox any Query Chain.
- Click the ‘Select’ button.
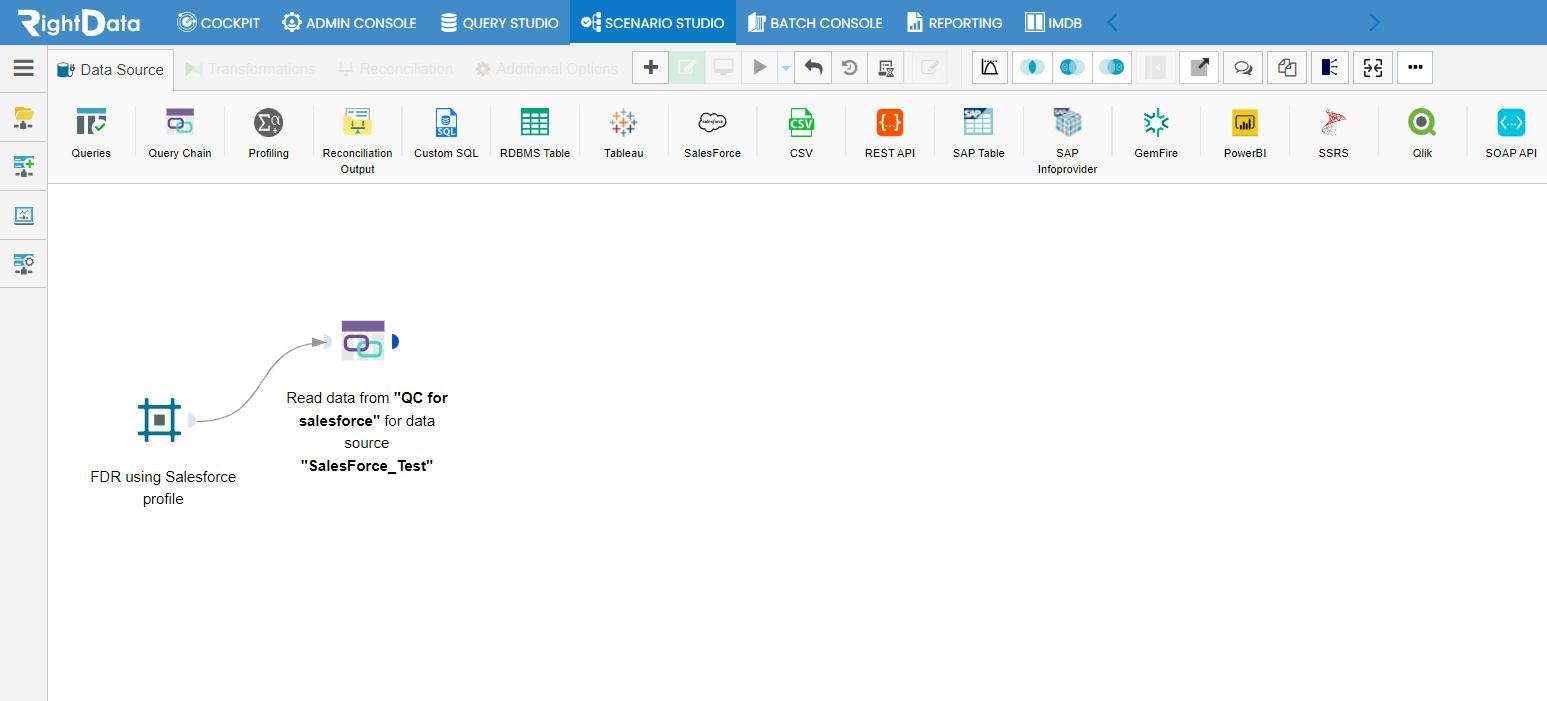
- The user is navigated to the ‘FDR’ session page saving and closing the ‘Query Chain (Read data from Table)’ widget.
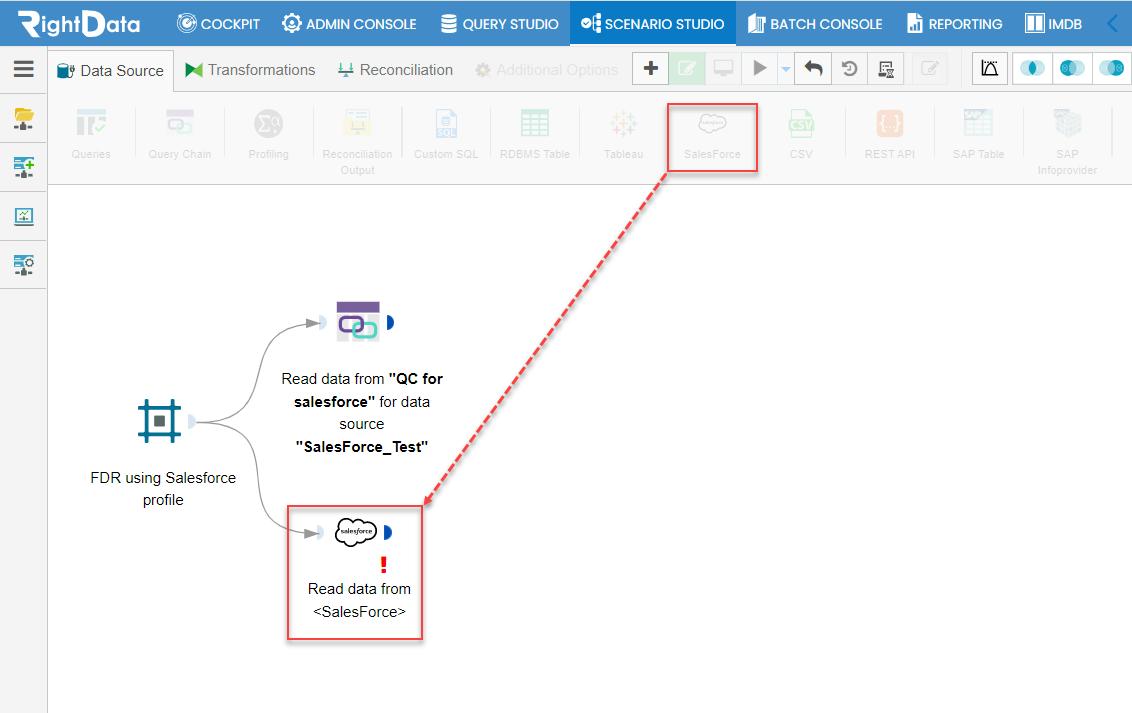
- From the Data Source tab, drag and drop ‘Salesforce’ icon onto FDR create and edit page.
- Double tap the ‘Read data from <SalesForce>’ widget.
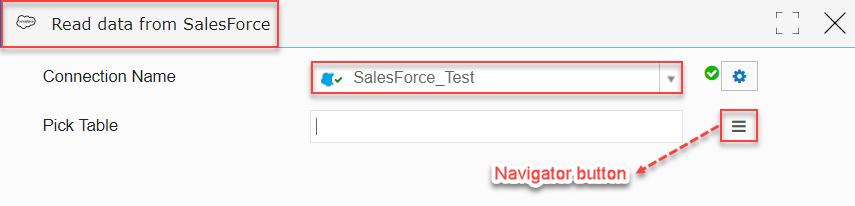
- A ‘Read data from SalesForce’ pop-up window is displayed.
- Select ‘SalesForce_Test’ as the ‘Connection Name’ drop-down list.
- Click the ‘Navigator’ button.
- A ‘Navigator’ slide screen is displayed.
- Select ‘Account’ table from the ‘Salesforce’ schema.
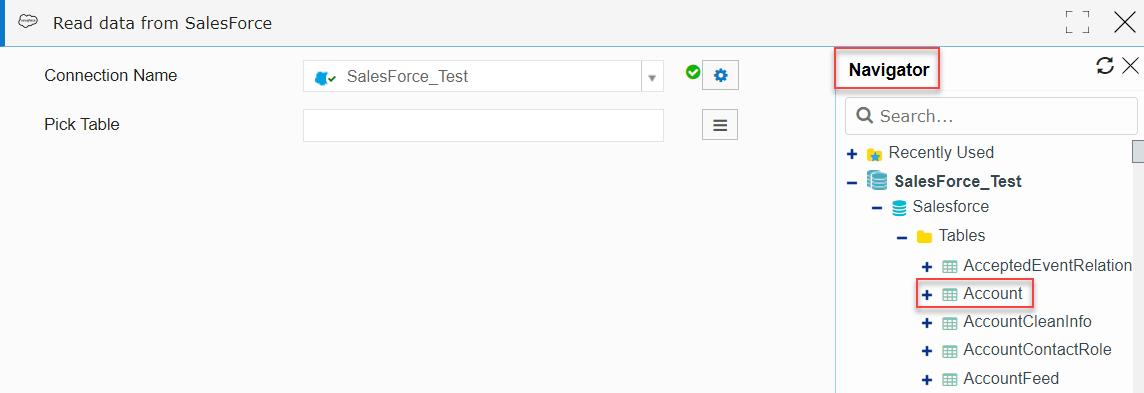
- This action loads the ‘Account’ table.
- Click the ‘Select’ button.
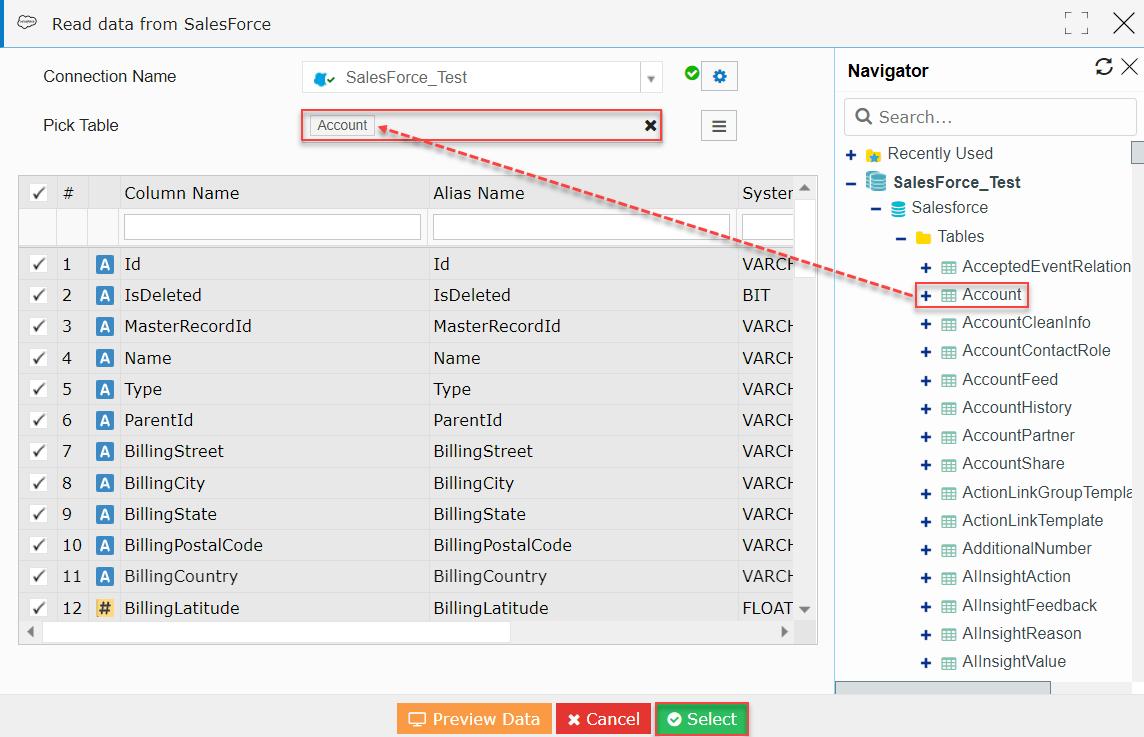
- This action closes the ‘Salesforce’ widget saving its data and the user is navigated to the FDR session page.
- Click the ‘Transformations’ tab.
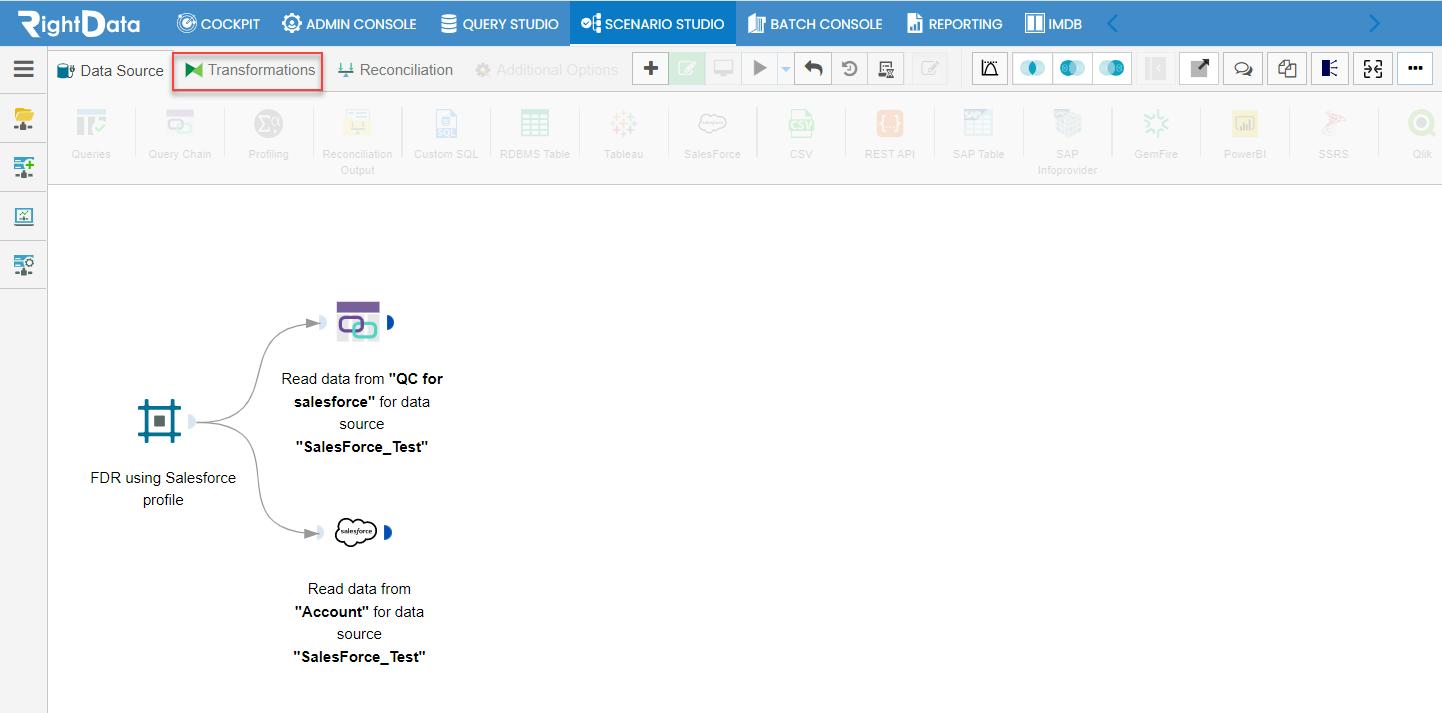
- Drag and drop ‘Projection’ icon.
- Double tap the ‘Transform data from QC for salesforce’ widget.
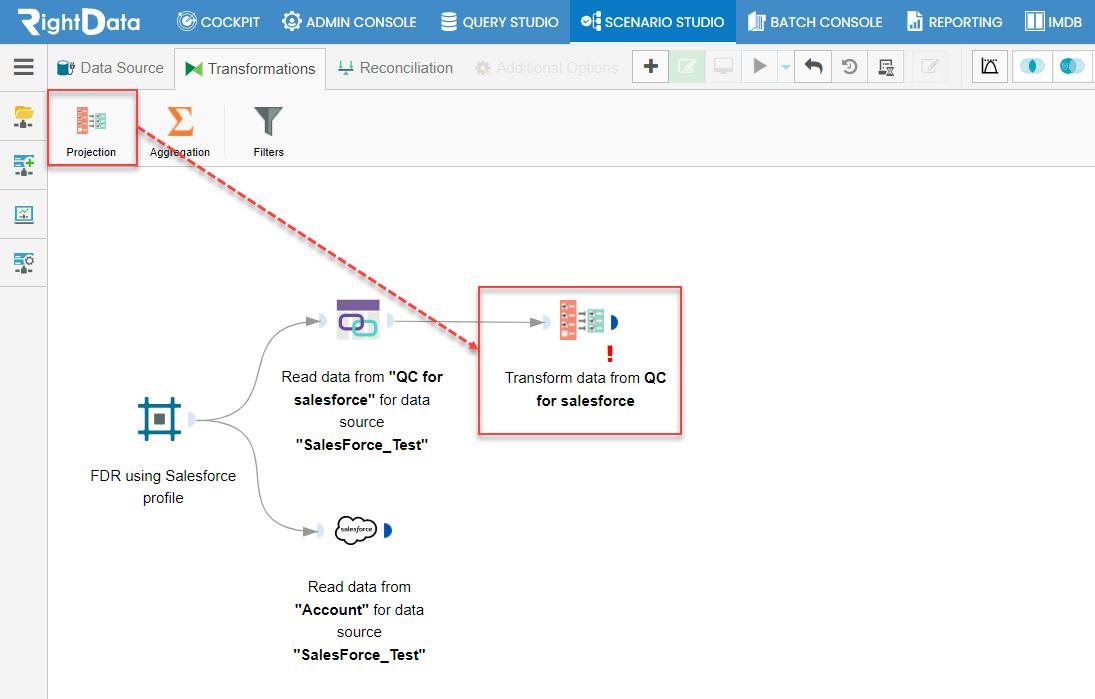
- A ‘Transform data from QC for salesforce’ pop-up window is displayed.
Note: By default, all the column names are checked in.
- Click the ‘Save’ button.
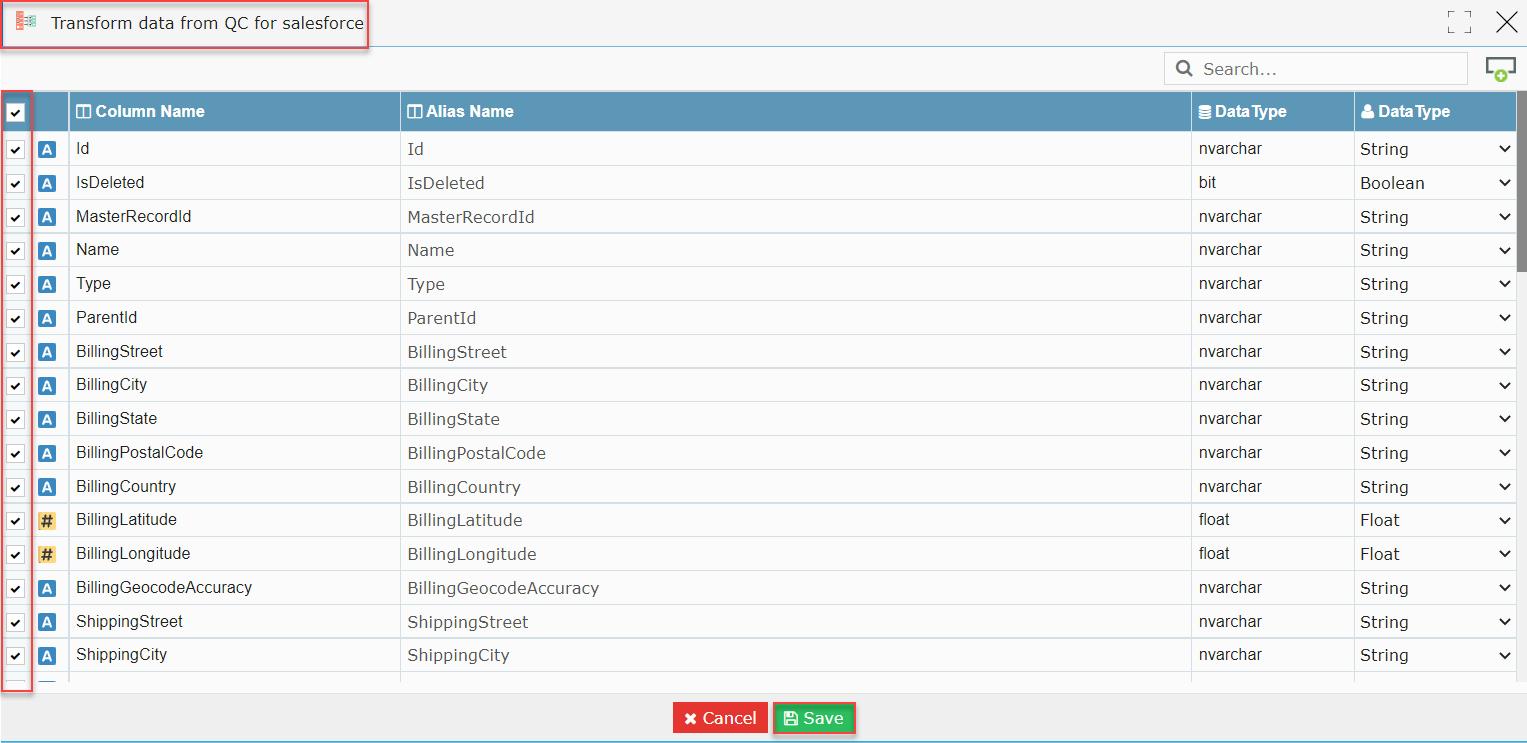
- This action closes the ‘Transform data from QC for salesforce’ widget by saving its data.
- The user is navigated to the FDR session page.
- Now, click the ‘Reconciliation’ tab.
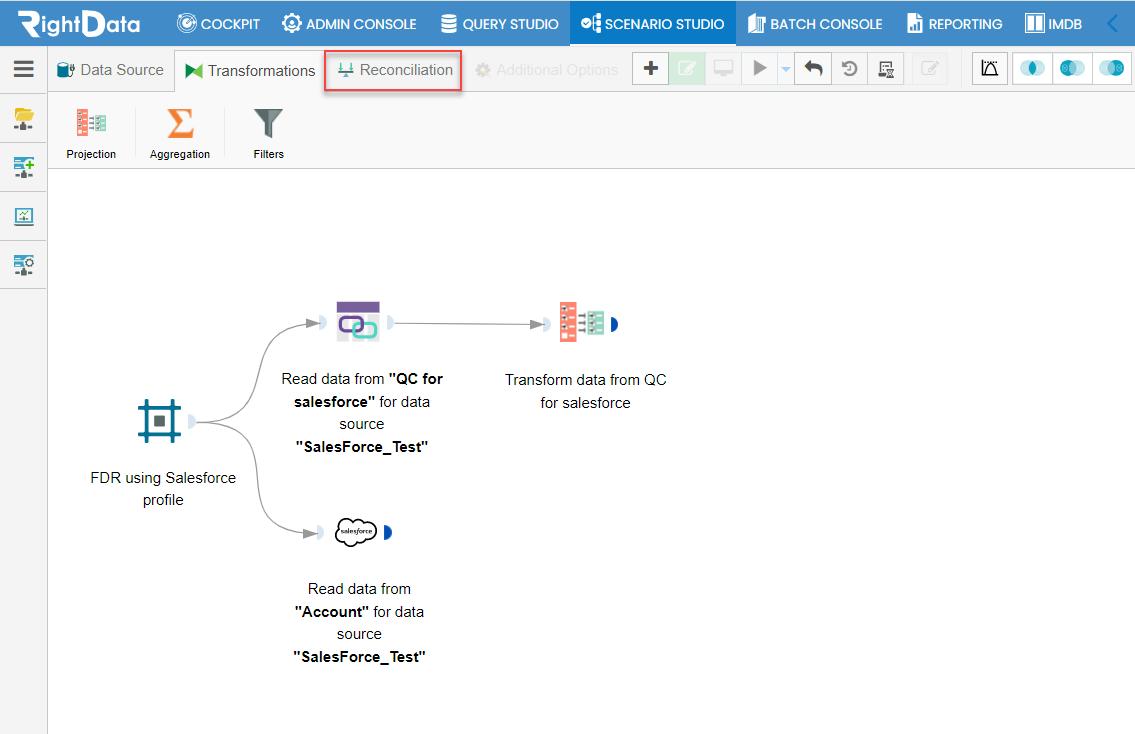
- Drag and drop ‘Map source & target fields’ icon onto the FDR session page.
- Double tap the ‘Map source & target fields’ widget.
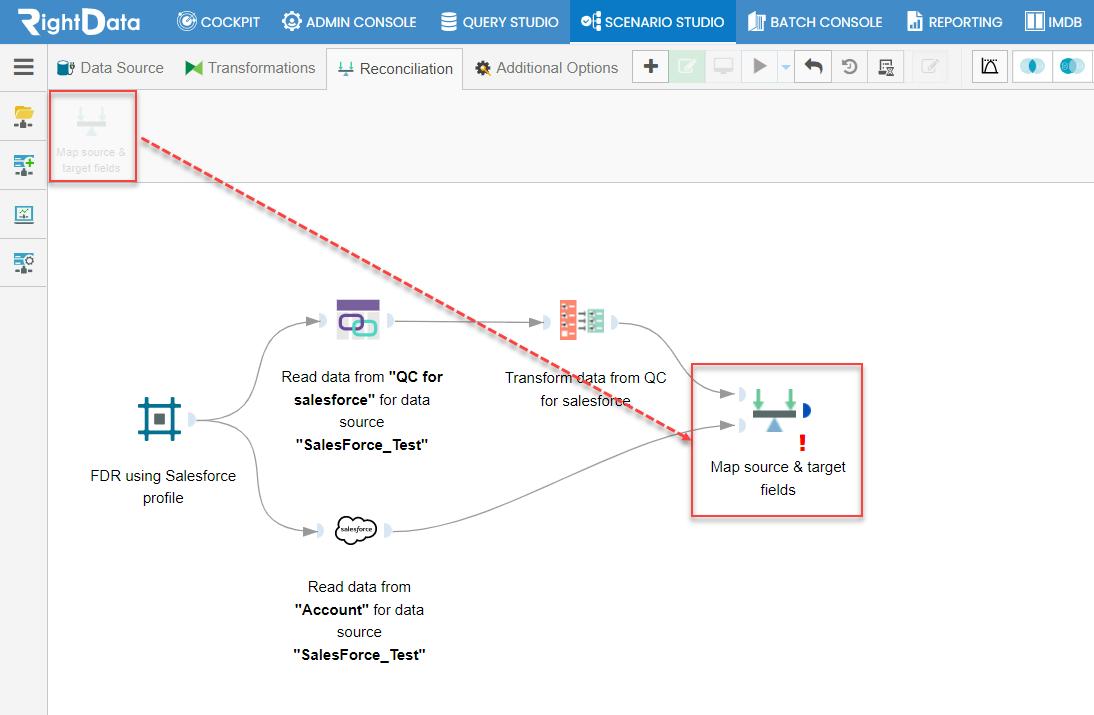
- A ‘Map source & target fields’ pop-up window is displayed.
Note: The ‘Id’ column is selected as the ‘Primary’ key.
- Click the ‘Save’ button.
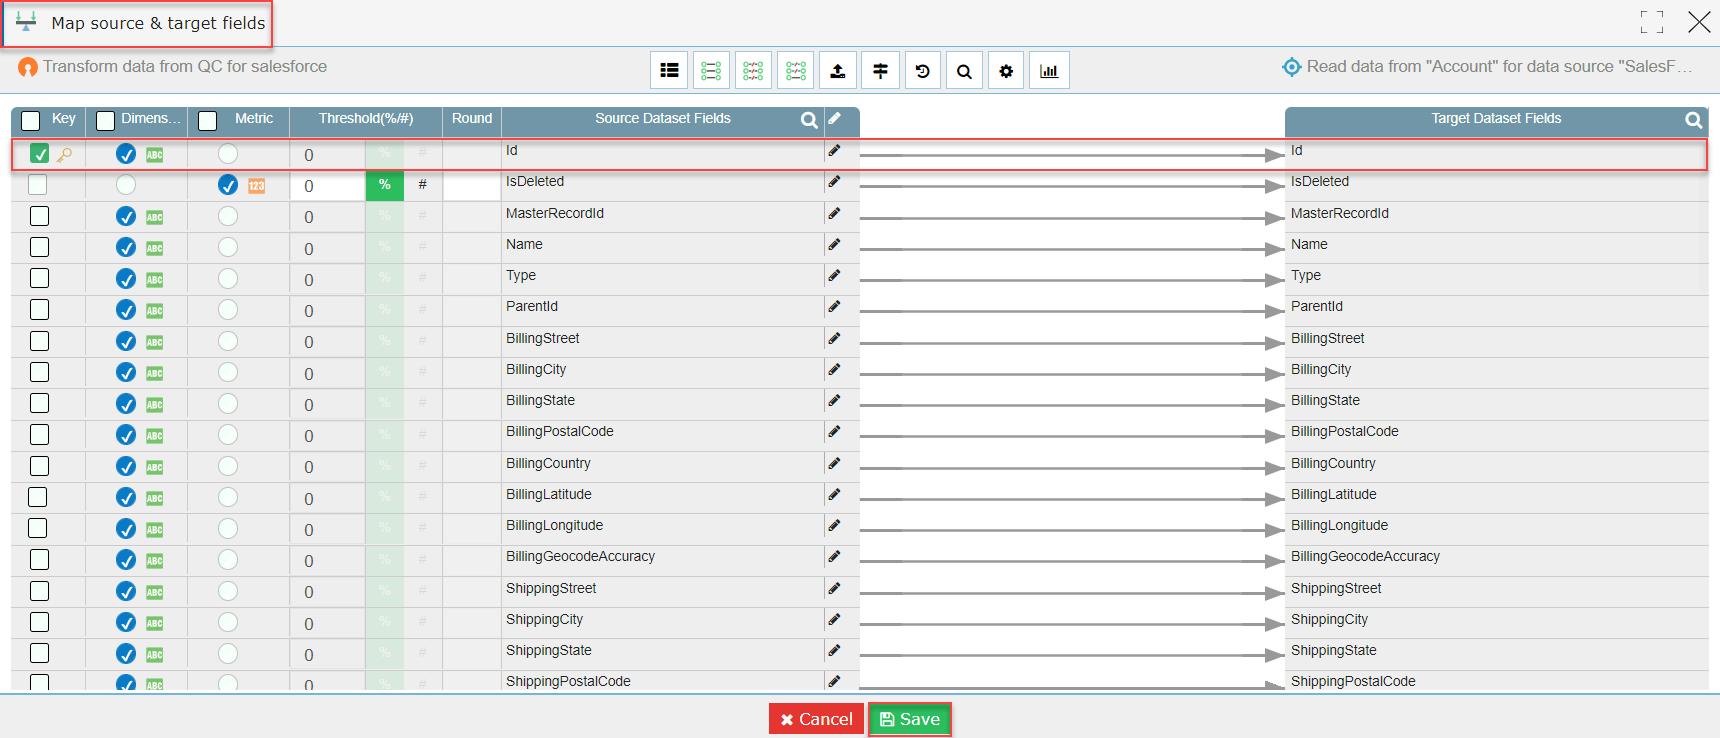
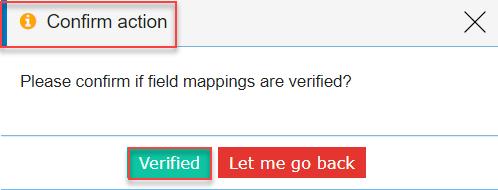
- A ‘Confirm action’ pop-up window is displayed.
- Click the ‘Verified’ button.
- The ‘Map source & target fields’ widget is closed saving the widget data.
- The user is navigated to the FDR session page in create and edit mode.
- Click the ‘Additional Options’ tab.
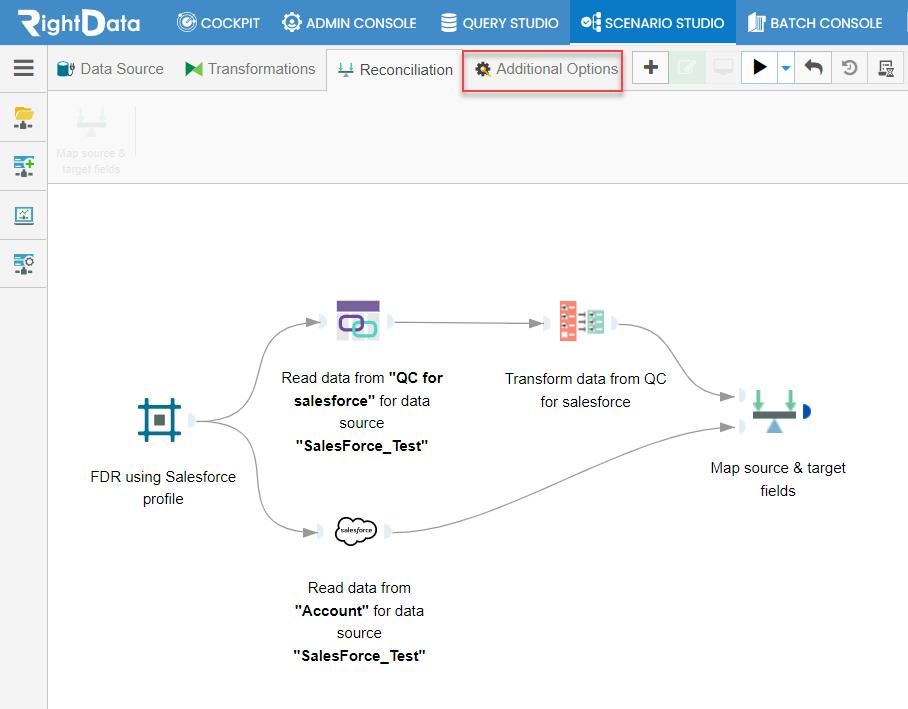
- Drag and drop an ‘Email’ icon onto the FDR session in create and edit mode.
- Double tap the ‘Email Settings’ widget.
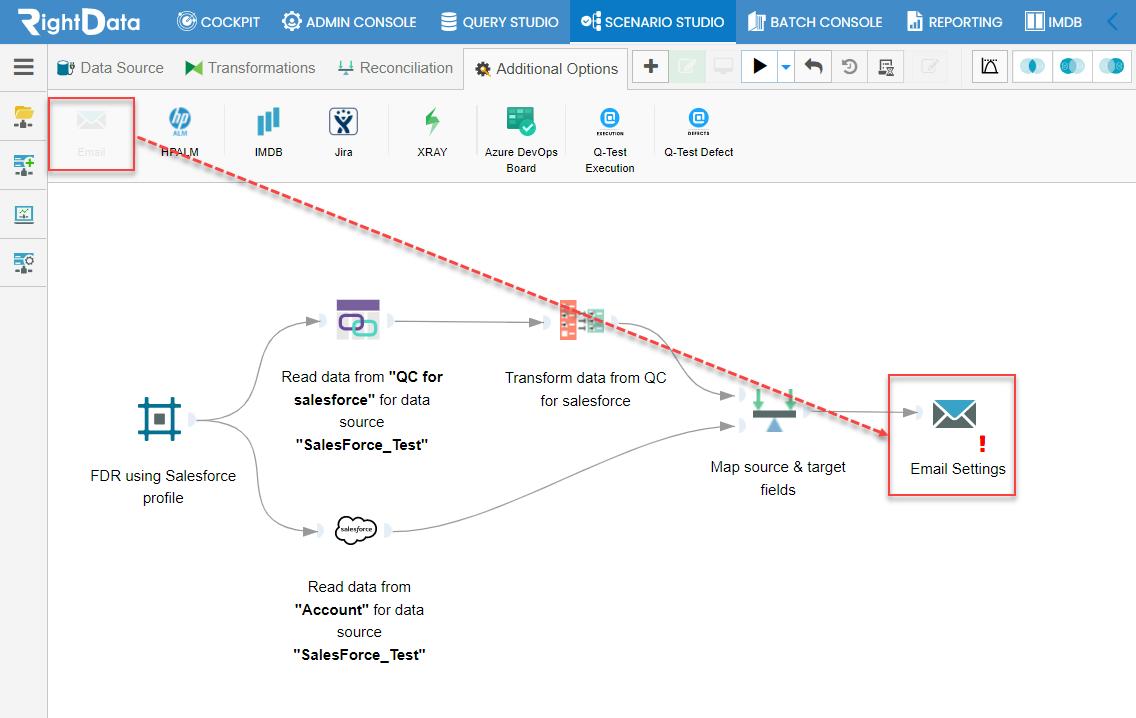
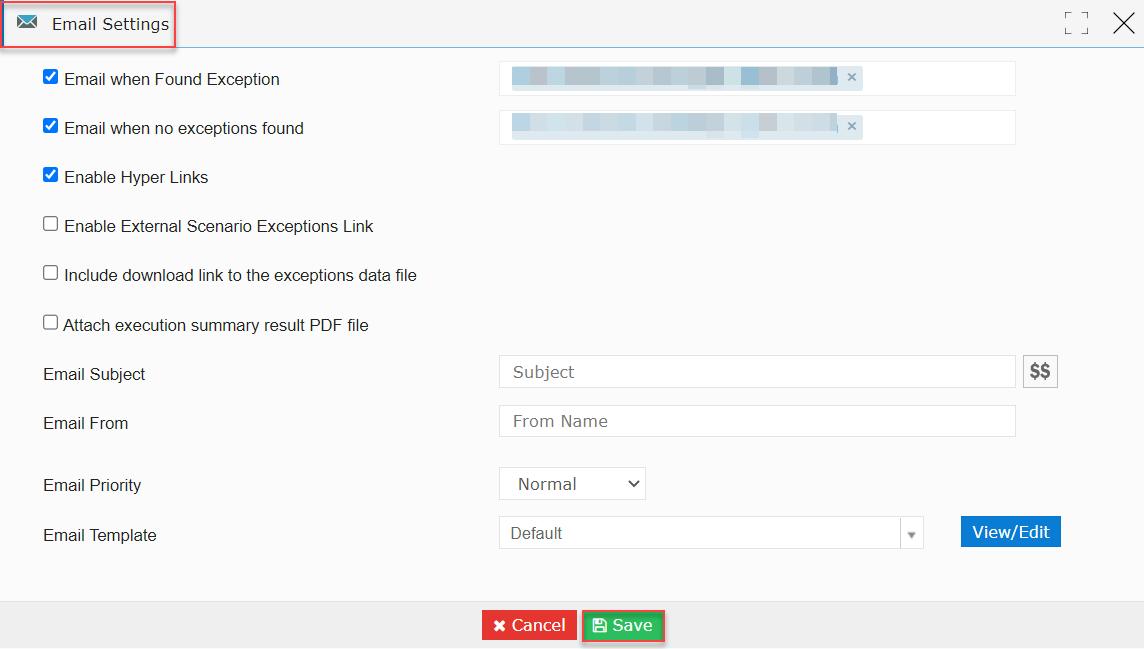
- An ‘Email Settings’ pop-up window is displayed.
- Click the ‘Save’ button
Note: Email is greyed due to confidential data.
- The ‘Email Settings’ widget is closed saving the data.
- The user is navigated to the FDR session page in create and edit mode.
- Click the ‘Execute Now’ button.
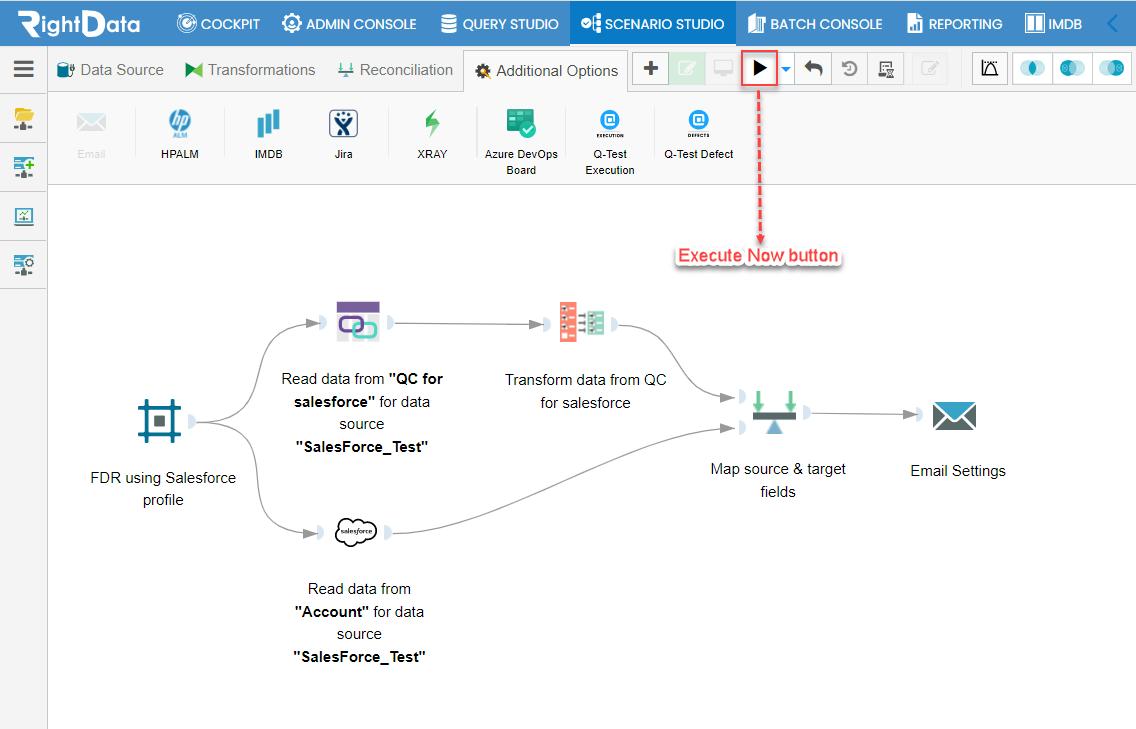
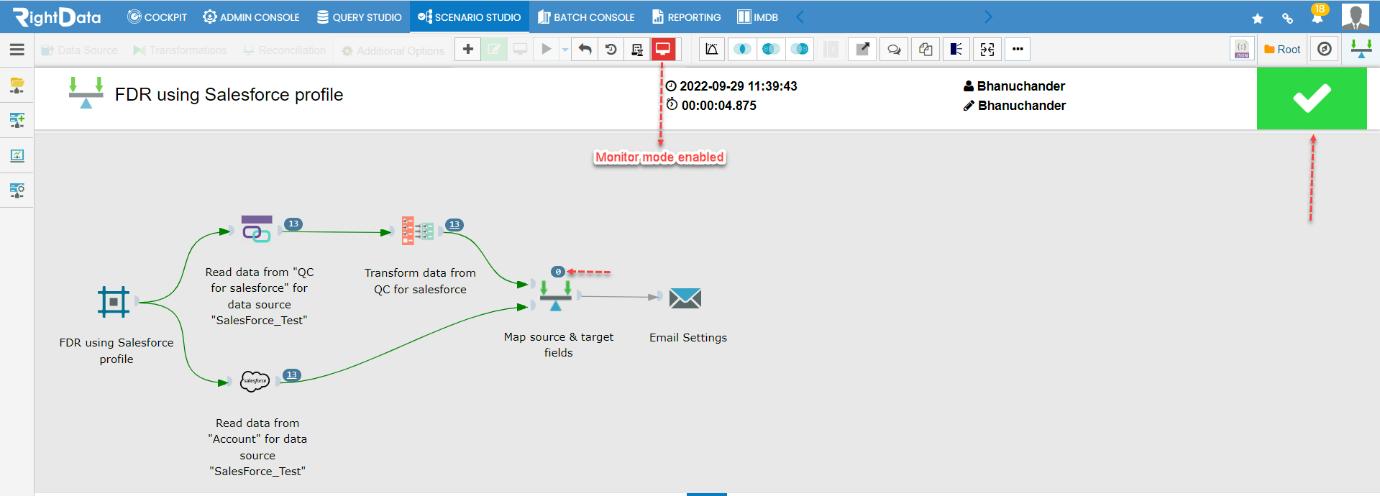
- The FDR execution is ‘Passed’ showing zero exceptions.
- A Monitor mode is enabled immediately after the execution process.
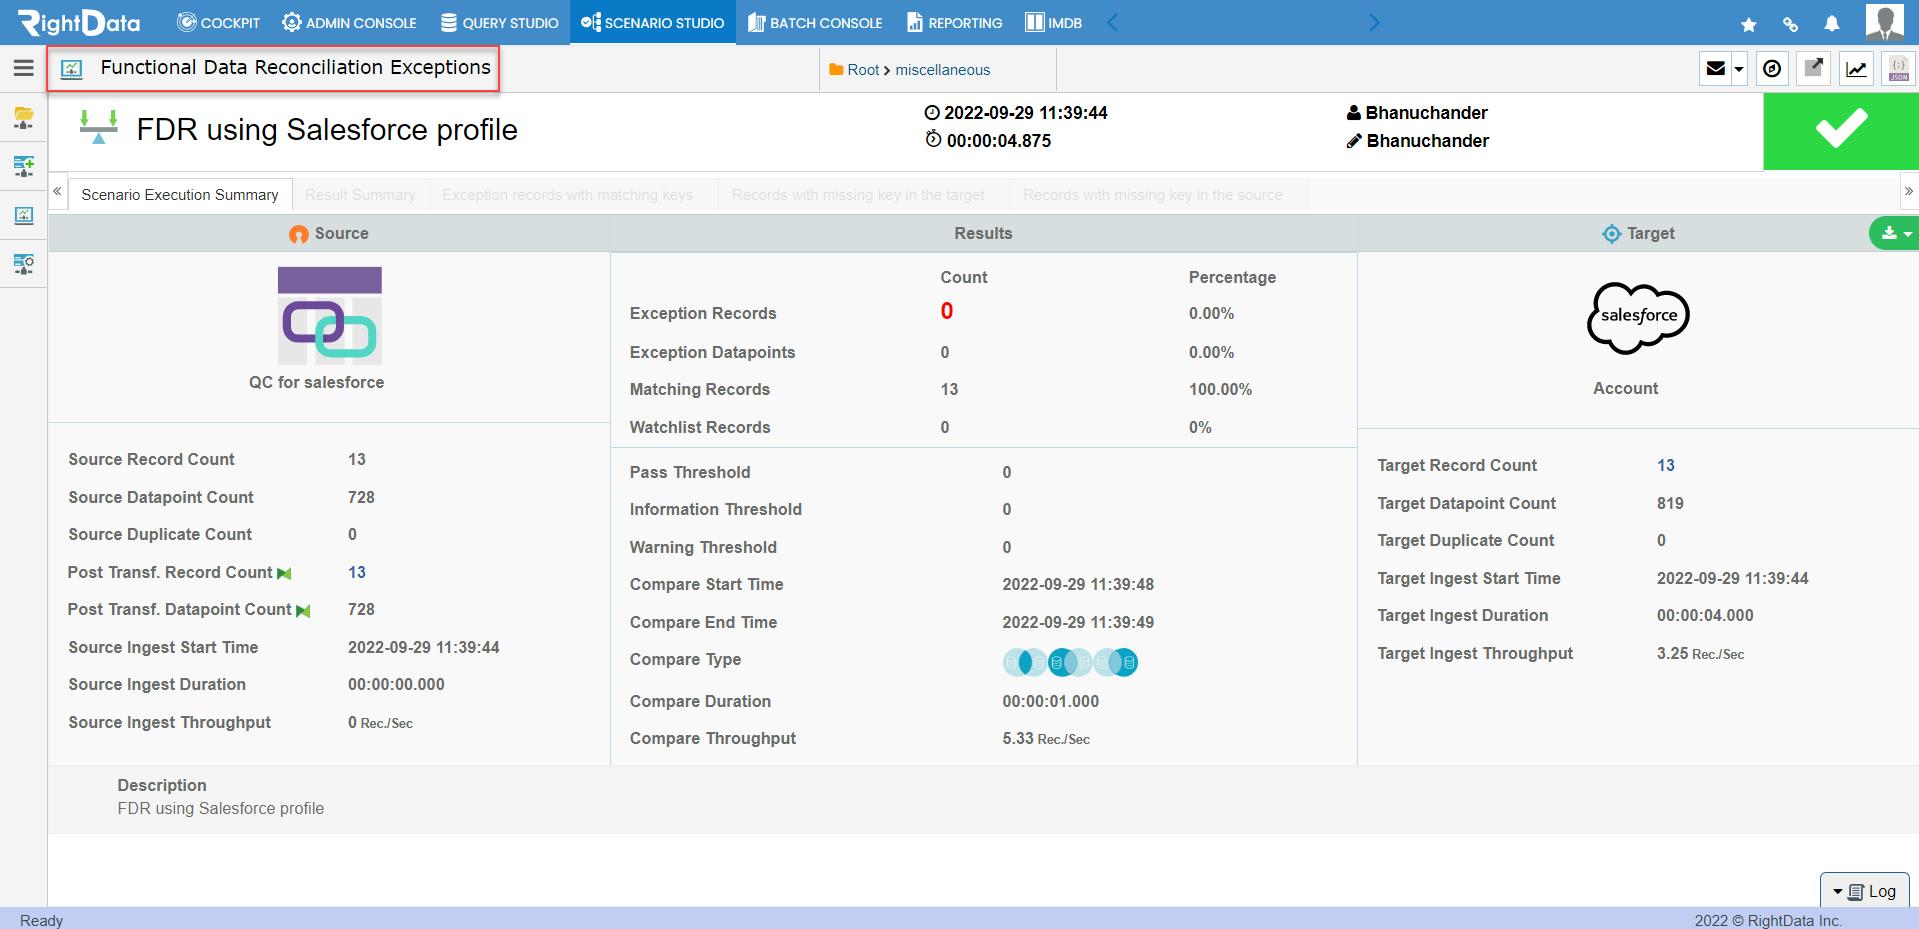
- Click the ‘Map source & target fields’ count icon (0).
- The user is navigated to the ‘Functional Data Reconciliation Exceptions’ page.
- The user receives the ‘Scenario Reconciliation Result’ email as shown below.