An enhancement has been made in the custom SQL data source widget in all Query chains, FDRs and Scenario validations. Two new buttons were added namely infer metadata and input metadata.
Infer Metadata:
An Infer Metadata executes an SQL Query extracting the Metadata and data associated with the Metadata.
Steps involved:
- Click the ‘QUERY STUDIO’ tab.
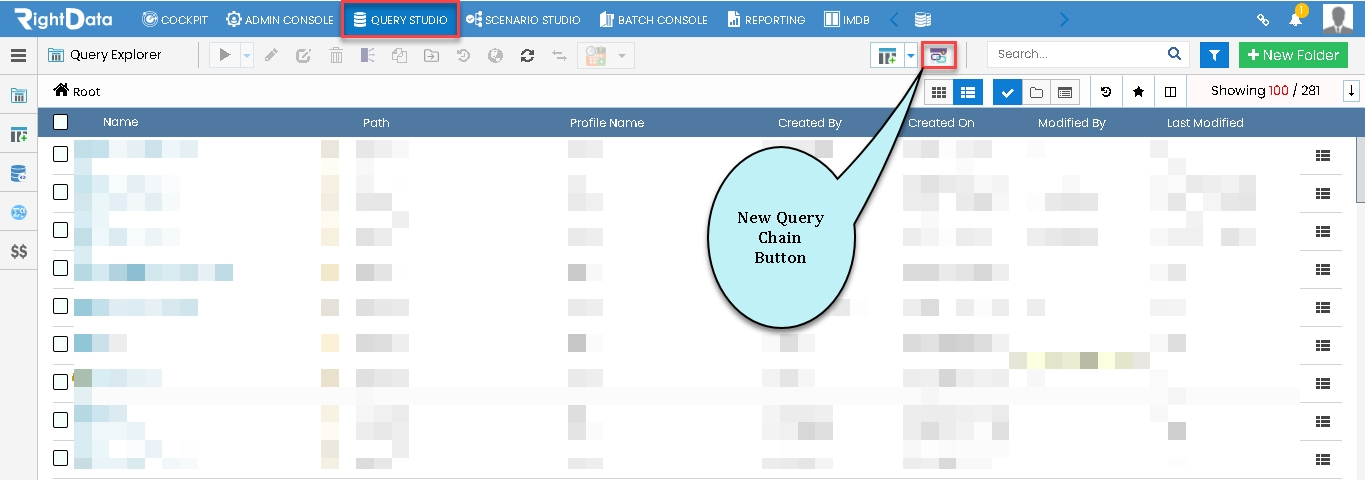
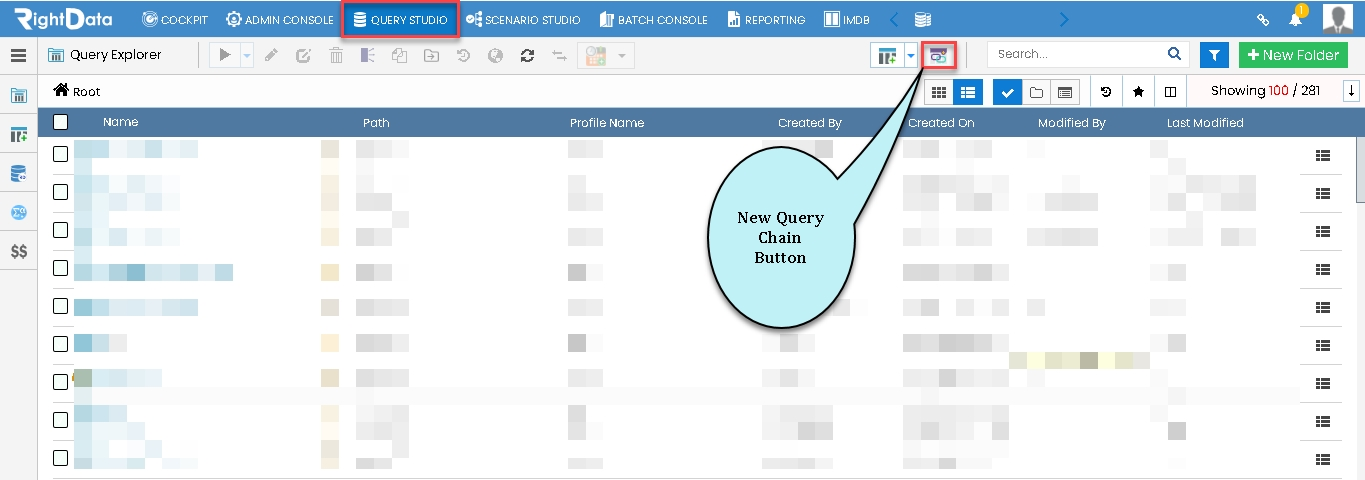
- Hover on ‘New Query Chain’ button.
- Click the ‘New Query Chain’ button.
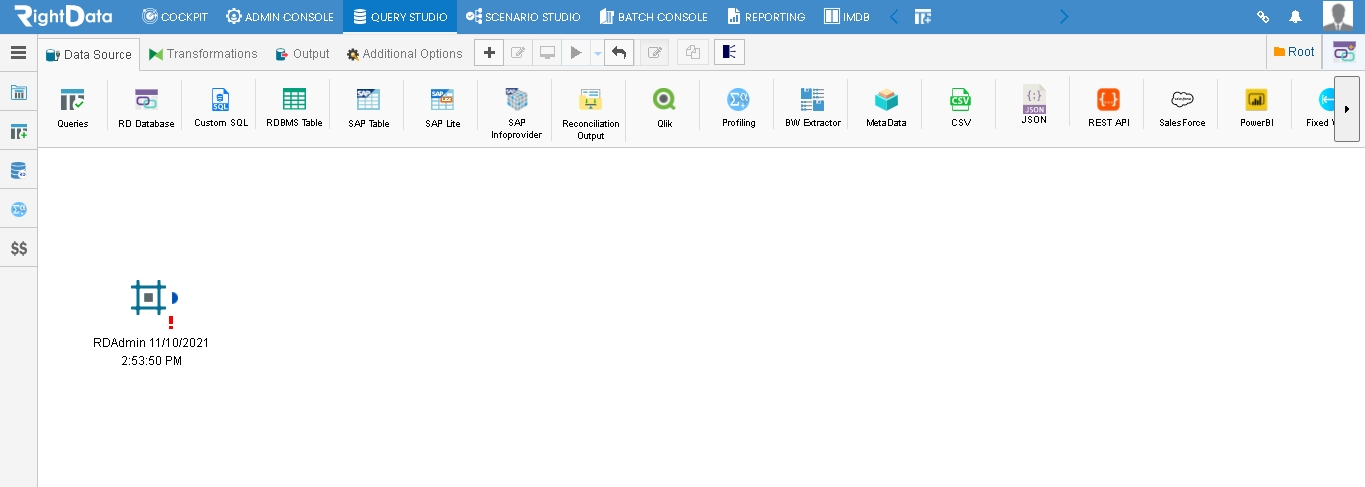
- The user is navigated to the Query Chain session page in create and edit mode..
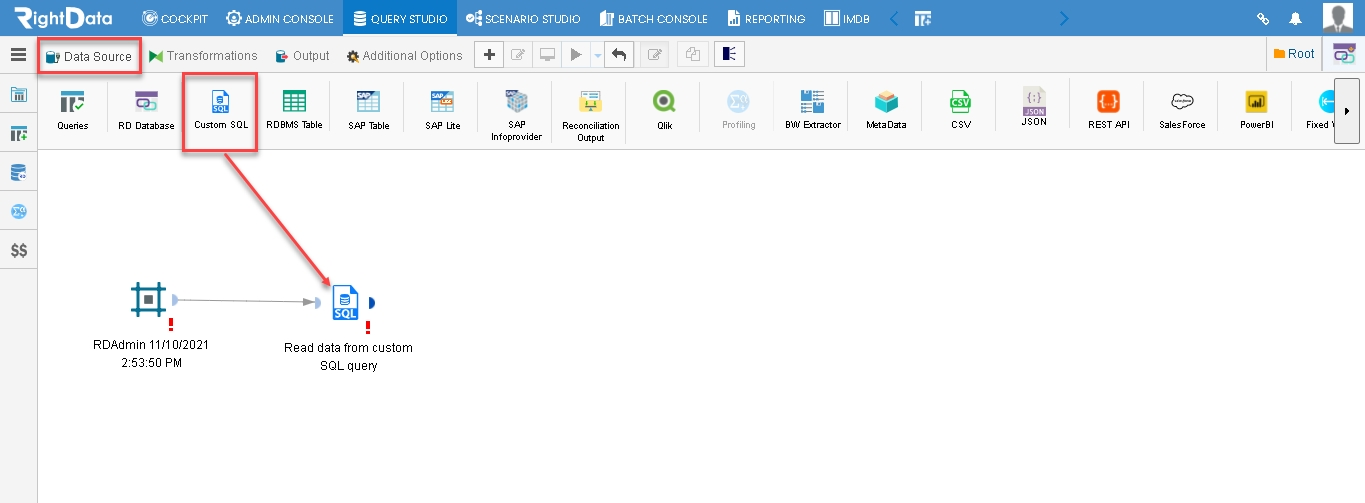
- From the ‘Data Source’ tab, drag and drop the ‘Custom SQL’ icon as shown here.
- Click the ‘Custom SQL’ Widget.
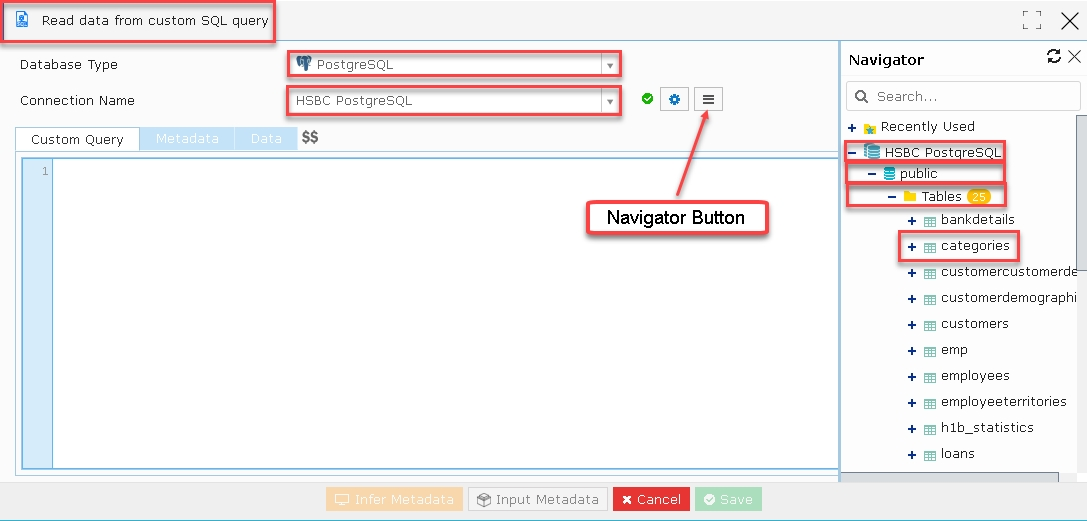
- A pop-up window ‘Read data from custom SQL query’ is displayed.
- Select Database Type as ‘PostgreSQL’ from the drop-down option.
- Select Connection Name as ‘HSBC PostgreSQL’ from the drop-down option.
- Click the ‘Navigator’ button.
- Select categories from HSBC PostgreSQL-Public-Tables-categories from the Navigator.
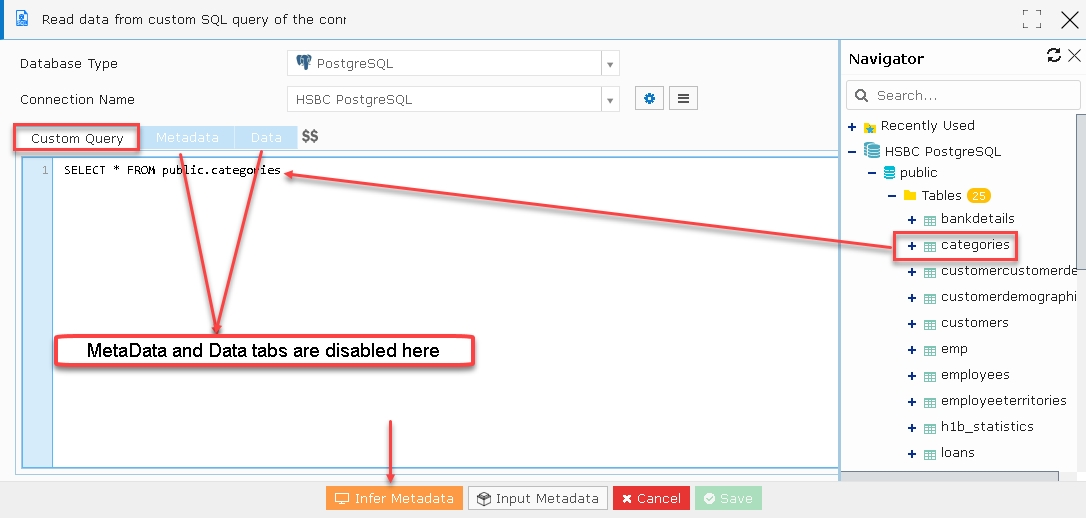
- As the user clicks on the categories, a Custom Query will be added from the Navigator.
Note: The ‘Metadata’ and ‘Data’ are in disable mode before clicking the ‘Infer Metadata’ button.
- Select and click the ‘Infer Metadata’ button.
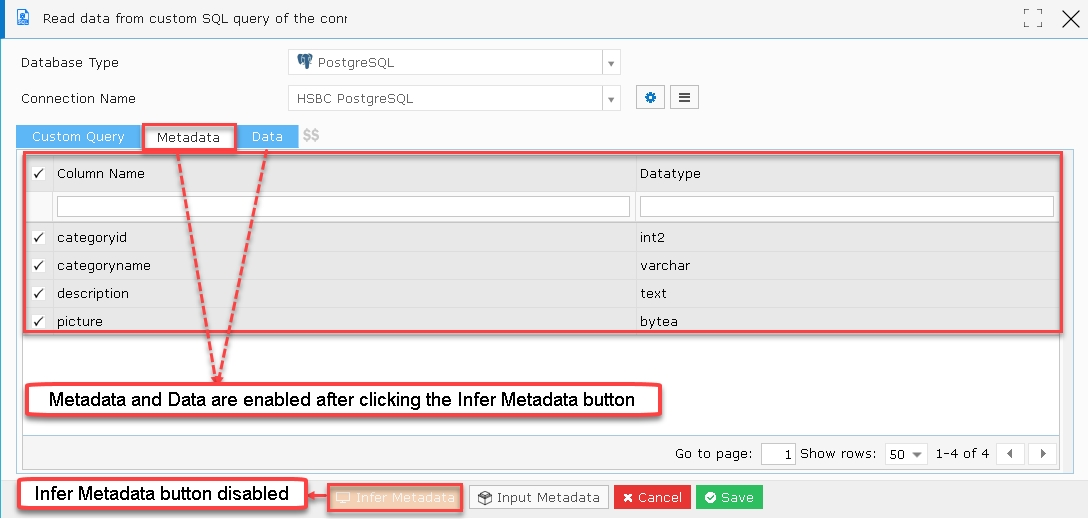
- The Metadata and Data associated with Metadata will be extracted.
- By default, the ‘Metadata’ column will be displayed immediately after clicking the ‘Infer Metadata’ button.
- The user can view the ‘Column Name’ and the ‘Data Type’ in the Metadata tab.
Note: ‘Metadata’ and ‘Data’ tabs are enabled immediately after clicking the ‘Infer Metadata’ button but ‘Infer Metadata’ button is disabled immediately after clicking on it.
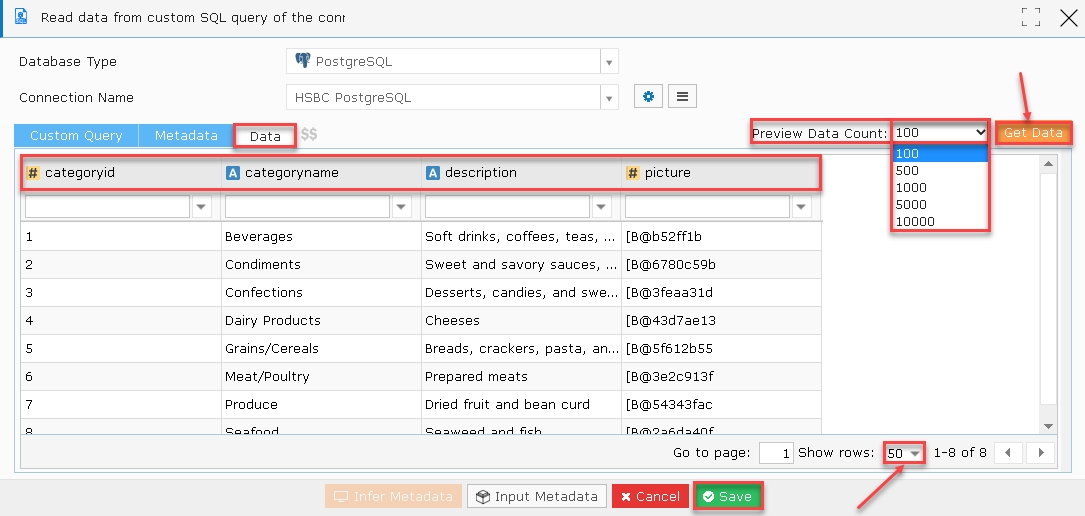
- Now click the ‘Data’ tab to view the extracted data from the related Metadata.
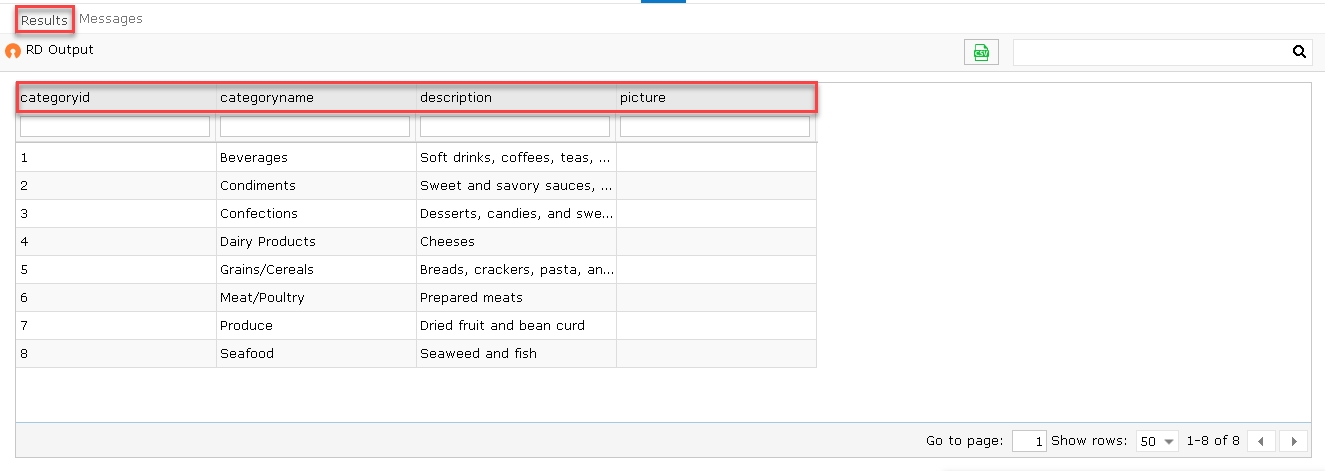
- The ‘Data’ tab contains the following data:
- categoryid
- categoryname
- description
- picture
- By default, the Preview Data Count is set to ‘100’ pages showing ‘50’ rows in a single page.
- Click the ‘Save’ button to save the ‘Custom SQL Query’ widget.
Note: The user can select up to 10,000 pages and click the Get Data button to load the selected pages.
- The Custom SQL widget collapses saving the widget.
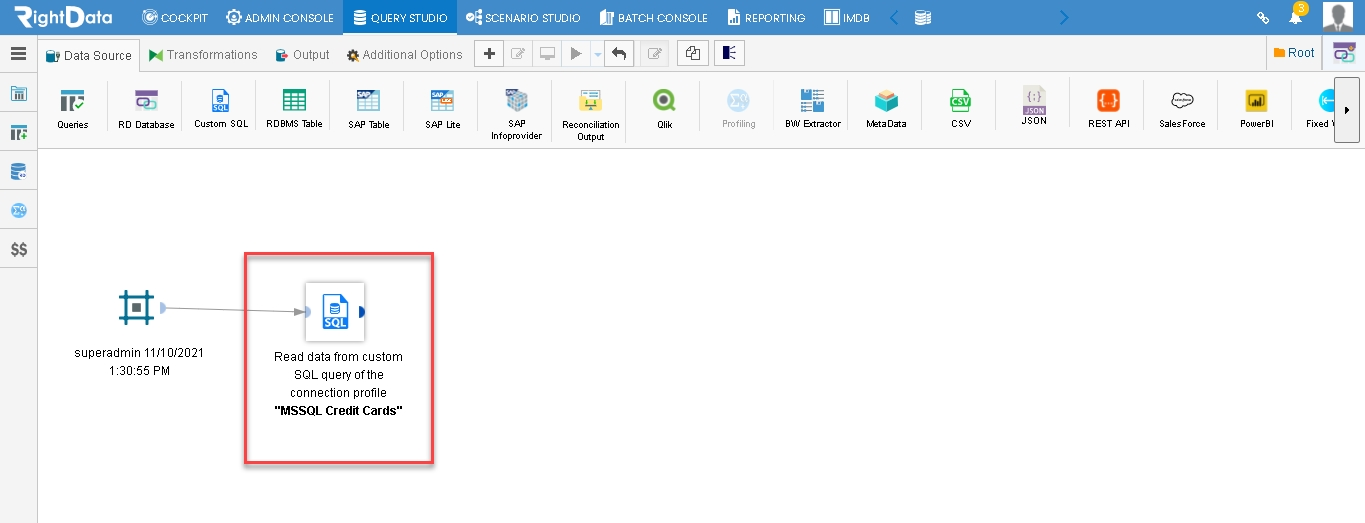
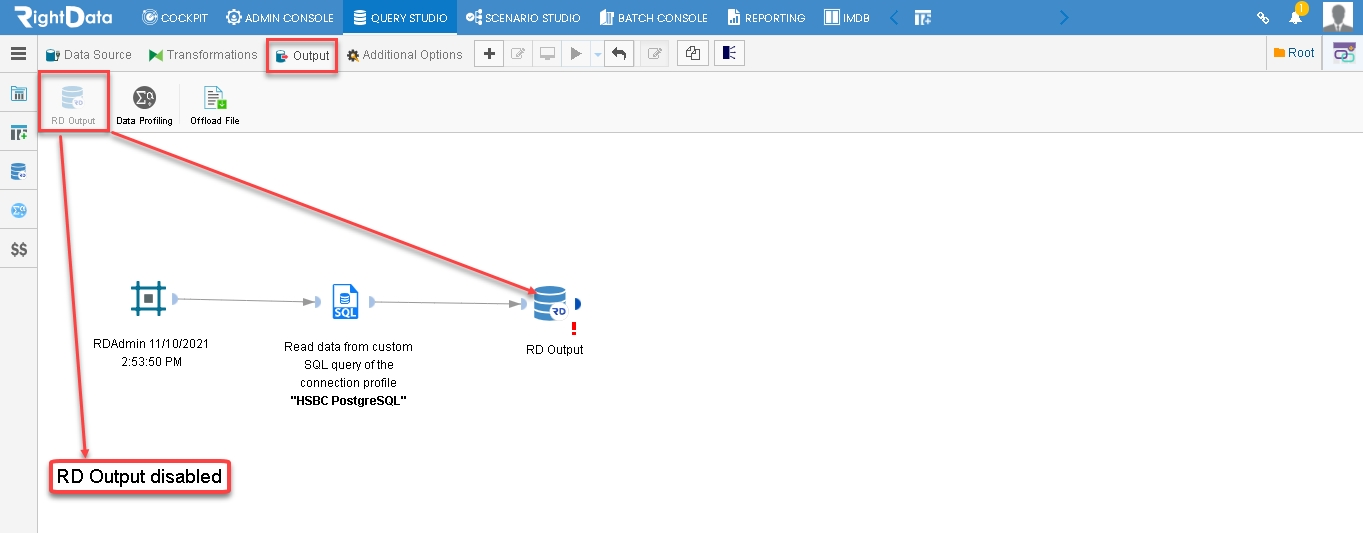
- From the ‘Output’ tab, drag and drop an ‘RD Output’ icon.
Note: ‘RD Output’ icon gets disabled immediately after dragging the RD Output onto create and edit Query Chain page.
- Click the ‘RD Output’ widget.
- An ‘RD Output’ pop-up window is displayed.
- Click the ‘Select’ button to save the ‘Custom SQL’ widget.
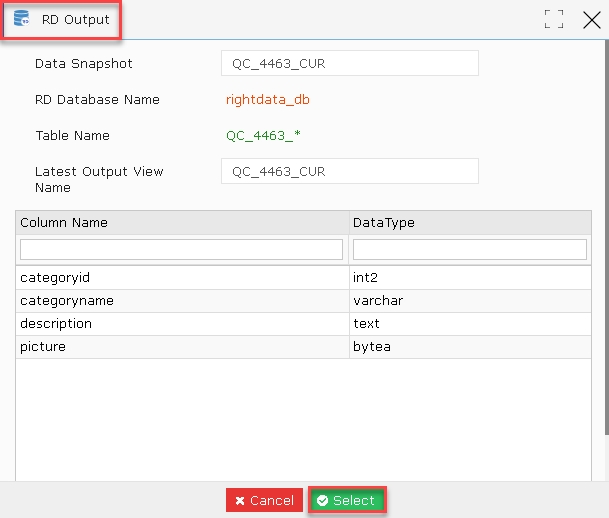
- The ‘Custom SQL’ widget is closed and the user is navigated to Query Chain session page.
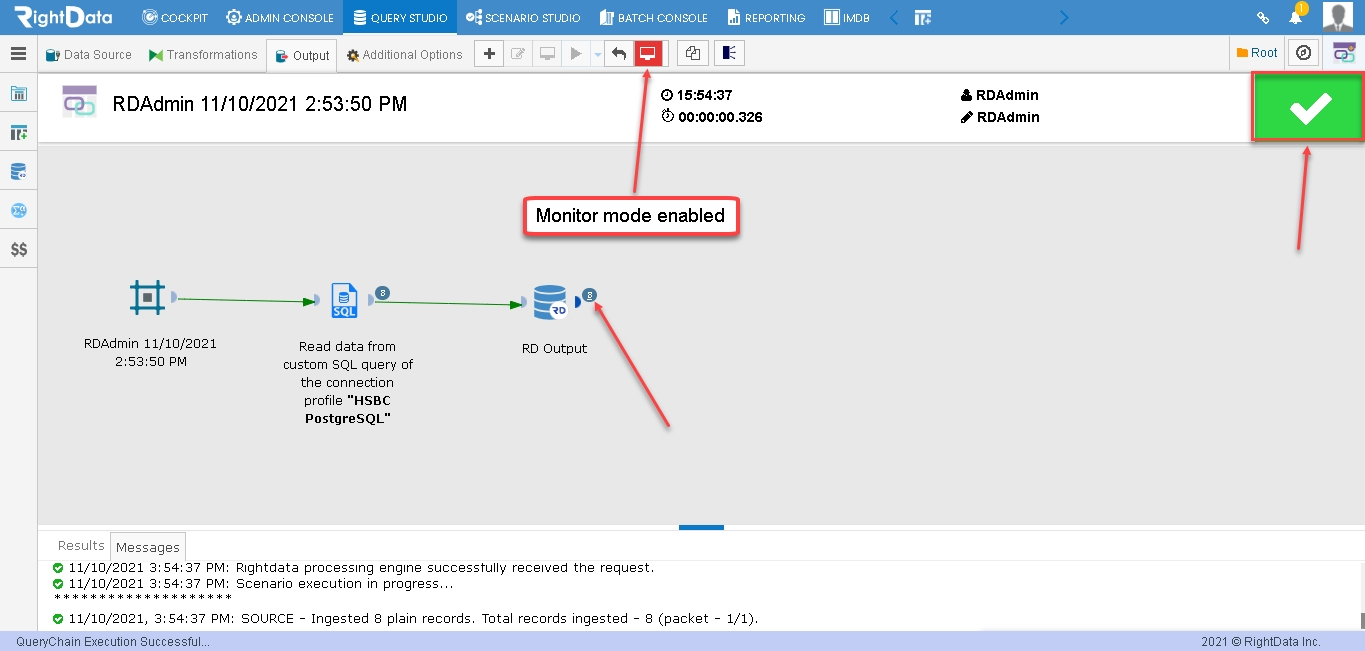
- Click the ‘Execute Now’ button.
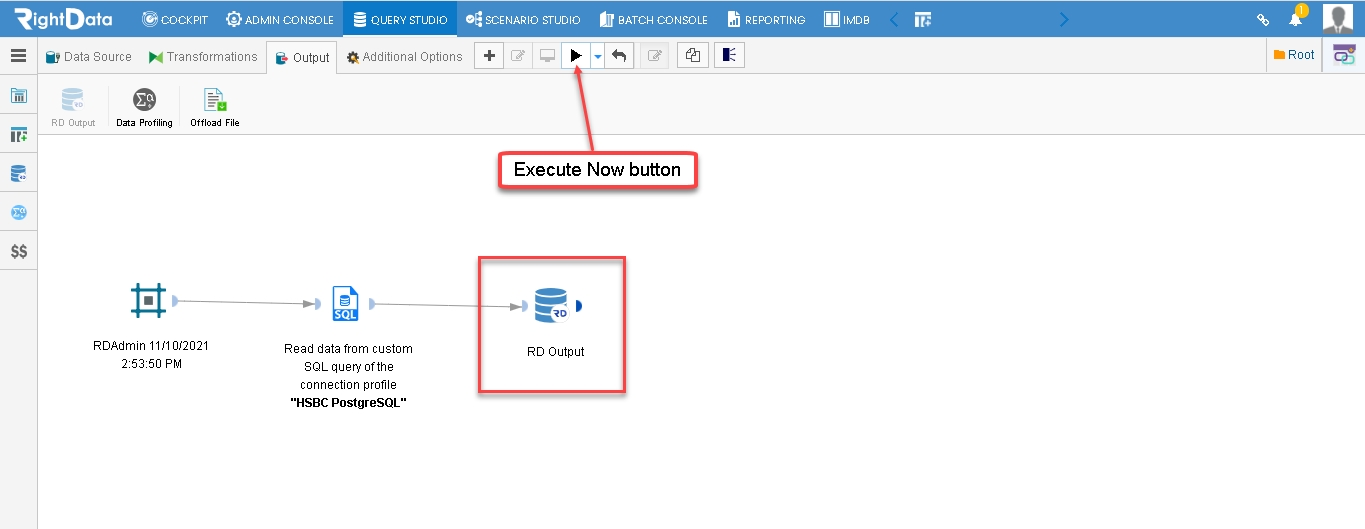
- A red colored monitor mode is enabled with a green tick mark at the top right indicates a successful execution.
- Click on the count button that appears just beside the ‘RD Output’ widget.
- The Results page displaying the exact data taken in the Custom SQL widget is shown.
Input Metadata:
An Input Metadata is useful to save an SQL Query without performing the execution. Input Metadata is useful if you have an SQL Query that takes long time to perform the execution.
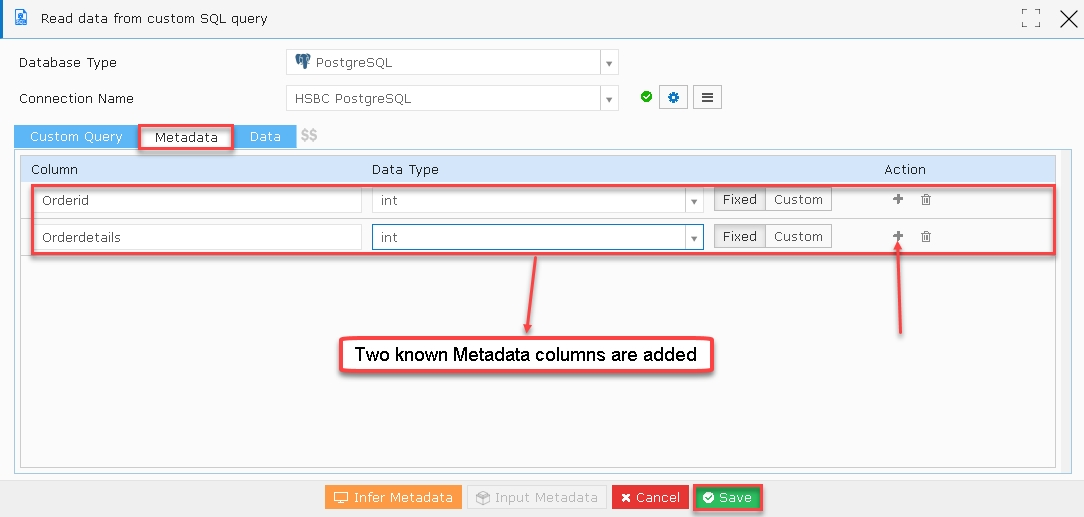
Note: In order to use this option, the user needs to add the known Metadata (Columns and Data Type).
Steps involved:
- Click the ‘QUERY STUDIO’ tab.
- Hover on ‘New Query Chain’ button.
- Click the New Query Chain’ button.
- The user is navigated to the Query Chain session page in create and edit mode.
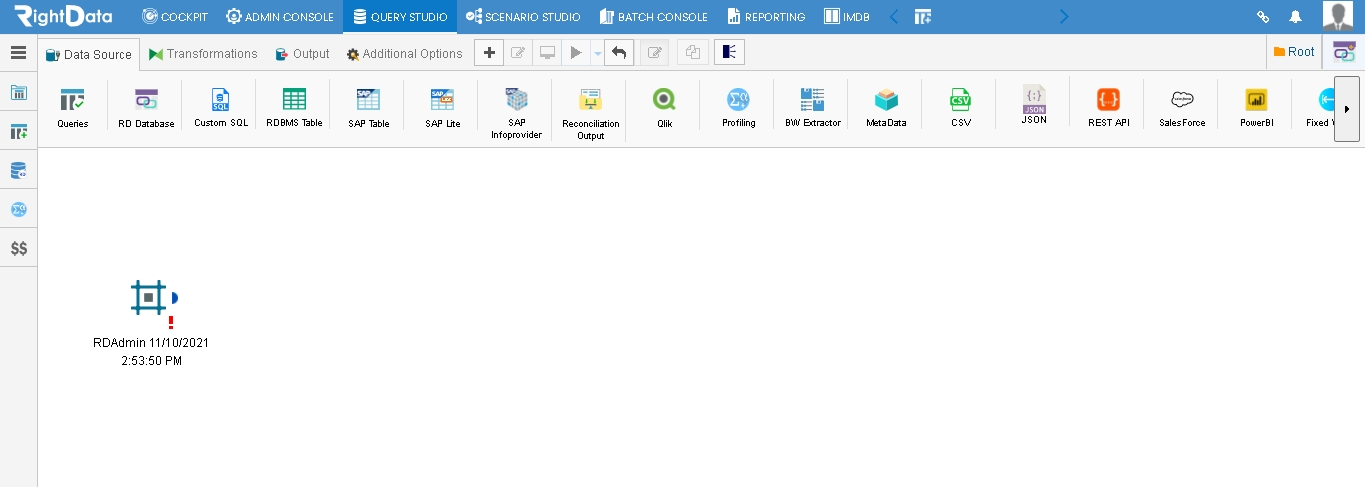
- From the ‘Data Source’ tab, drag and drop the ‘Custom SQL’ icon as shown here.
- Click the ‘Custom SQL’ Widget.
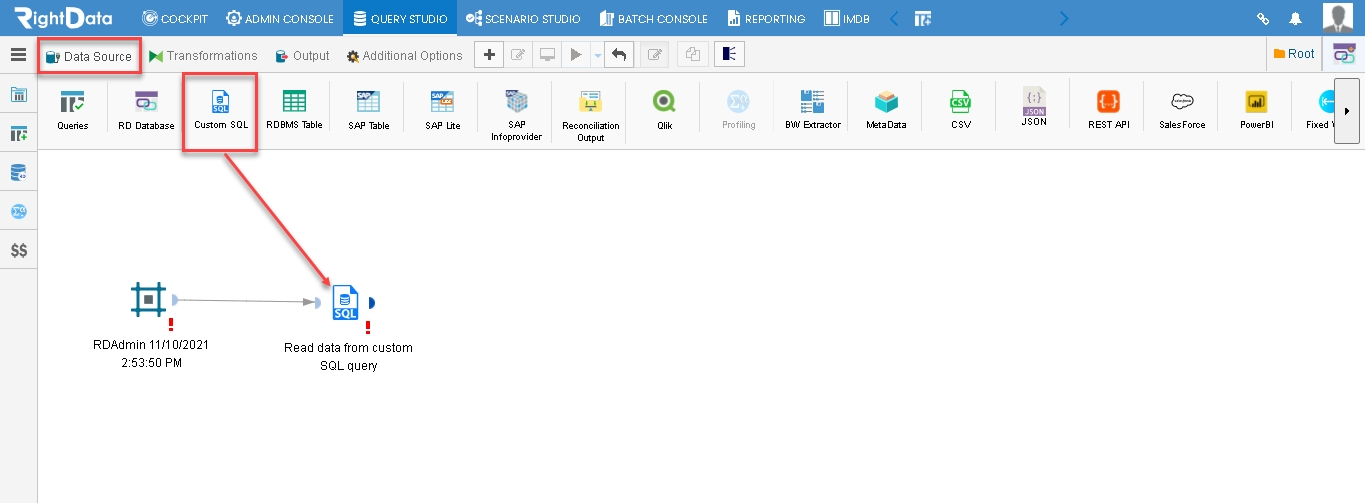
- A pop-up window ‘Read data from custom SQL query’ is displayed.
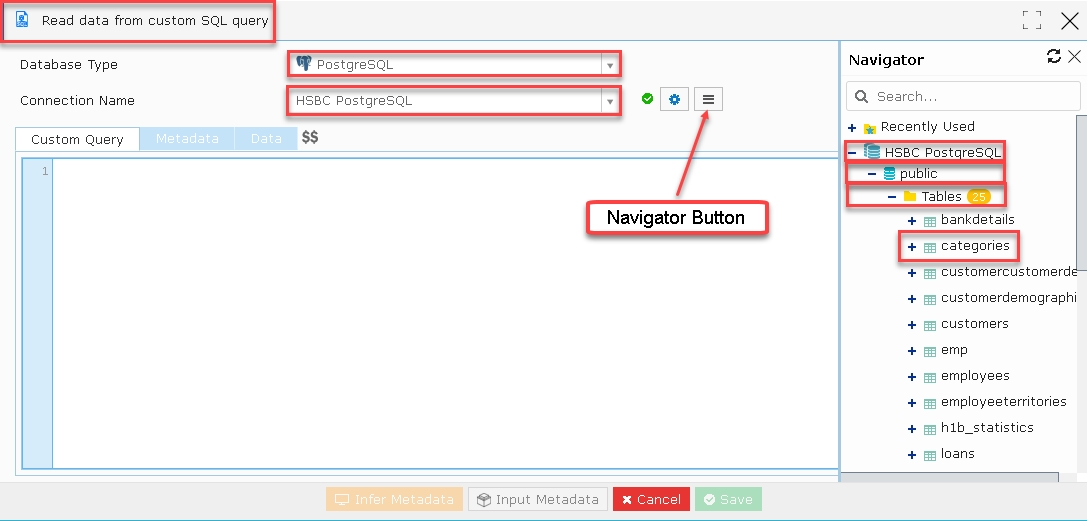
- Select Database Type as ‘PostgreSQL’ from the drop-down option.
- Select Connection Name as ‘HSBC PostgreSQL’ from the drop-down option.
- Click the ‘Navigator’ button.
- Select categories from HSBC PostgreSQL-Public-Tables-categories from the Navigator.
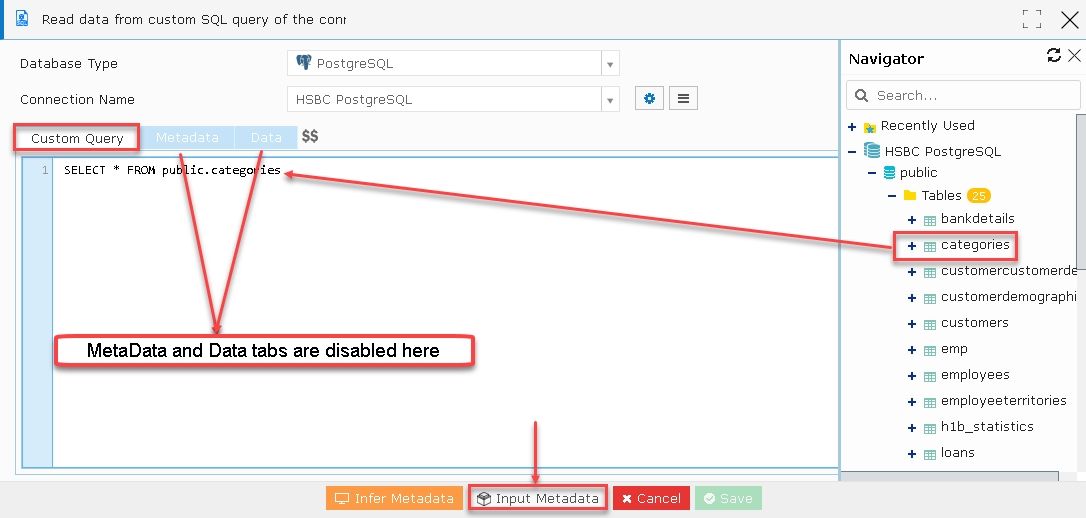
- As the user clicks on the categories, a Custom Query will be added from the Navigator.
Note: The ‘Metadata’ and ‘Data’ are in disable mode before clicking on the ‘Input Metadata’ button.
- Select and click the ‘Input Metadata’ button.
- The Metadata and Data associated with Metadata is displayed.
- By default, the Metadata column with empty columns and Data Types are displayed after clicking the ‘Input Metadata’ button.
- The user can view the Column and the Data Type in the ‘Metadata’ tab.
Note: ‘Metadata’ and ‘Data’ tabs are enabled immediately after clicking the ‘Input Metadata’ button but ‘Input Metadata’ button is disabled immediately after clicking on it.
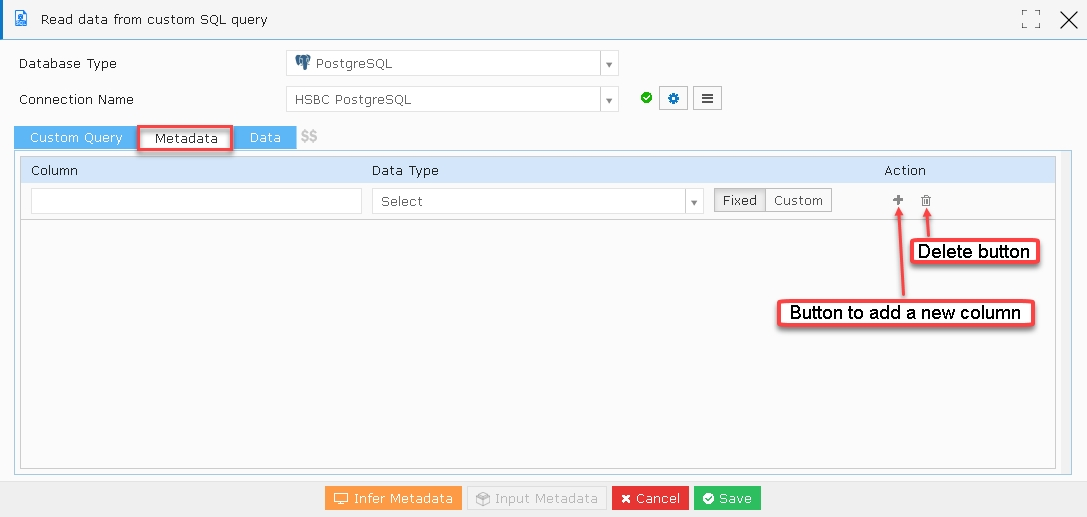
- Now add the known Metadata as shown here.
- Click the ‘Save’ button to save the ‘Custom SQL Query’ without executing.