A new data source ‘SOAP API’ is added in the Query Chain. Users can request and extract the data using a SOAP API through POST method by the following ways as shown below:
- SOAP API without Transformations
- SOAP API using Transformations.
- SOAP API using variables.
1. SOAP API without Transformations:
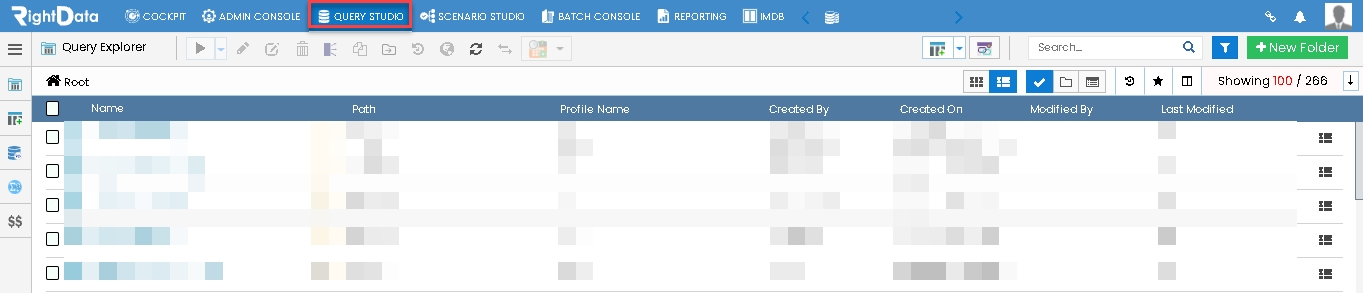
- Click the ‘QUERY STUDIO’ tab.
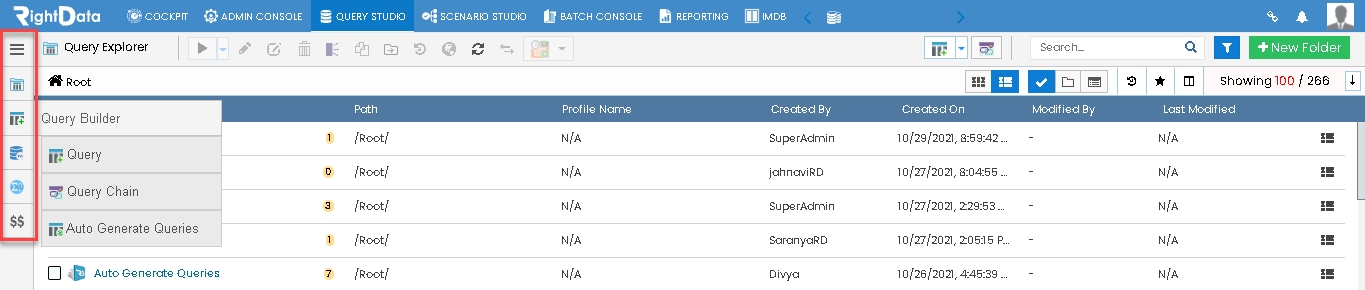
- Hover on the left pane options available on the application.
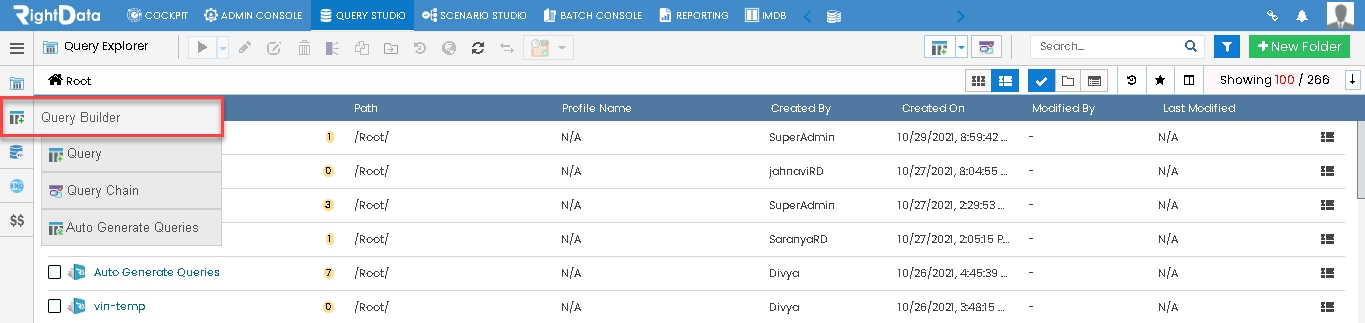
- Hover on the ‘Query Builder’ to expand its features.
- Select the ‘Query Chain’ option.
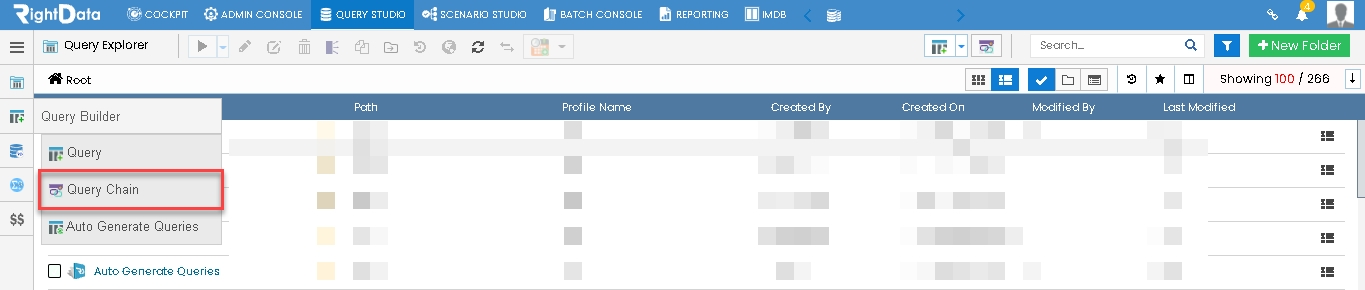
- Click the Query Chain option to redirect to a new Query Chain session page in create and edit mode.
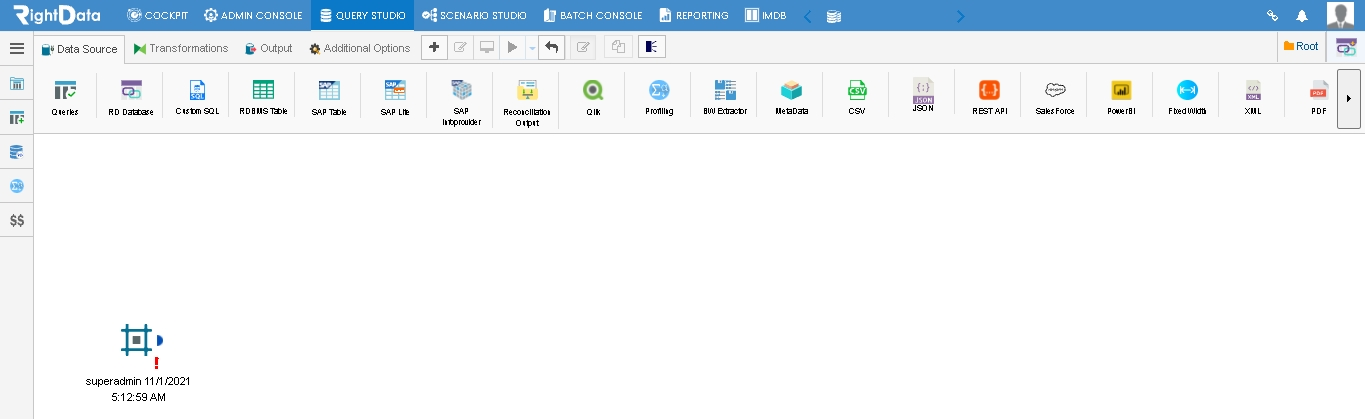
- From the ‘Data Source’ tab, drag and drop the ‘SOAP API’ icon as shown here.
- Click the “SOAP API” widget.
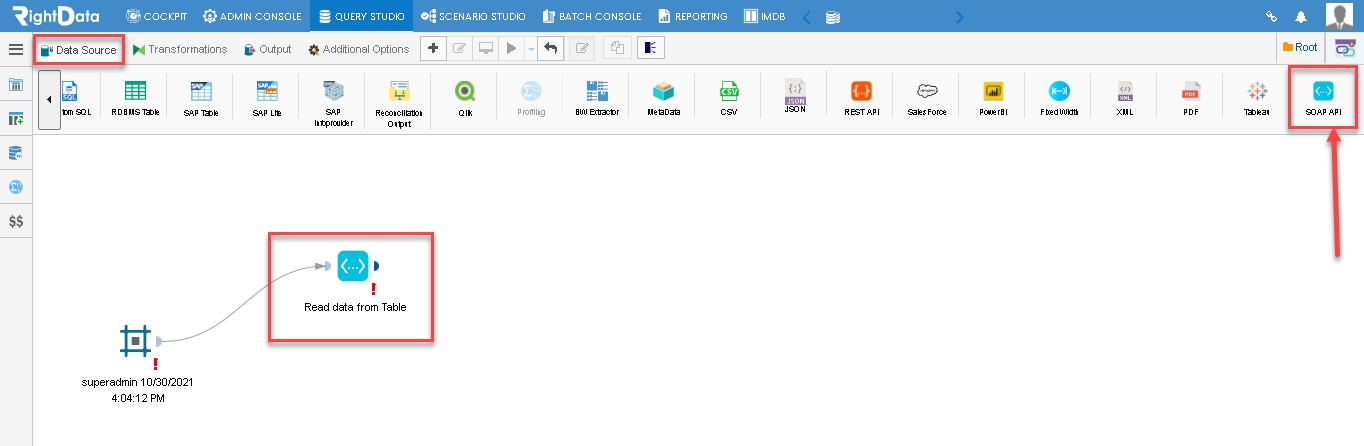
- A ‘Read data from Table’ pop-up window is displayed.
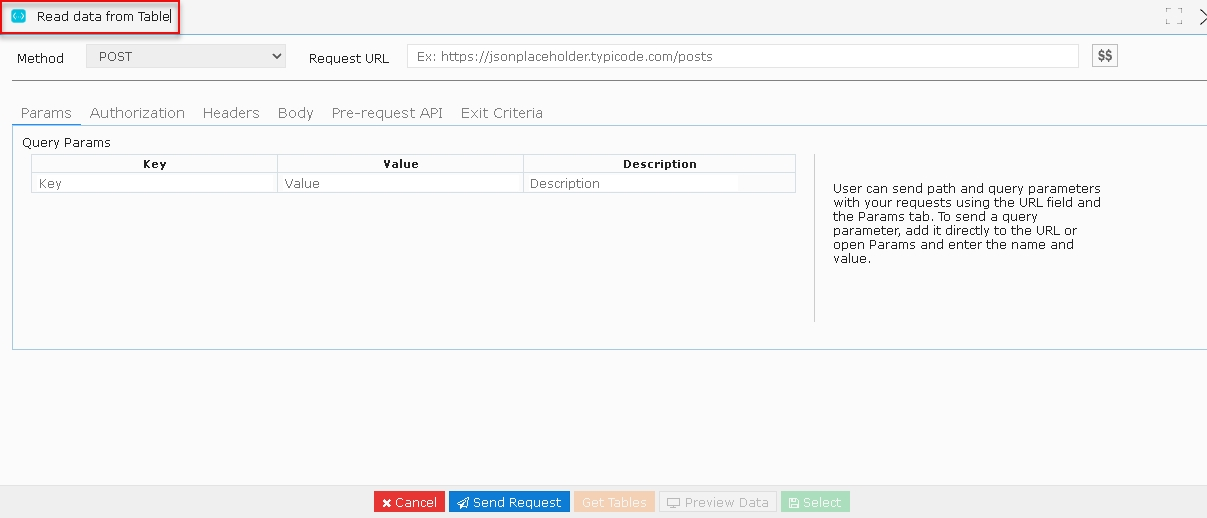
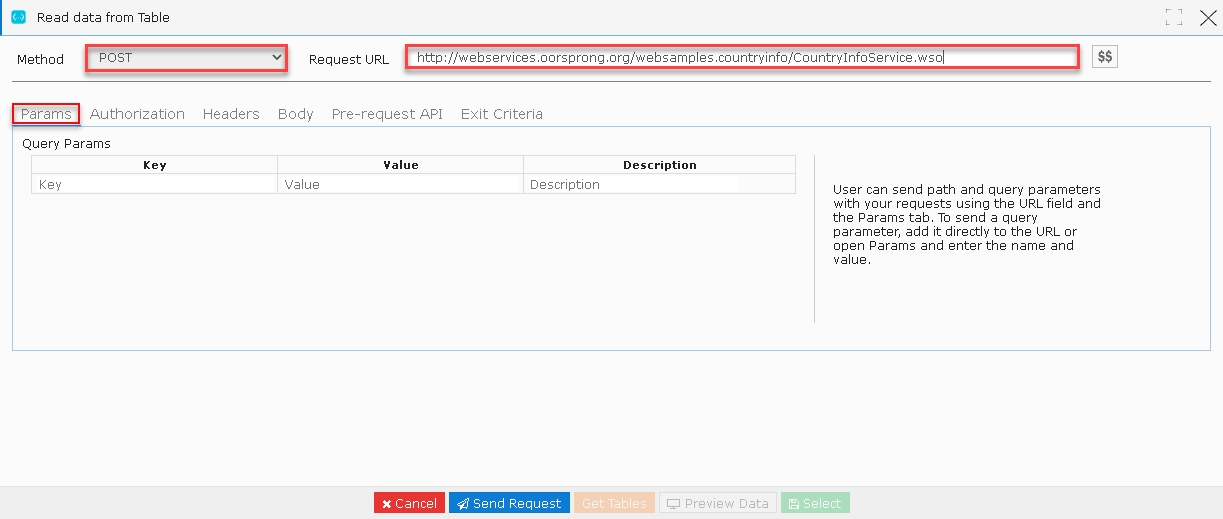
- Select the POST option from the Method drop-down list to Input the requested API.
Note: For example, let us consider the below URL link to add it in the Request URL text box available http://webservices.oorsprong.org/websamples.countryinfo/CountryInfoService.wso.
Note: By default, the ‘Params’ tab is displayed.
- Now, go to the ‘Headers’ tab.
- The ‘Headers’ parameters such as KEY, VALUE and DESCRIPTION are displayed.
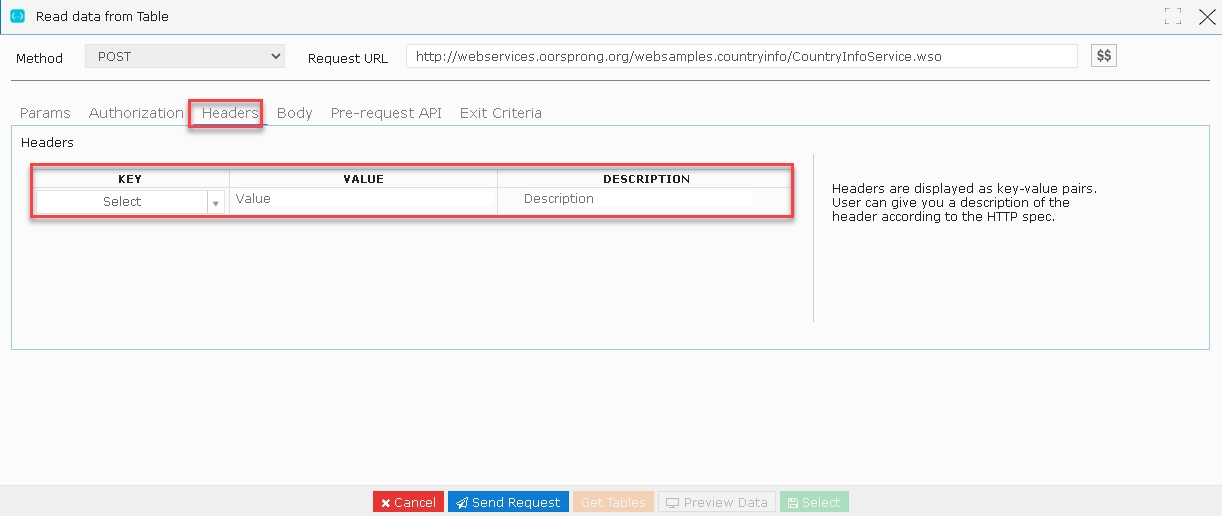
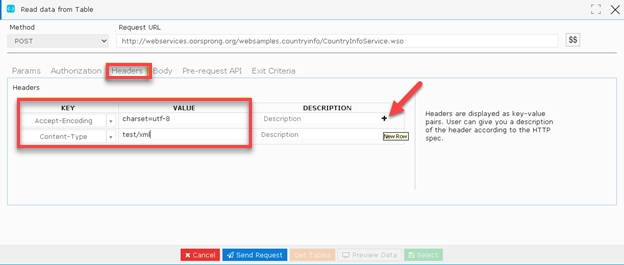
- Add the default keys and values under Headers option as shown here:
| KEY | VALUE |
| Accept-Encoding | Charset=utf-8 |
| Content-Type | Test/xml |
Note: A plus (+) button is provided for you to add any additional keys and values if required.
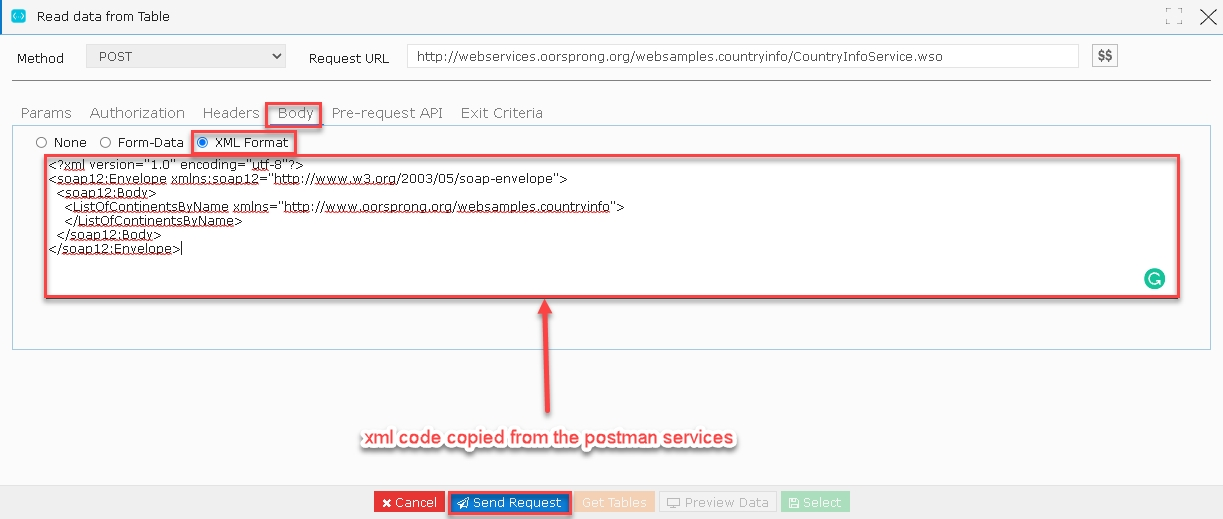
- Open the Postman services and input the request URL (http://webservices.oorsprong.org/websamples.countryinfo/CountryInfoService.wso) used above and extract the raw xml code from it
- Copy the above Body code from the Postman services.
- Add this same piece of code in the ‘Body’ session within the SOAP API widget under ‘XML Format.’
- Click the Send Request button.
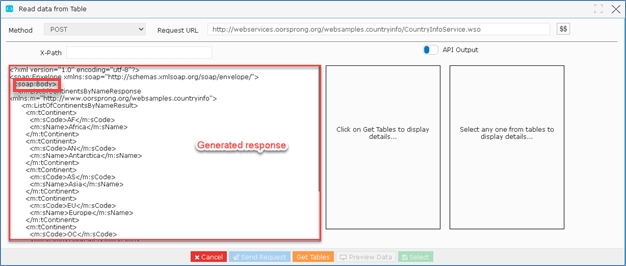
- A response is generated as shown here.
Note: The contents/nodes under the <soap:Body> keep on changing based on the request.
Note: Once the code is generated after clicking the ‘Send Request’ button, then consequently the ‘Get Tables’ button is enabled for you to perform next action.
- Before clicking on “Get Tables” button from the requested URL, the user needs to configure the X-Path as below:
- Parent node/main node: soap:Envelope
- Subsequent node: soap:Body
- Sub-sub node: m:ListOfContinentsByNameResponse
- Sub-sub-sub node: m:ListOfContinentsByNameResult
- repetitive node/tag: m:tContinent (The repetitive node will be converted into a table to extract the columns present in it)
- X-Path configuration will be “soap:Envelope/soap:Body/m:ListOfContinentsByNameResponse/m:ListOfContinentsByNameResult/m:tContinent”
Note: x-path can be configured by adding the main/parent node (soap:Envelope) followed by subsequent node (soap:Body) and so on, until you see a repetition node under “<soap:Body>.” If you find a repetition node under subsequent node (<soap:Body>) then you can stop here configuring the X-Path”.“m:tcontinent” is the repetitive node here under the subsequent node “<soap:Body>”.
- Now, add the X-Path configuration.
- Click the ‘Get Tables’ button as shown here.
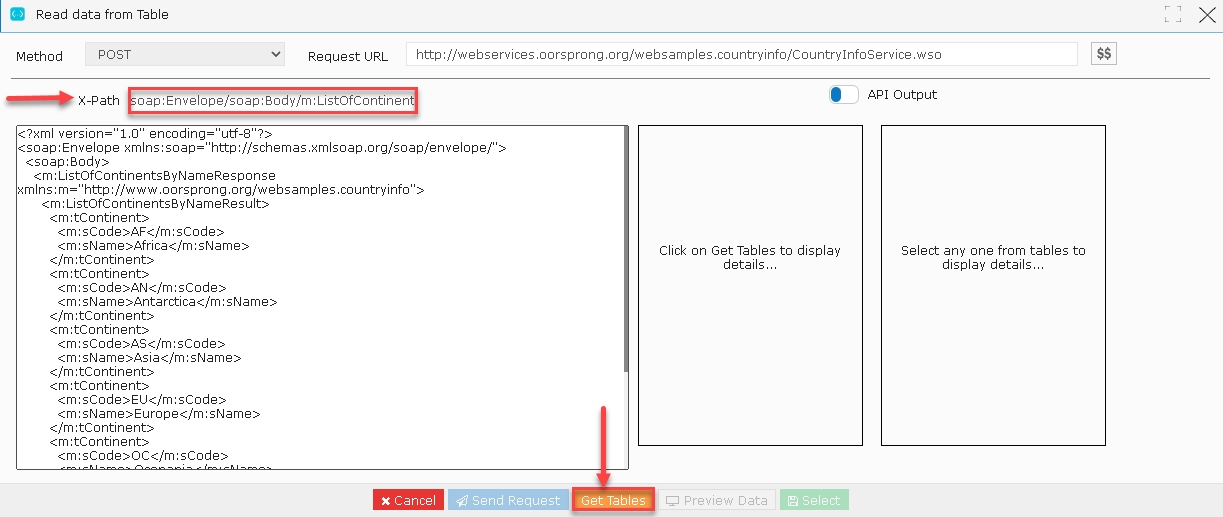
- The following screen is displayed.
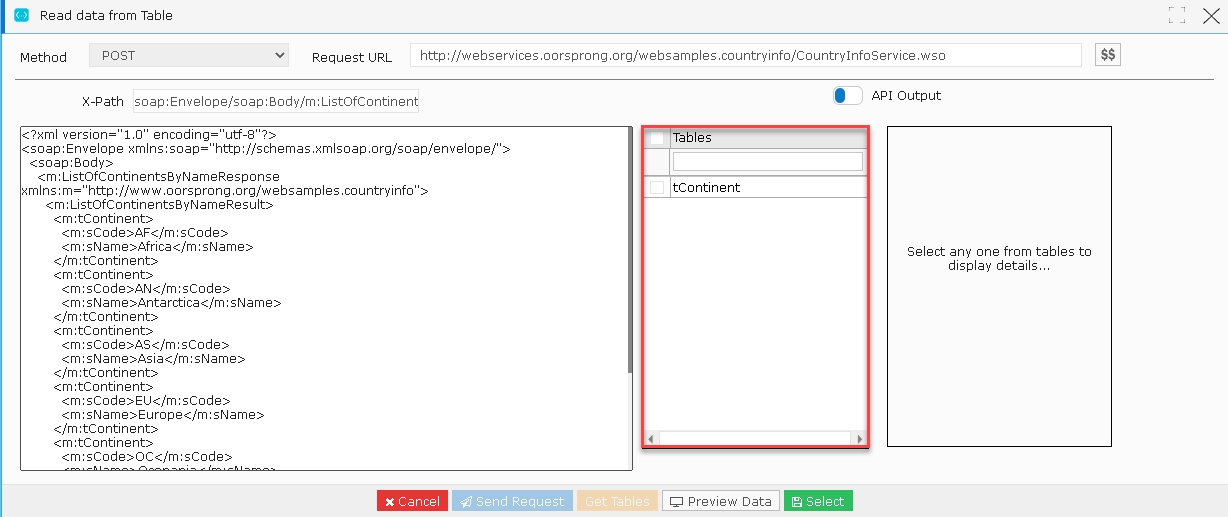
- Check the Tables option.
- ‘tContinent’ will be selected automatically.
- The Column Names appear beside the ‘tContinent’ section.
- The Column Names in ‘tContinent’ are shown below:
- _id
- sCode
- sName
Note: ‘_id’ is not the column but the identification number of that particular xml file. Simultaneously, you must select at least one column to save the SOAP API widget (except _id).
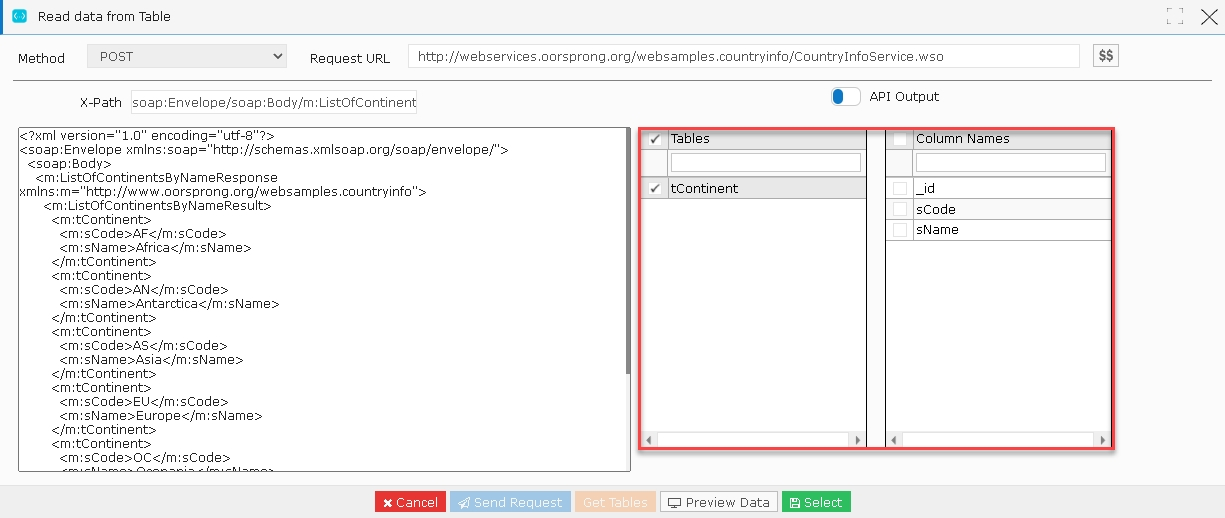
- The user can either individually select the Column Names ( sCode, sName) or else select all the Column Names except ‘_id’ as it’s only an identification number.
- For instance, the user selected Column Names ‘sCode and sName’ from ‘tContinent’ table.
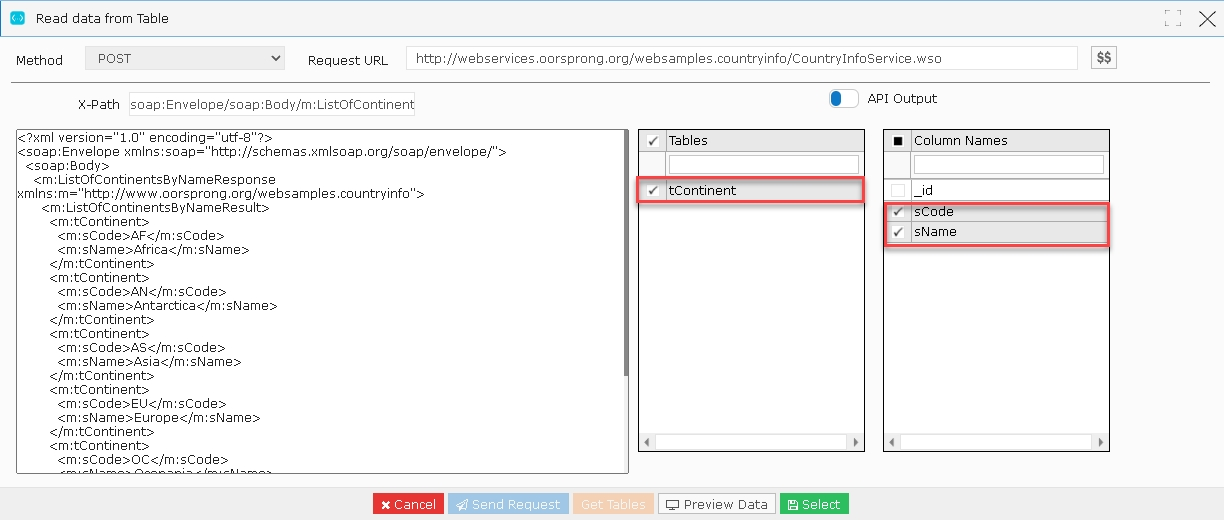
- The user can preview the data using a ‘Preview Data’ button.
- Click the ‘Preview Data’ button.
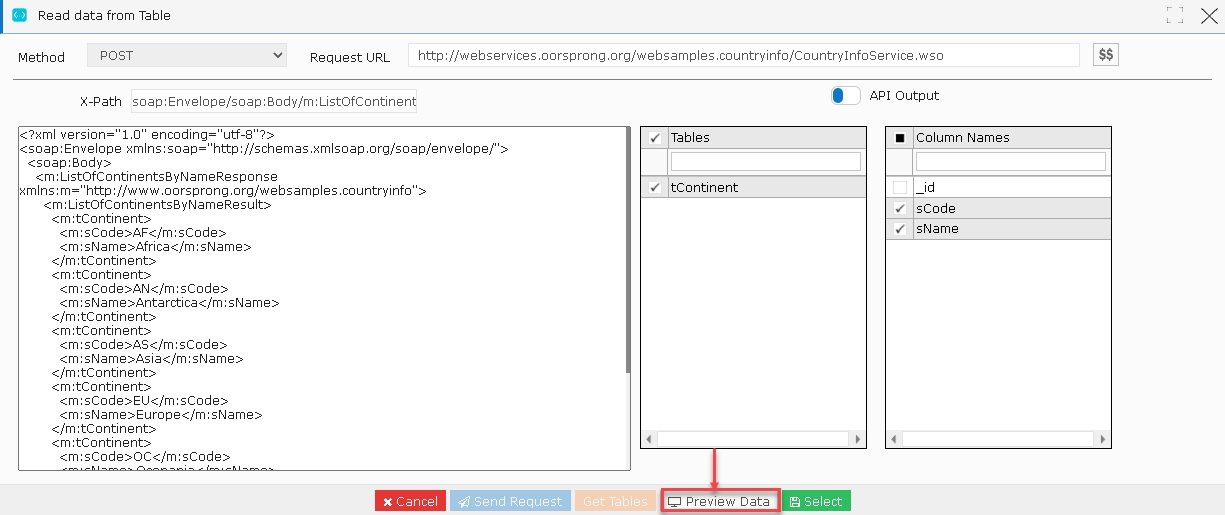
- An ‘Existing Query’ pop-up window is displayed showing the ‘sCode’ and ‘sName’ data columns.
- Close this window and navigate back to the ‘Read data from Table’ window.
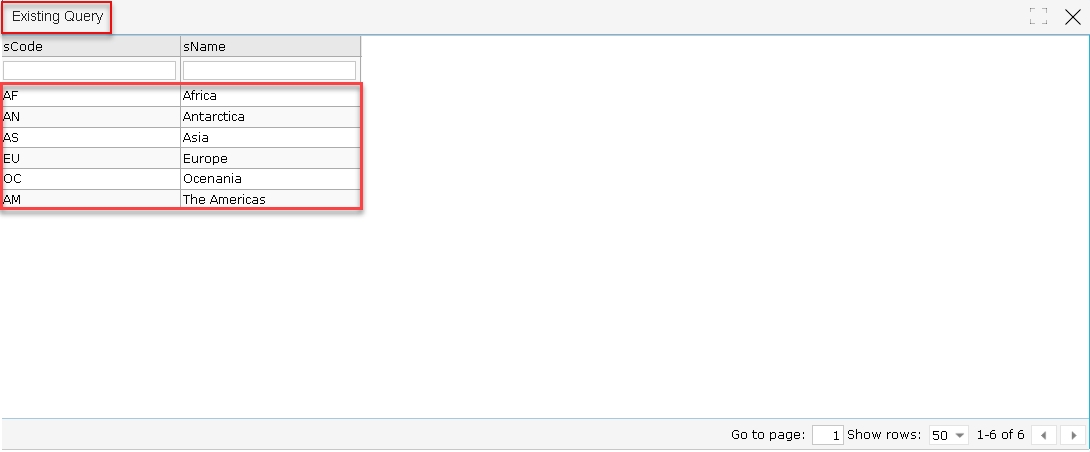
- Click the ‘Select’ button to save the ‘SOAP API’ widget data.
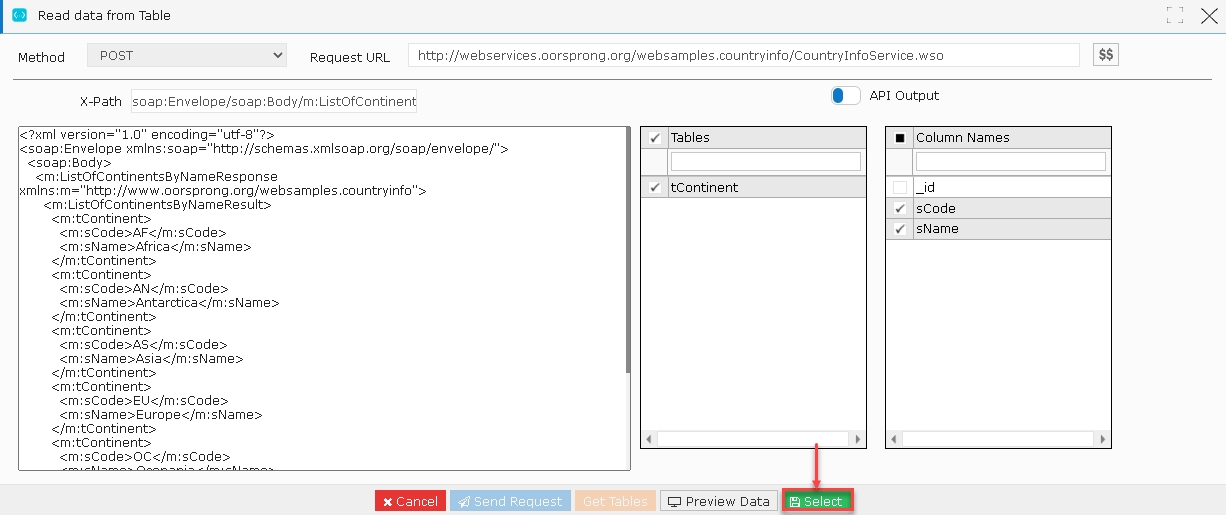
- The SOAP API will collapse in the create and edit Query Chain page saving the widget data.
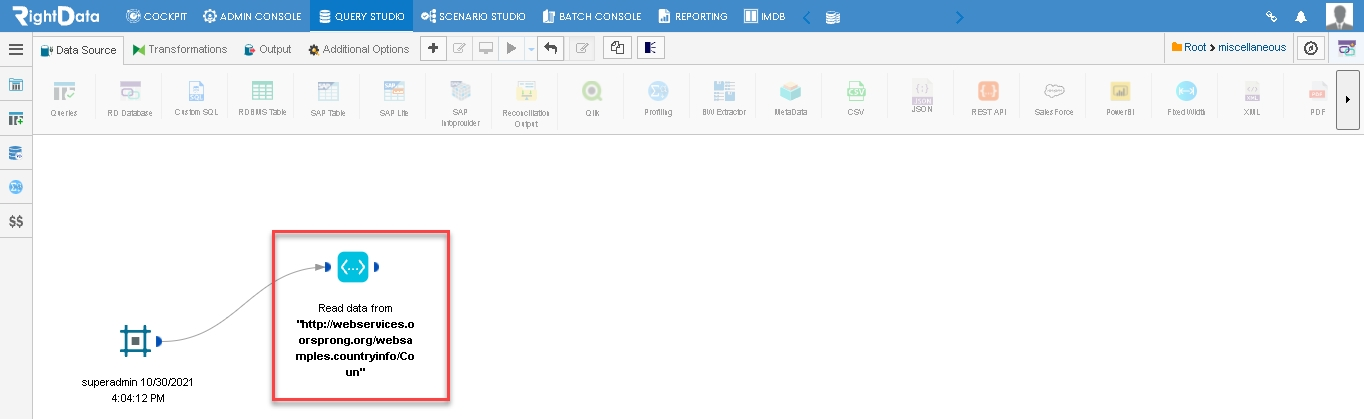
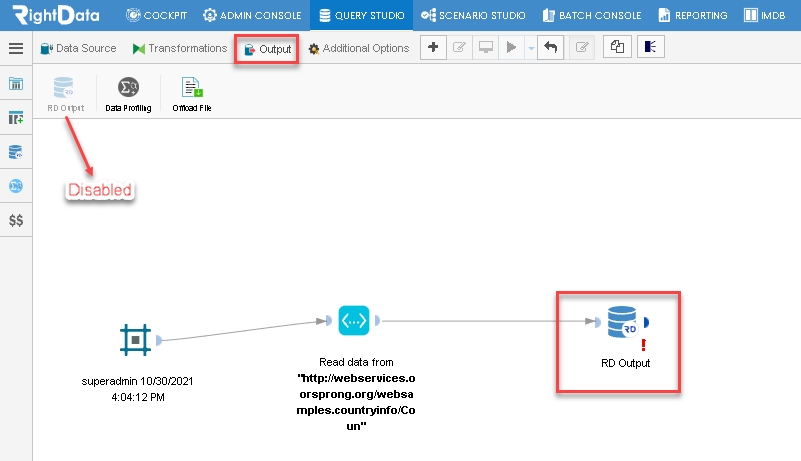
- From the ‘Output’ tab, drag and drop an ‘RD Output’ widget as shown here.
Note: RD Output option in the Output tab gets disabled as you drag and drop the RD Output widget.
- Click the ‘RD Output’ widget.
- An ‘RD Output’ pop-up window is displayed.
- Click the ‘Select’ button.
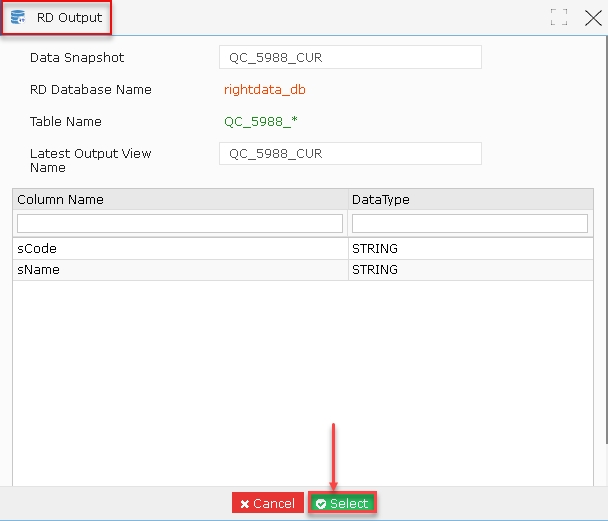
- The ‘RD Output’ widget is closed saving the data.
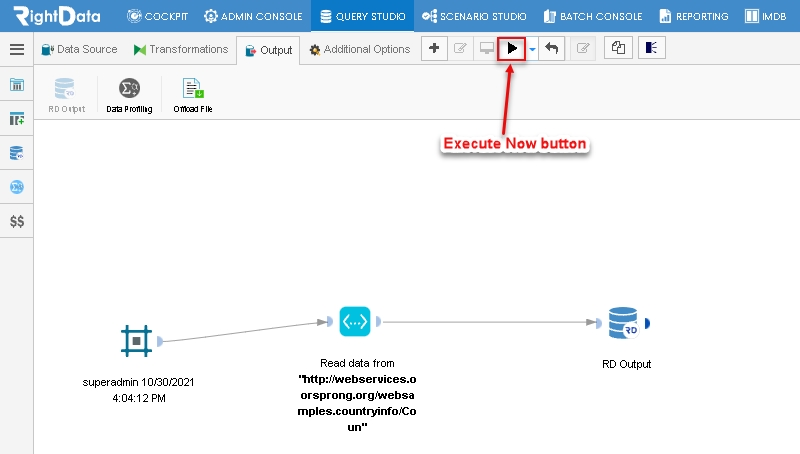
- The user is navigated to the ‘Query Chain’ session page.
- Click the ‘Execute Now’ button.
- A green tick mark appears on the top right corner of the screen indicating successful execution.
Note: After successfully execution, the monitor mode gets enabled.
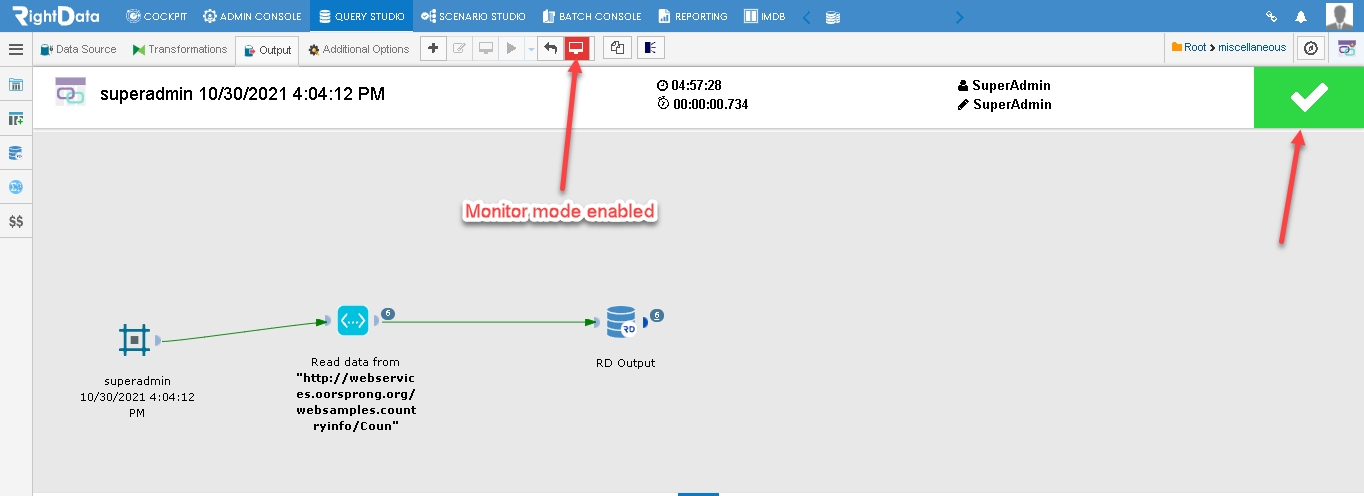
- Click on the count that appears beside the ‘RD Output’ widget.
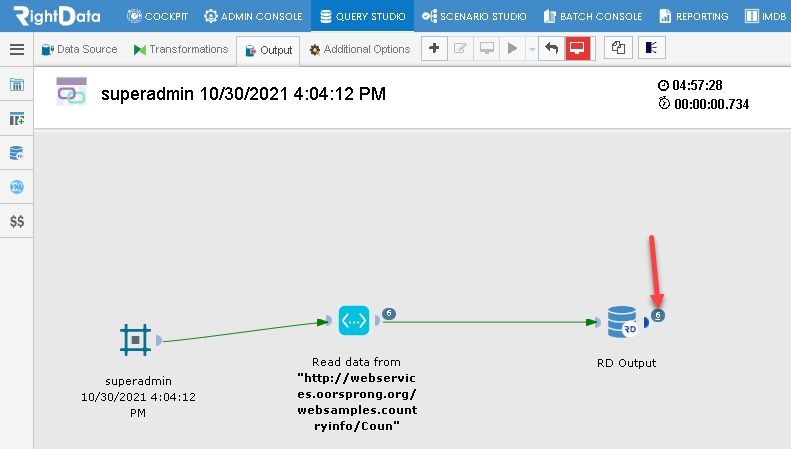
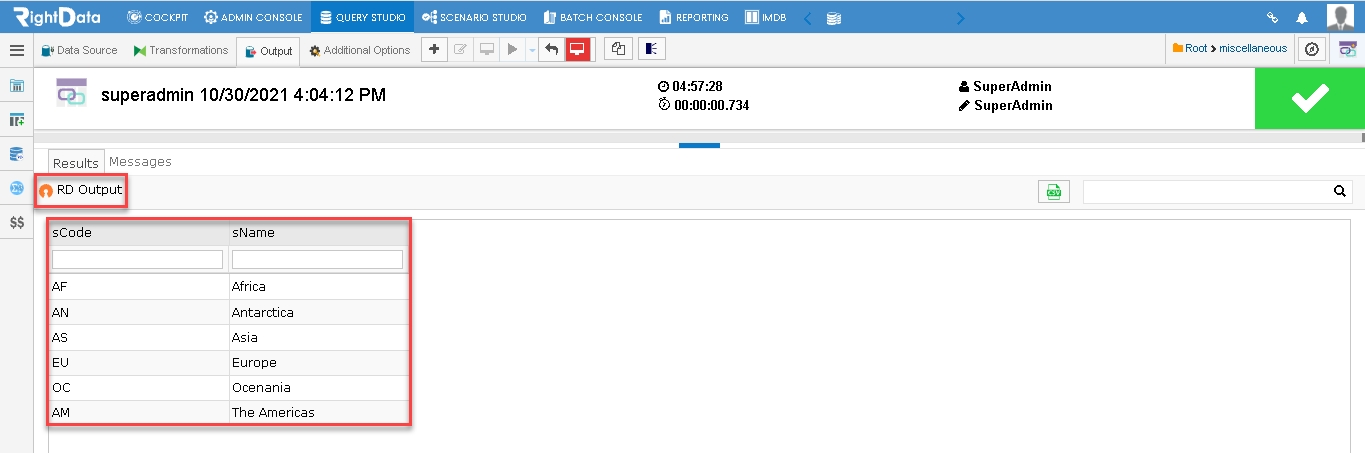
- The user is navigated to the following screen.
Note: The user can view the SOAP API table (tContinent) data that was previously requested in the SOAP API widget.
2. SOAP API using Transformations:
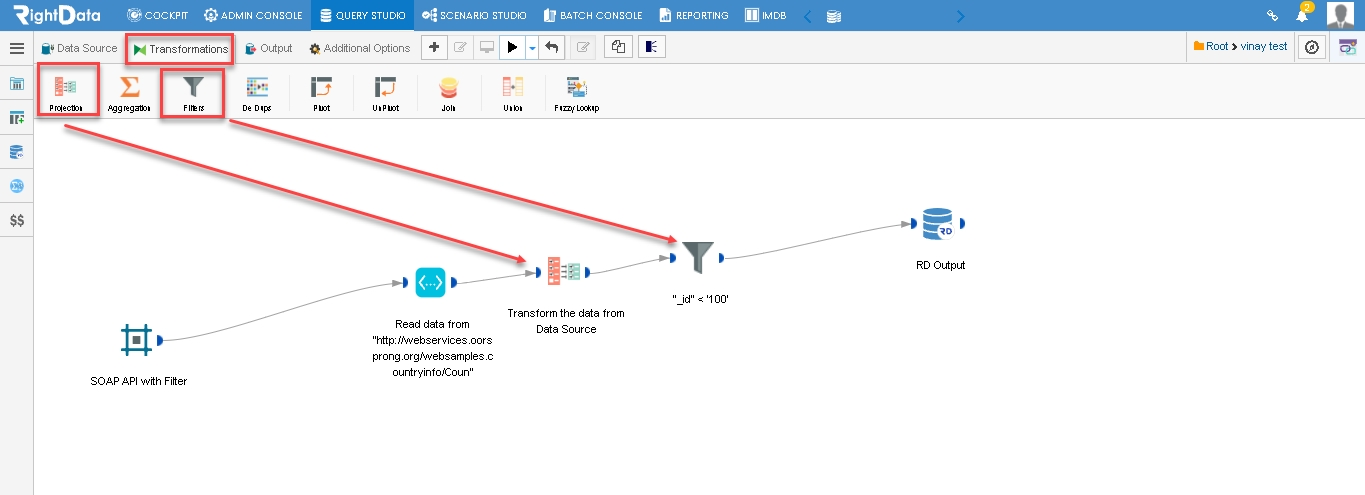
- Navigate to the ‘Transformations’ tab, then drag and drop ‘Projection’ and ‘Filters’ widgets on to the Query Chain in create and edit mode.
- Place these two Transformation widgets between ‘SOAP API’ and ‘RD Output’ widgets.
- Click the ‘Projection’ widget.
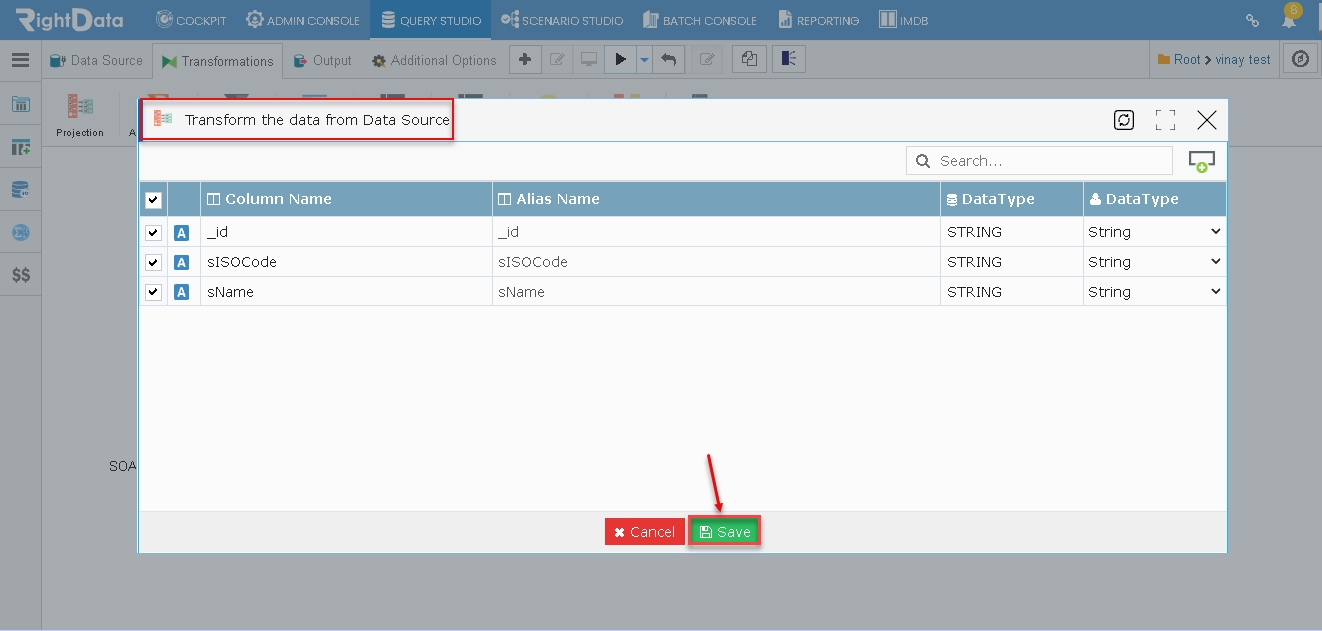
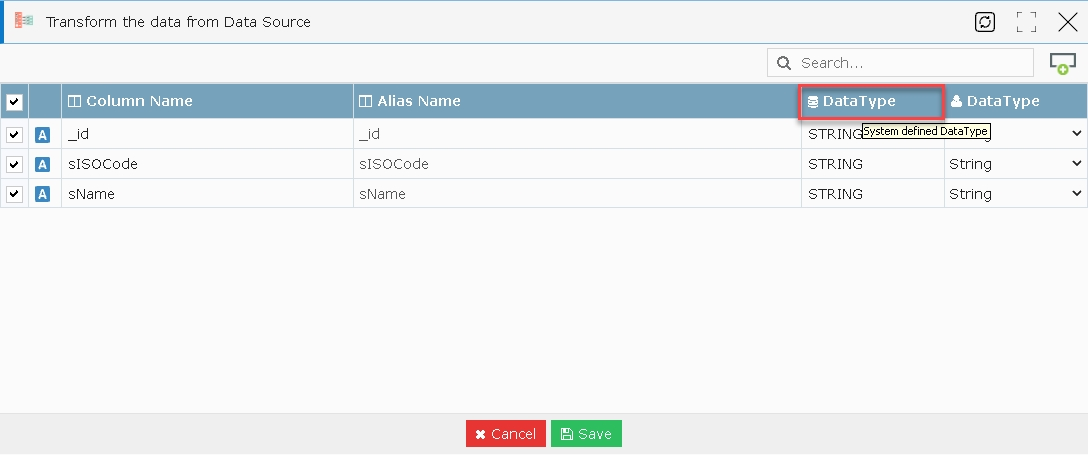
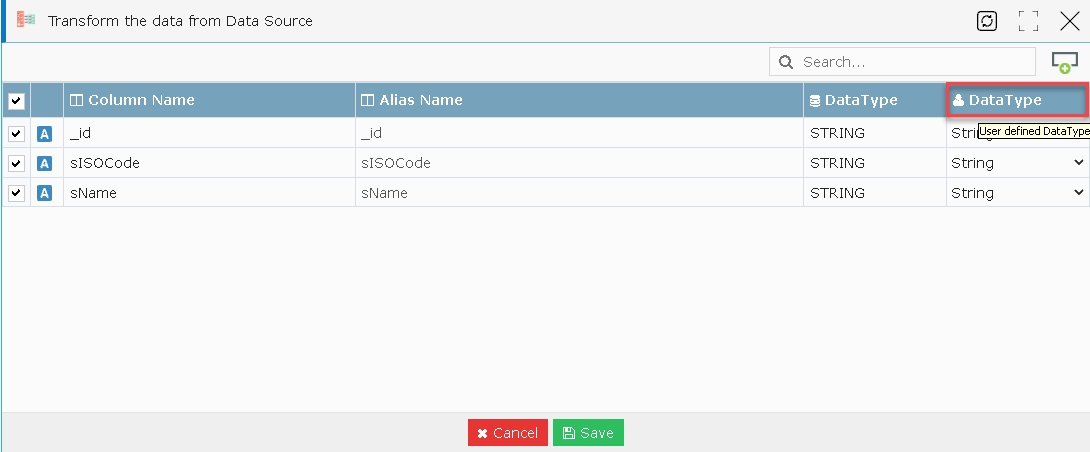
- A ‘Transform the data from data source’ pop-up window is displayed.
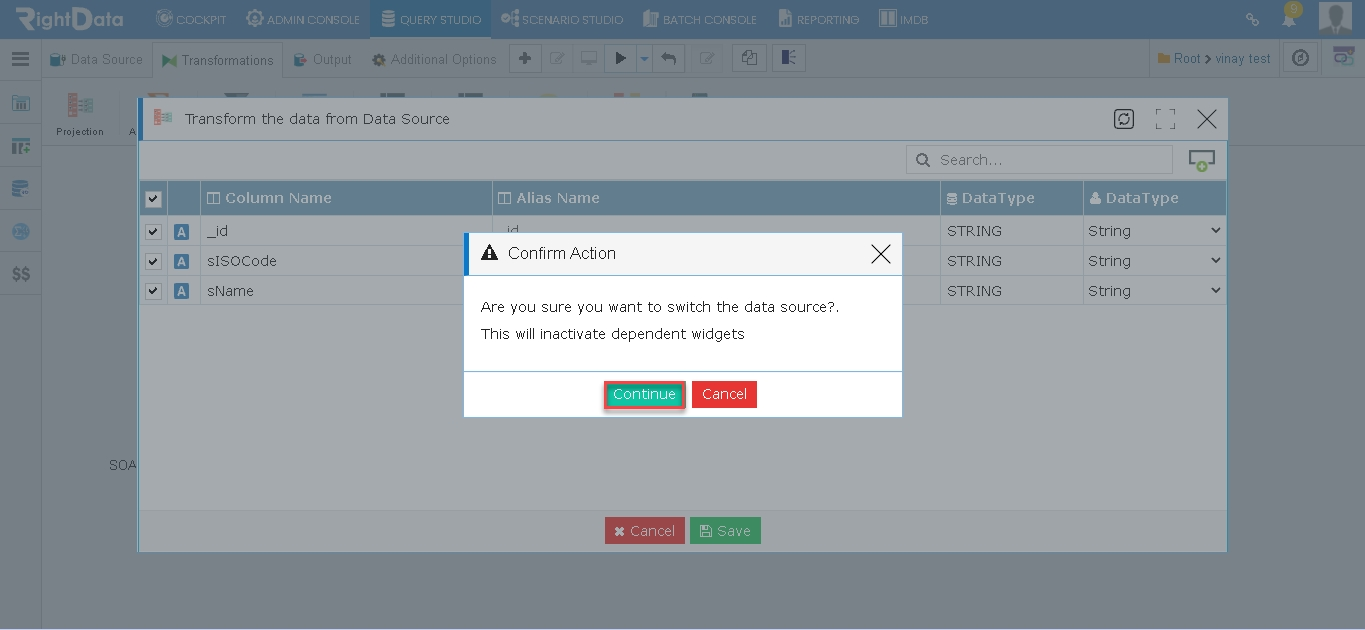
- Click the ‘Save’ button to save the ‘Projection’ Transformation widget.
- The Confirm Action pop-up window appears to confirm whether the user wish to switch the Data Type.
Tool tip: Hover on the Data Type to get more information about it.
Note: The System defined and the User defined Data types displays Data type as STRING for both of them as per the console settings. You can also override the data types from STRING to others from the dropdown list. The System defined Data type cannot be altered.
- Click the ‘Continue’ button on the Confirm Action pop-up window to save the ‘Projection’ Transformation widget data.
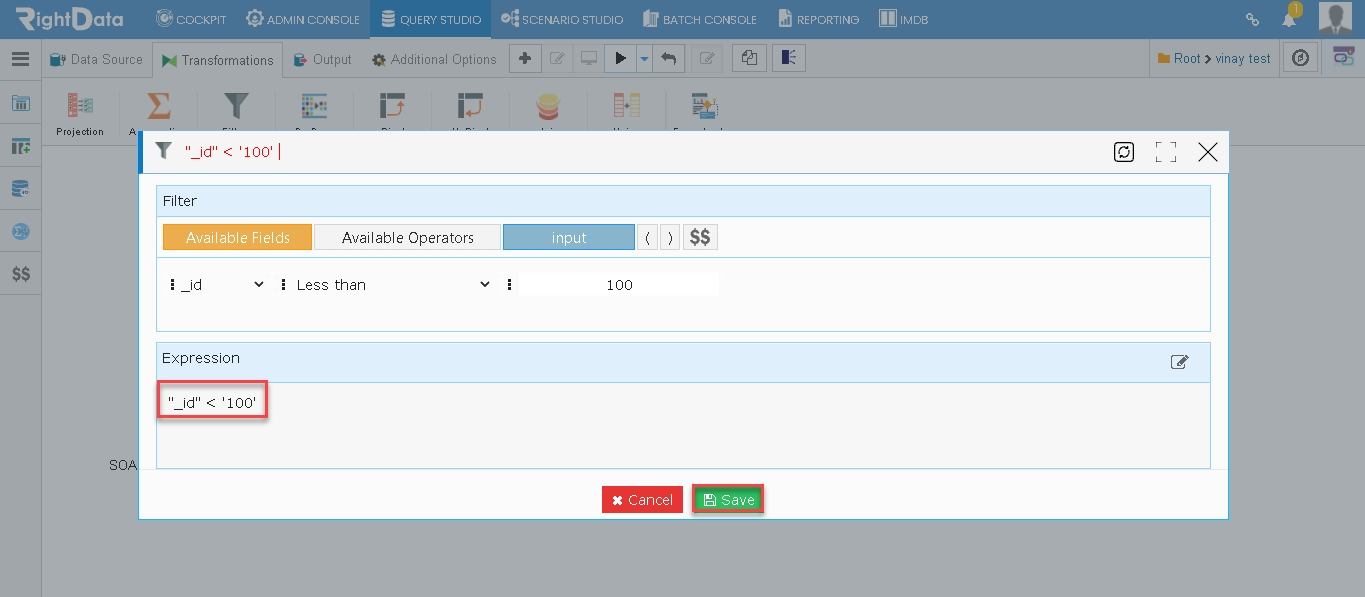
- Click the ‘Filters’ widget to filter the data as per the condition defined in the filter pop-up window.
- Set the filter condition from the Available Fields, Available Operators drop-down list and input text box field.
- The defined filter condition appears as an expression under the Expression section.
Note: The Edit icon available against Expression section can be utilized to further edit the generated expression and save the same.
- Click the ‘Save’ button to save the defined filter condition and the ‘Filters’ transformation widget as well.
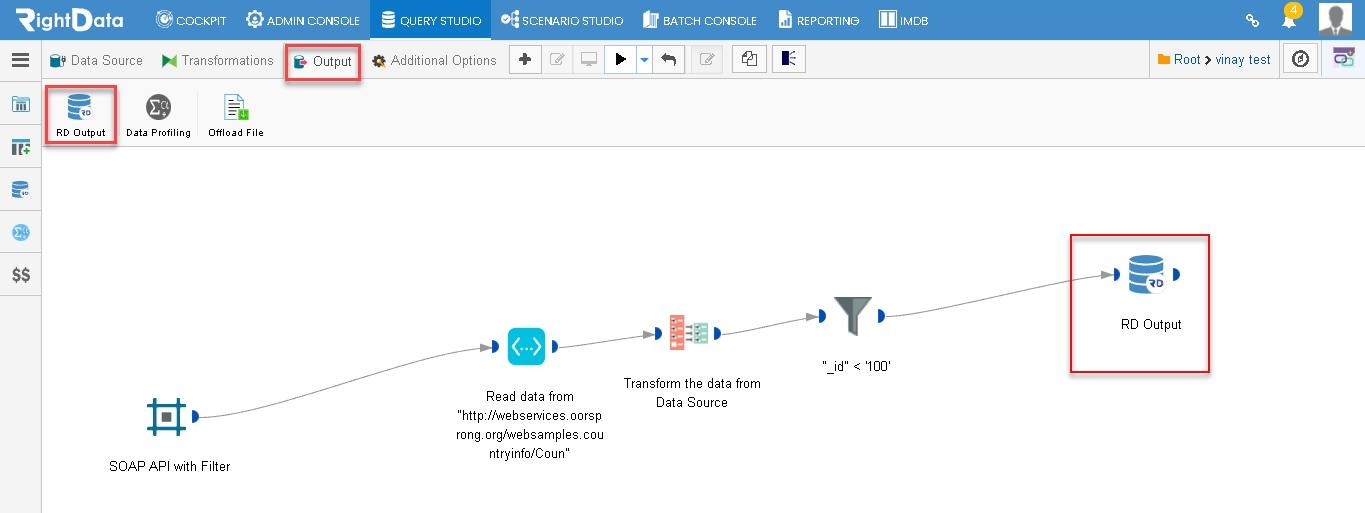
- Navigate to the Output tab, then drag and drop ‘RD Output’ widget on to the Query Chain in create and edit mode.
- Click the ‘RD Output’ widget.
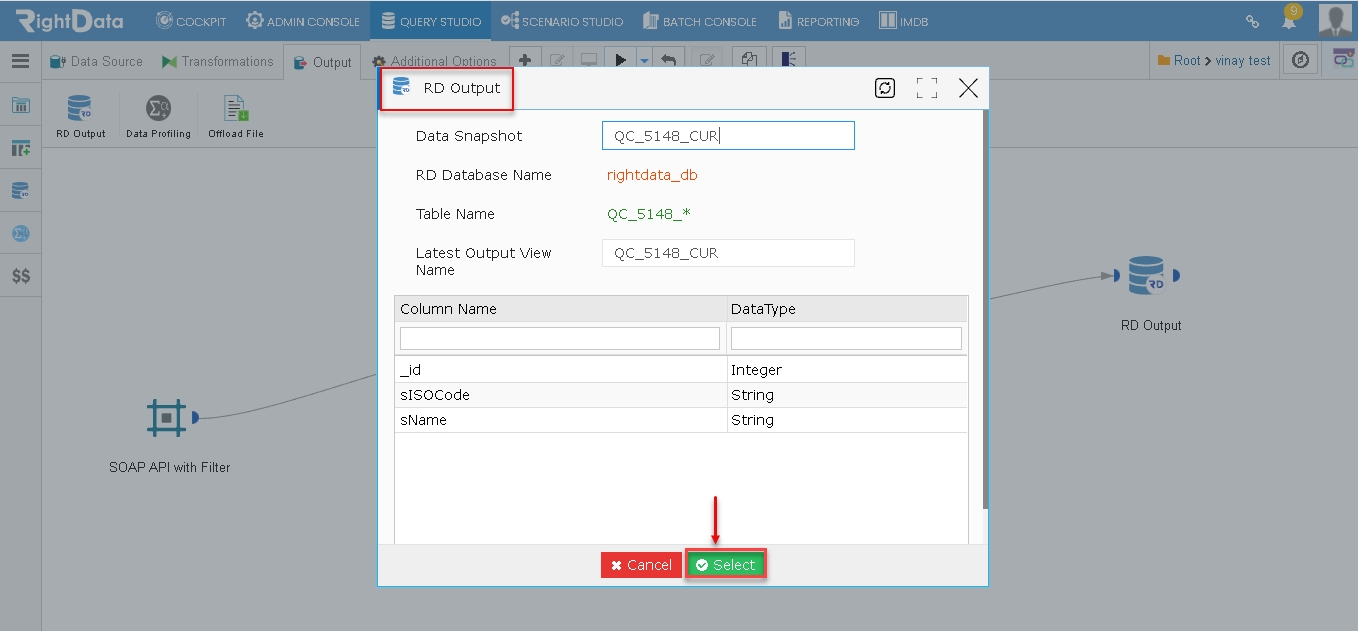
- An ‘RD Output’ pop-up window is displayed.
- Click the ‘Select’ button to save the ‘RD Output’ widget.
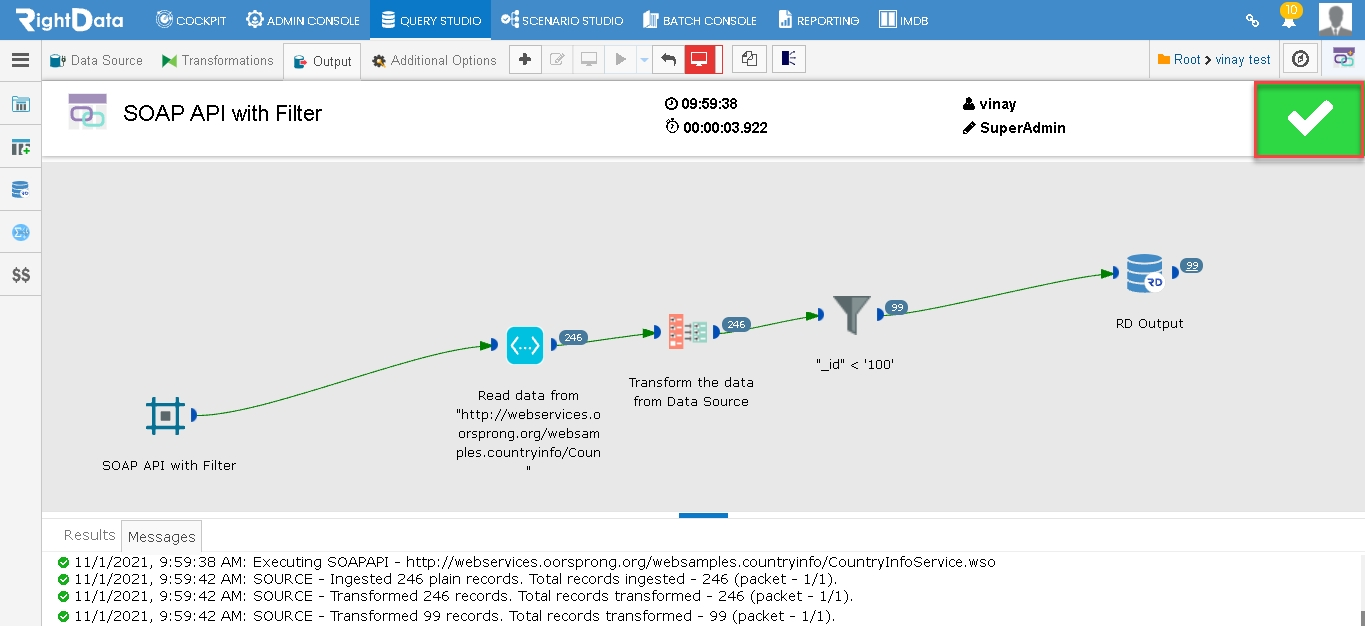
- Now click the Execute Now button to perform the execution process.
- A green tick mark appears on the top right corner of the screen indicating a successful execution.
Note: After successfully execution, the Monitor mode gets enabled.
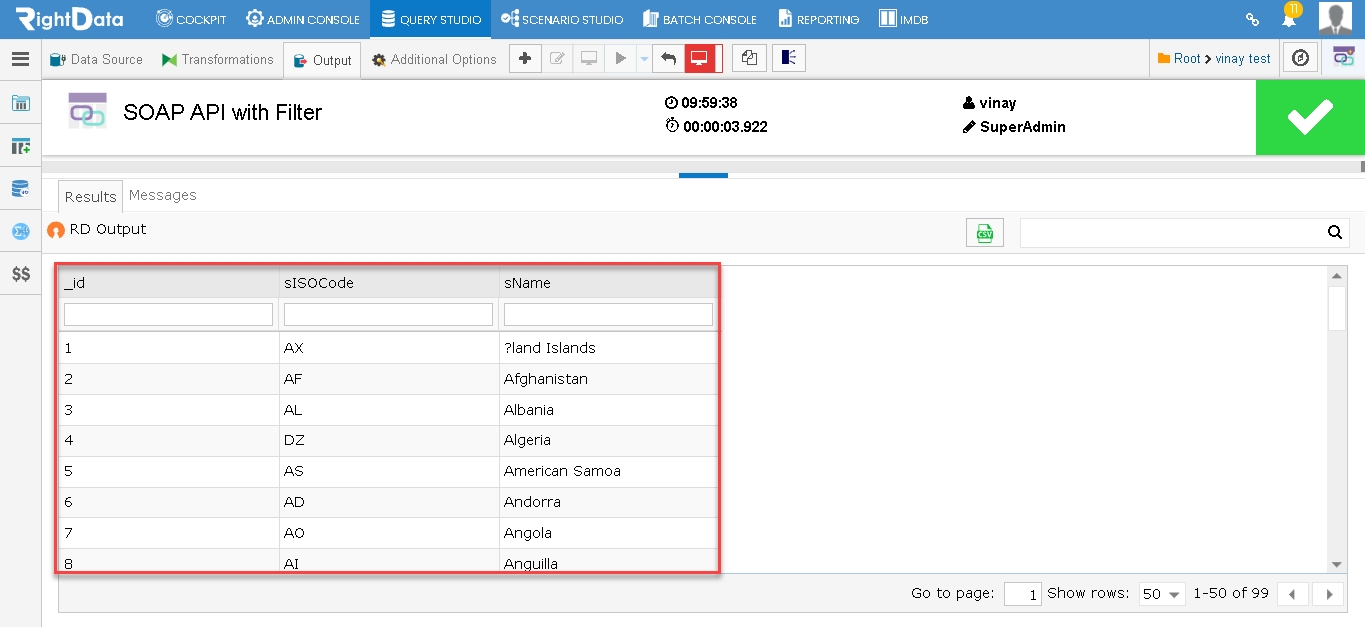
- Click the count that appears beside the ‘RD Output’ widget to see the final result.
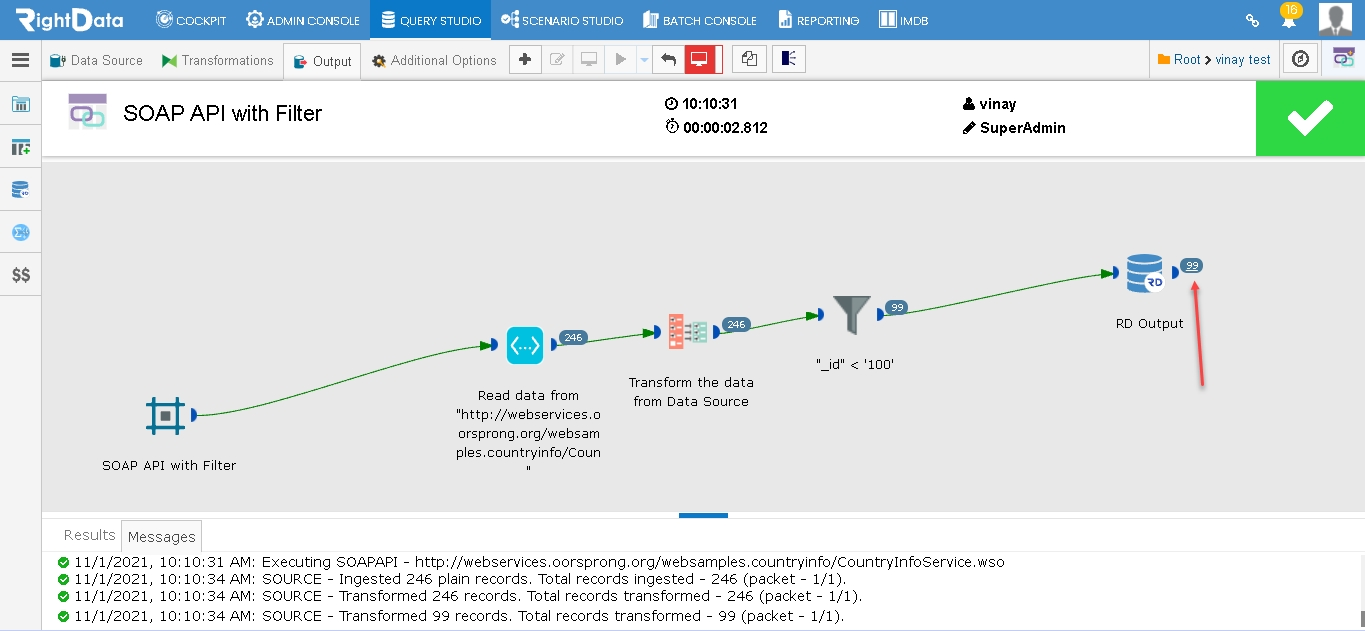
- The detailed final output result is shown.
3. SOAP API using variables:
The user can also add ‘variables/variable’ to a SOAP API and use this ‘variable used SOAP API’ in any Query Chain.
Note: Ensure not to replace the whole SOAP API with one variable since we haven’t created any functionality to add variables to special characters.
Steps involved:
- Click the ‘QUERY STUDIO’ tab.
- Hover on the ‘Variable Explorer’ snippet.
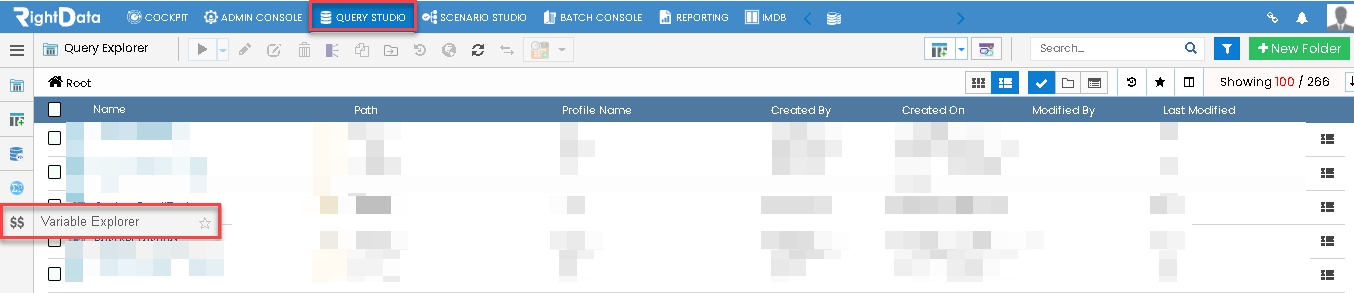
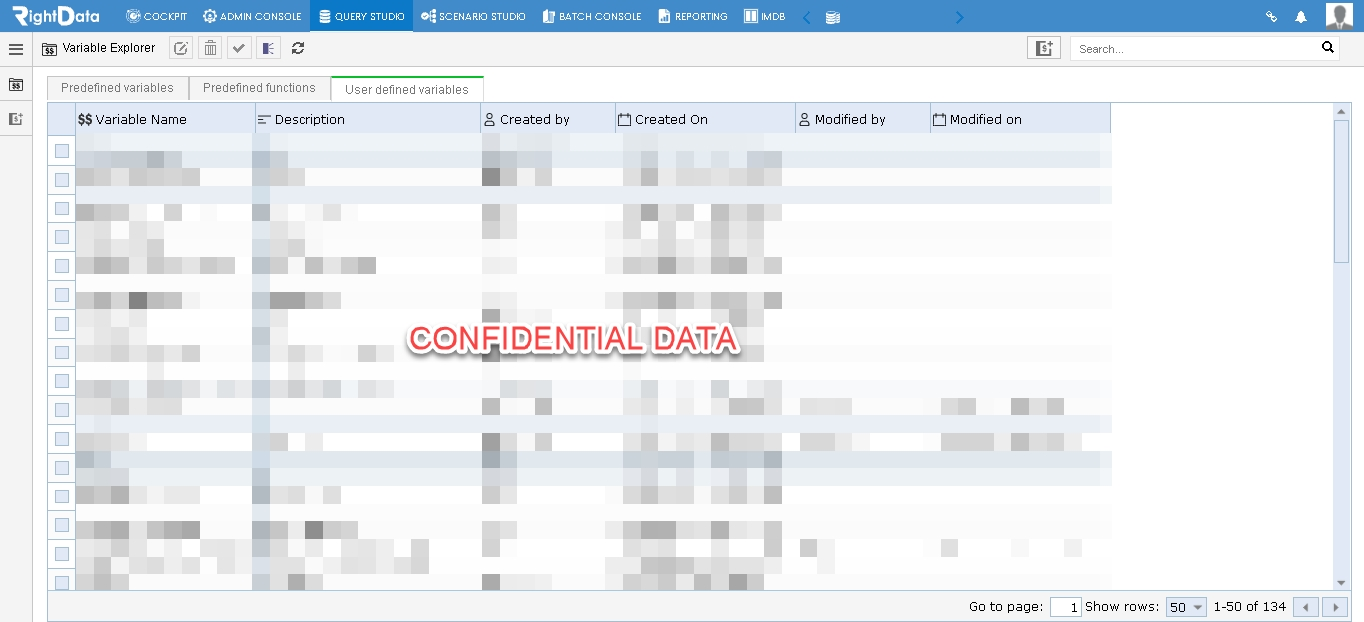
- Click the ‘Variable Explorer’ option to load its page details.
Note: We have intentionally blurred the confidential information.
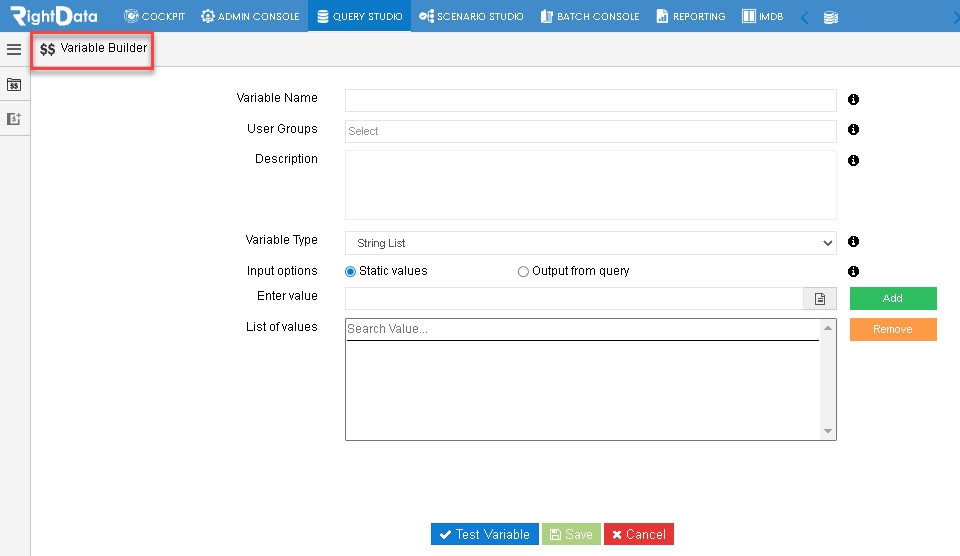
- Hover on the ‘Variable Builder’ option.

- Click the $$ Variable Builder option to view its details.
- Assume, the user is using the same above used SOAP API URL (http://webservices.oorsprong.org/websamples.countryinfo/CountryInfoService.wso)
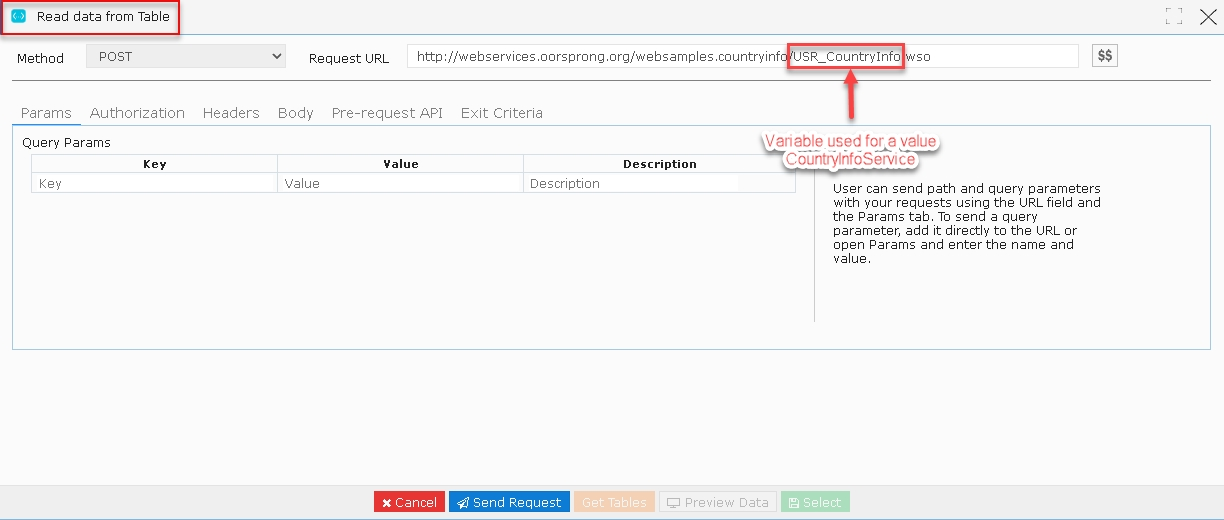
- Consider to add a variable (USR_CountryInfo) to a value (CountryInfoService) in the SOAP API (http://webservices.oorsprong.org/websamples.countryinfo/CountryInfoService.wso)
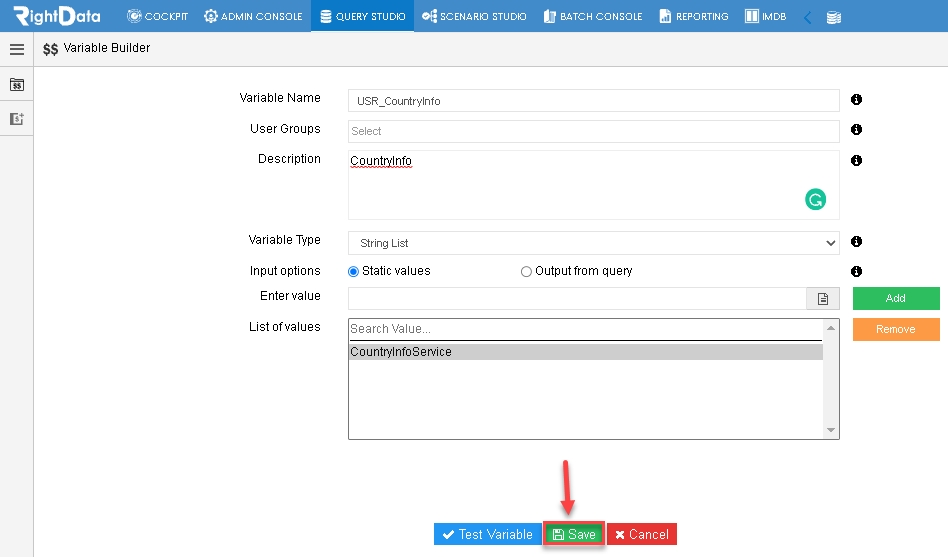
- Under the Variable Name Field, add (USR_CountryInfo)
- Under the Description, add (CountryInfo)
- Under the Input Field select Static values (by default, it is selected)
- Under the Enter value field add the value (CountryInfoService)
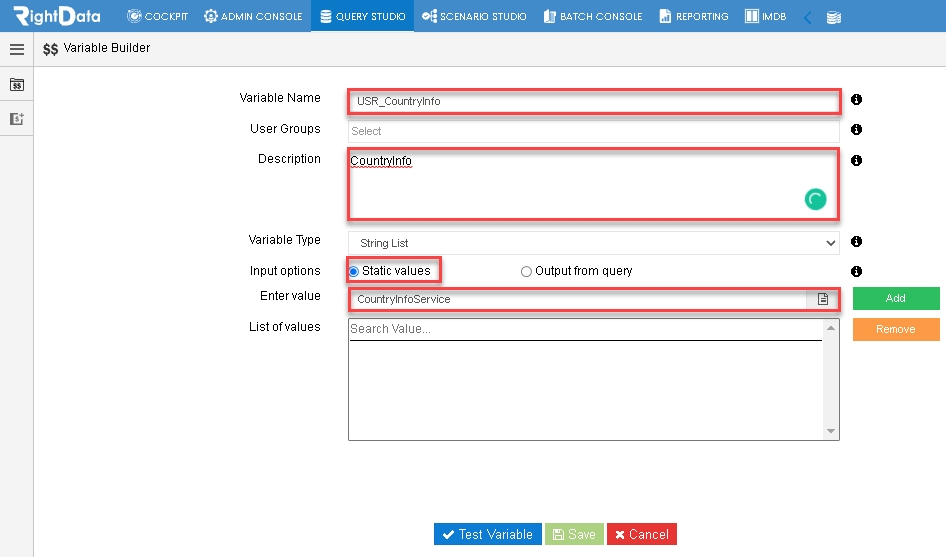
- Click the ‘Add’ button from the Enter Value option (CountryInfoService)
- The value (CountryInfoService) gets added under the List of values fields as shown here.
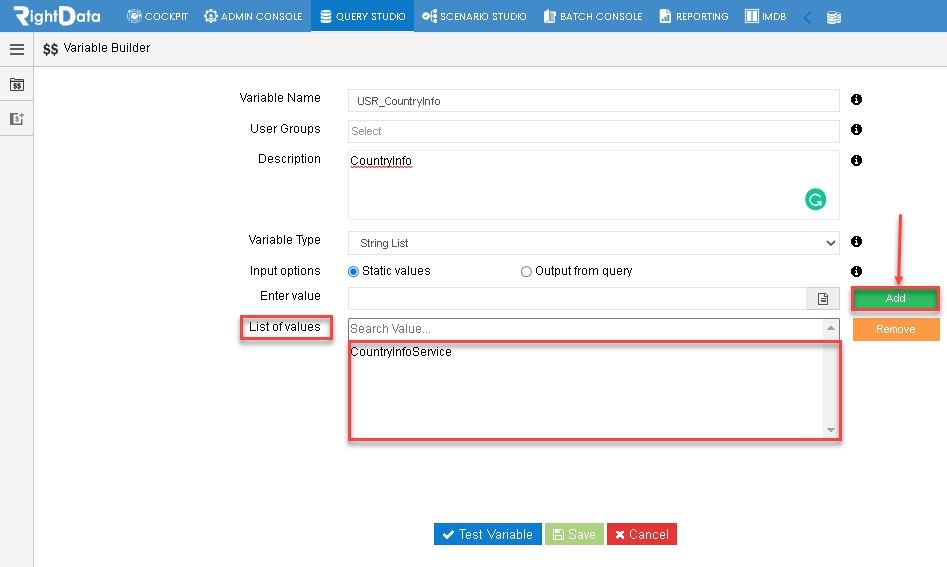
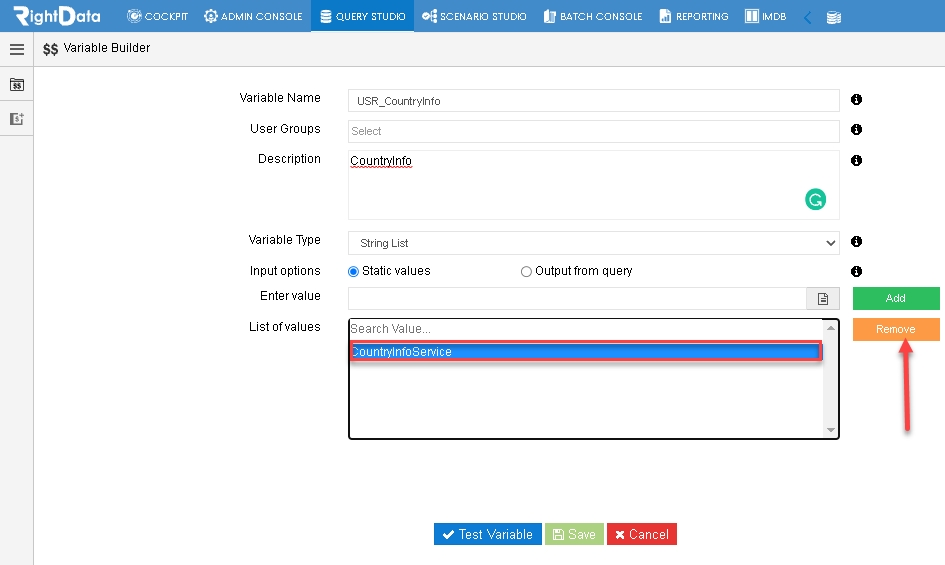
- If the user enters a wrong value, then he/she can select an already entered wrong value and click on ‘Remove’ button to remove the value.
- Click the ‘Test Variable’ button to test the added variable (CountryInfoService).
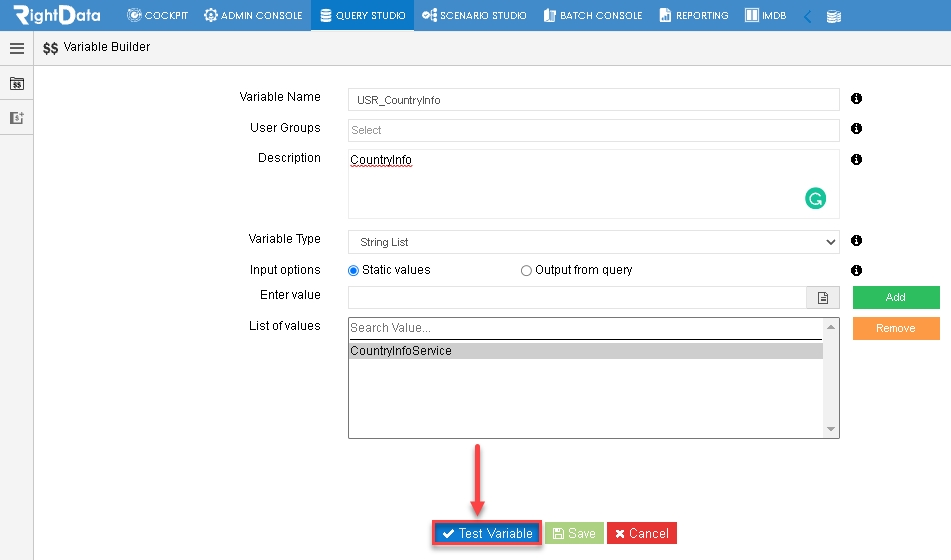
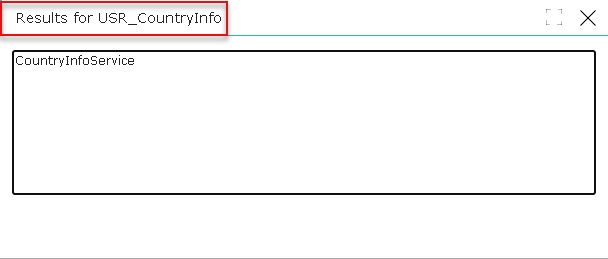
- A pop-up window ‘Results for USR_CountryInfo’ is displayed.
- Close this window and navigate back to ‘Variable Builder’ session page.
- Select the ‘Save’ button to save the Variable Name.
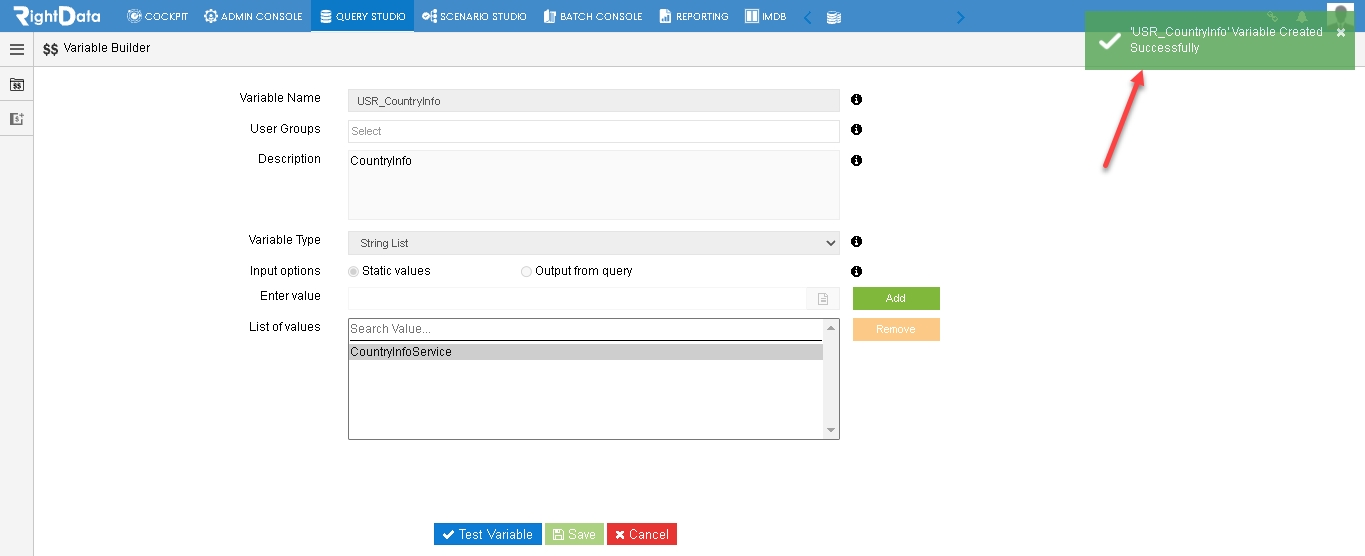
- A toaster message “’USR_CountryInfo’ Variable Created Successfully” is displayed.
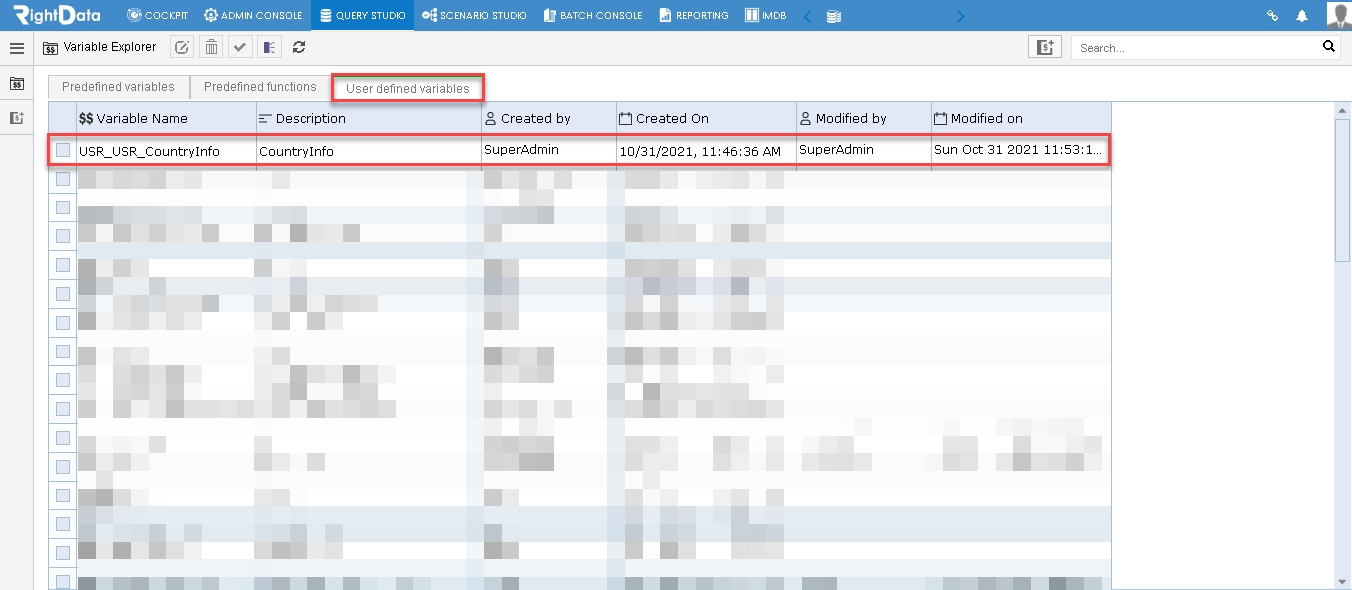
- The saved Variable Name (USR_CountryInfo) is visible from the ‘User defined variables’ tab as shown here.
- Now add this created Variable (USR_CountryInfo) in the previously used SOAP API for the value (CountryInfoService).
- Consider the user is using this Variable (USR_CountryInfo) in a SOAP API widget within a Query Chain.
- From the ‘QUERY STUDIO’, open a new Query Chain in create and edit mode as shown here.
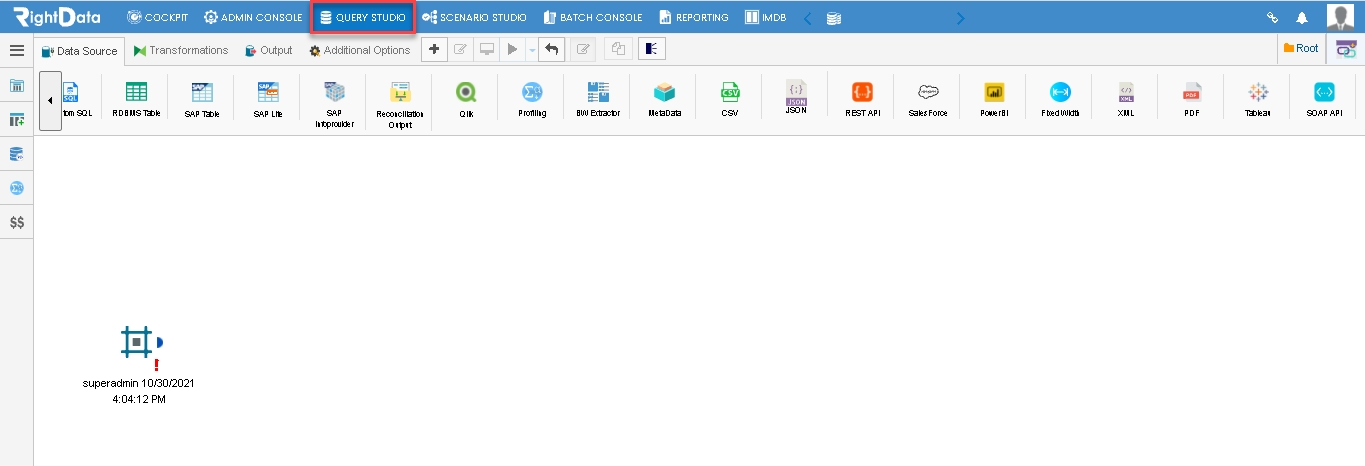
- From the ‘Data Source’ tab, drag and drop the ‘SOAP API’ icon as shown here:
- Click the ‘SOAP API’ widget.
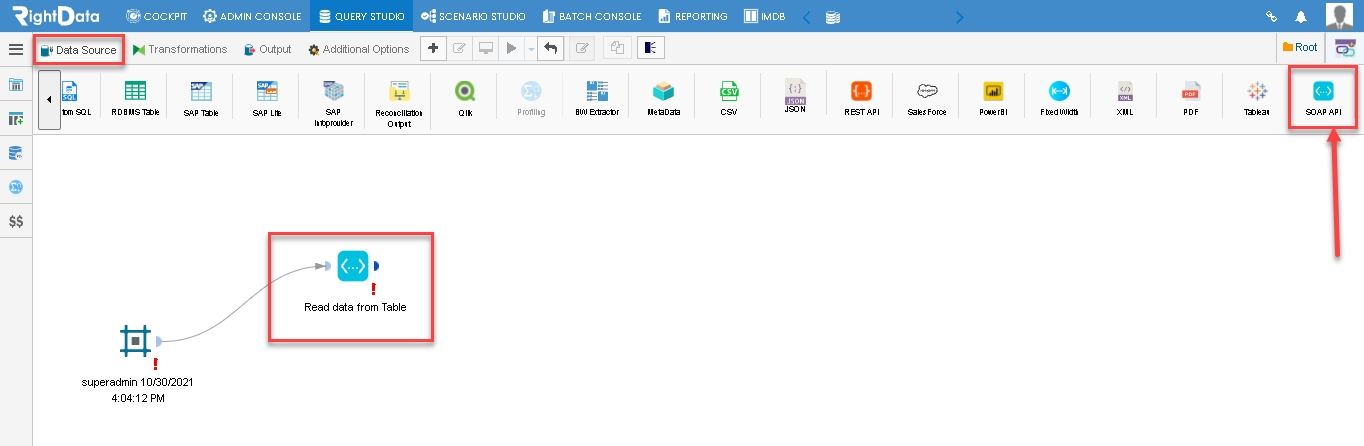
- A ‘Read data from Table’ pop-up window is displayed.
- Add this Variable used SOAP API (http://webservices.oorsprong.org/websamples.countryinfo/USR_CountryInfo.wso) under Request URL as shown here:
- Follow further steps from method 01 (SOAP API without Transformations) from bullet point 'Select the POST option from the Method drop-down list to Input the requested API.'