SOAP API as a Data Source in FDR scenario
A new data source ‘SOAP API’ is added in the FDR scenario. Users can request and extract the data using a SOAP API through POST method.
To learn more, let us walk through the below procedure:
- Click the ‘SCENARIO STUDIO’ tab.
- Hover on the ‘Scenario Builder’ snippet.
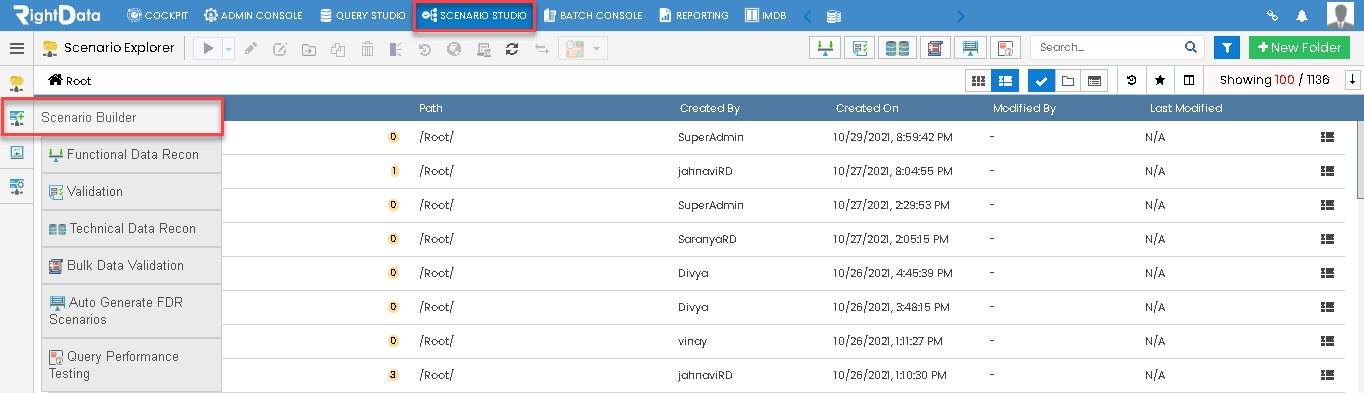
- Now, select and click the ‘Functional Data Recon’ option.
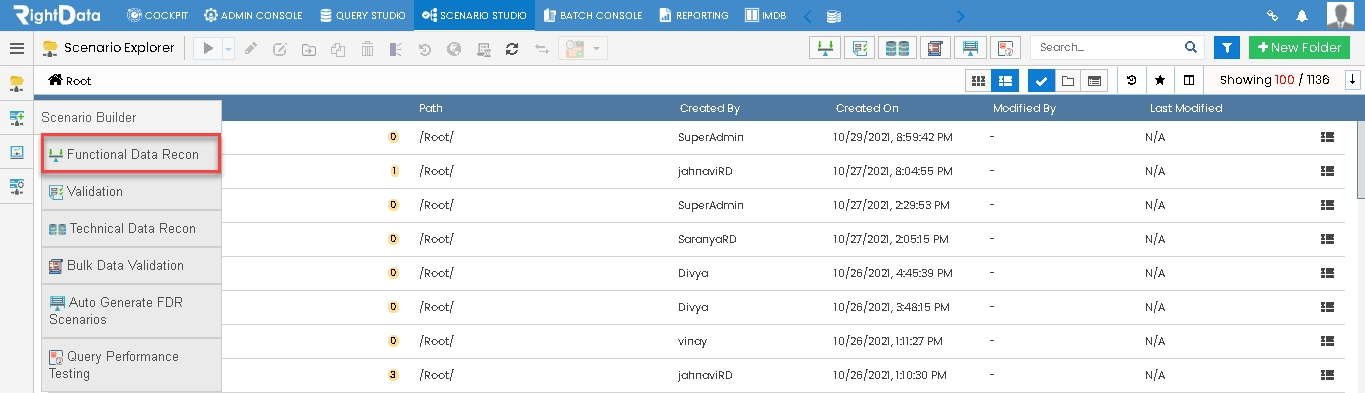
- The user is navigated to an FDR (Functional Data Recon) create and edit page as shown here:
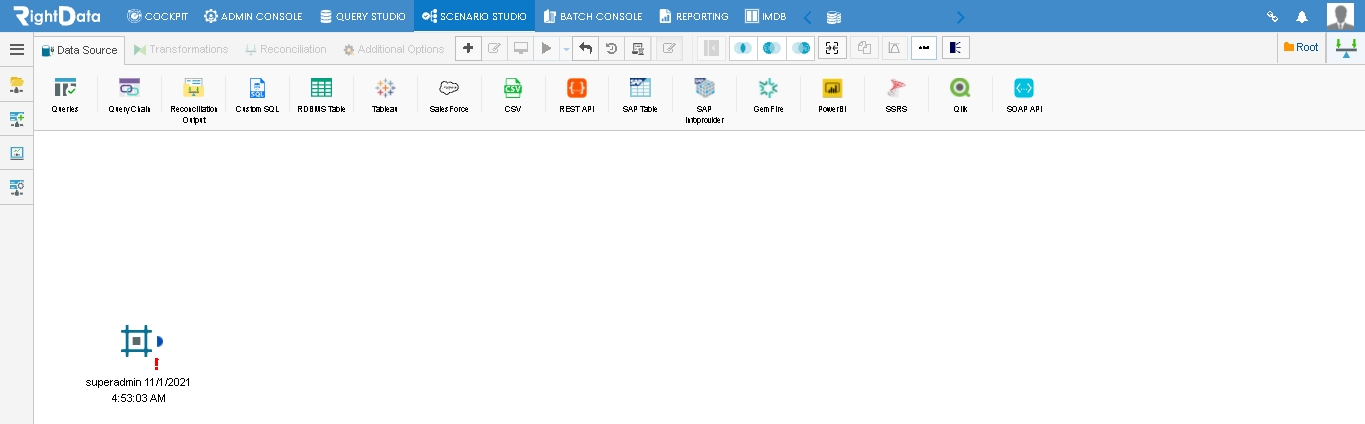
- From the Data Source tab, drag and drop the ‘SOAP API’ widget as shown here.
- Click the SOAP API’ widget. (Read data from Table).
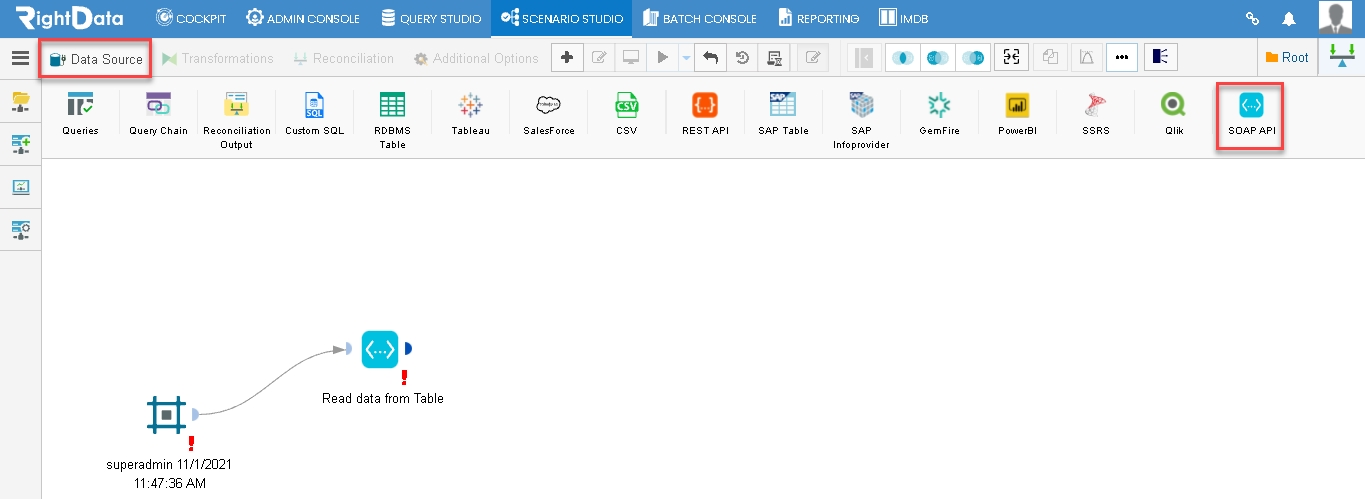
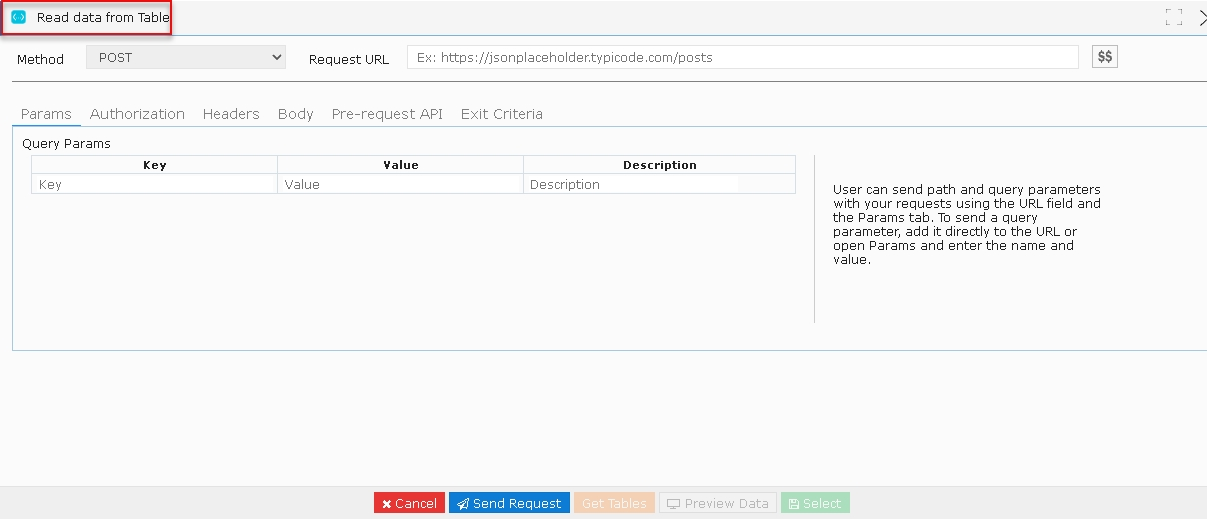
- A ‘Read data from Table’ pop-up window is displayed.
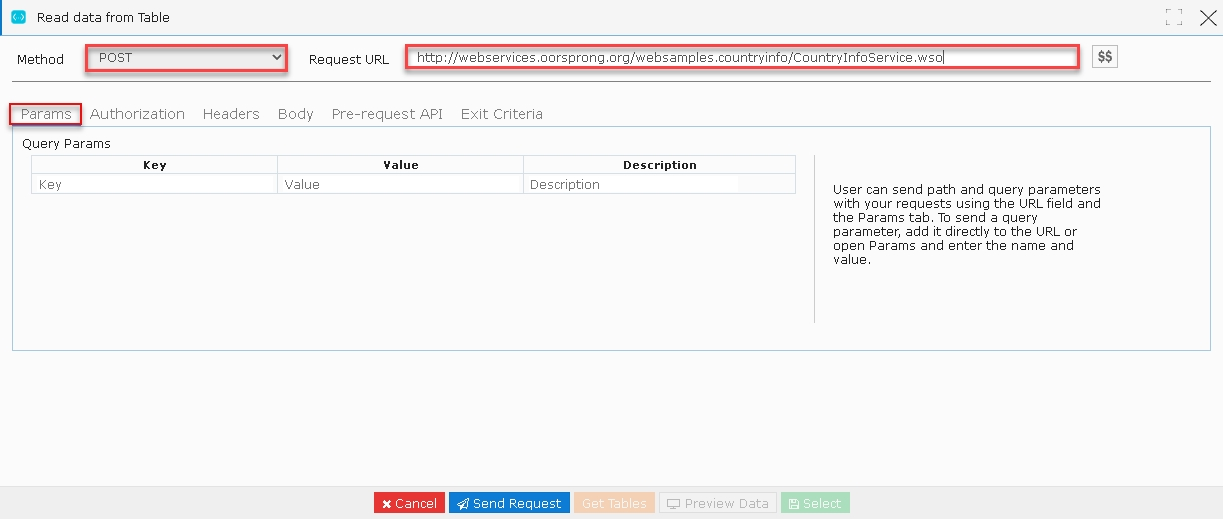
- Select the ‘POST’ option from the Method drop-down list to Input the requested API.
Note: For example, let us consider the below URL link to add it in the Request URL text box available http://webservices.oorsprong.org/websamples.countryinfo/CountryInfoService.wso.
Note: By default, the Params tab is displayed.
- Now, go to the ‘Headers’ tab.
- The ‘Headers’ parameters such as KEY, VALUE and DESCRIPTION are displayed.
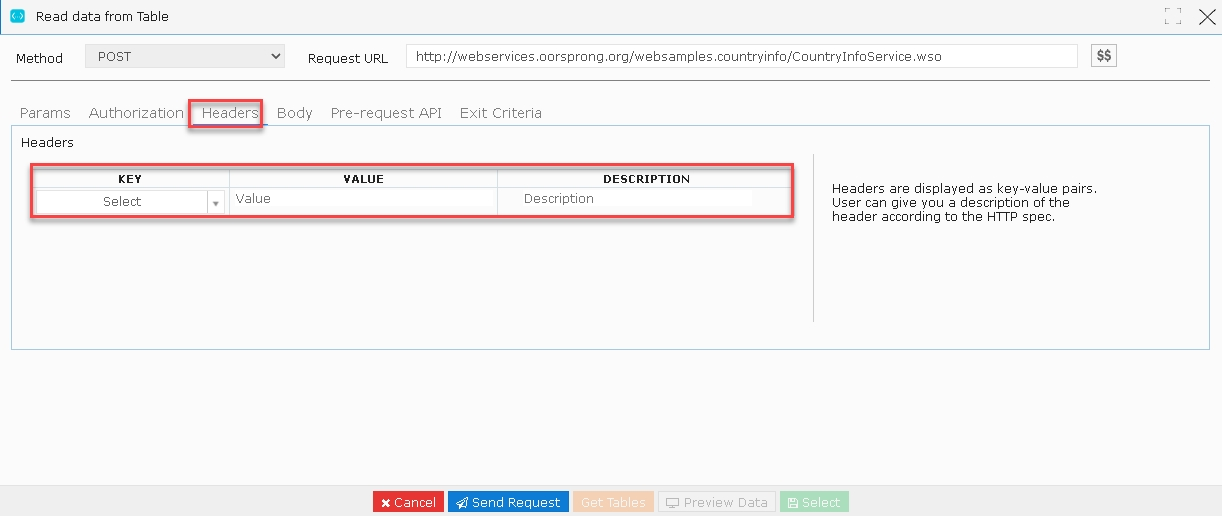
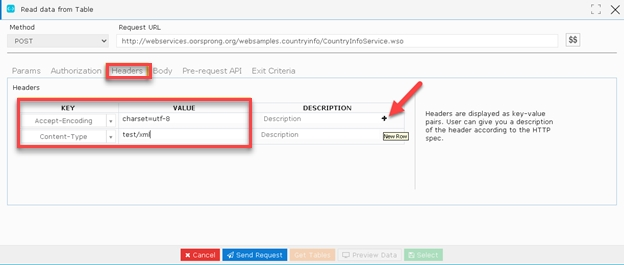
- Add the default keys and values under Headers option as shown here:
| KEY | VALUE |
| Accept-Encoding | Charset=utf-8 |
| Content-Type | Text/xml |
Note: A plus (+) button is provided for the user to add any additional keys and values if required.
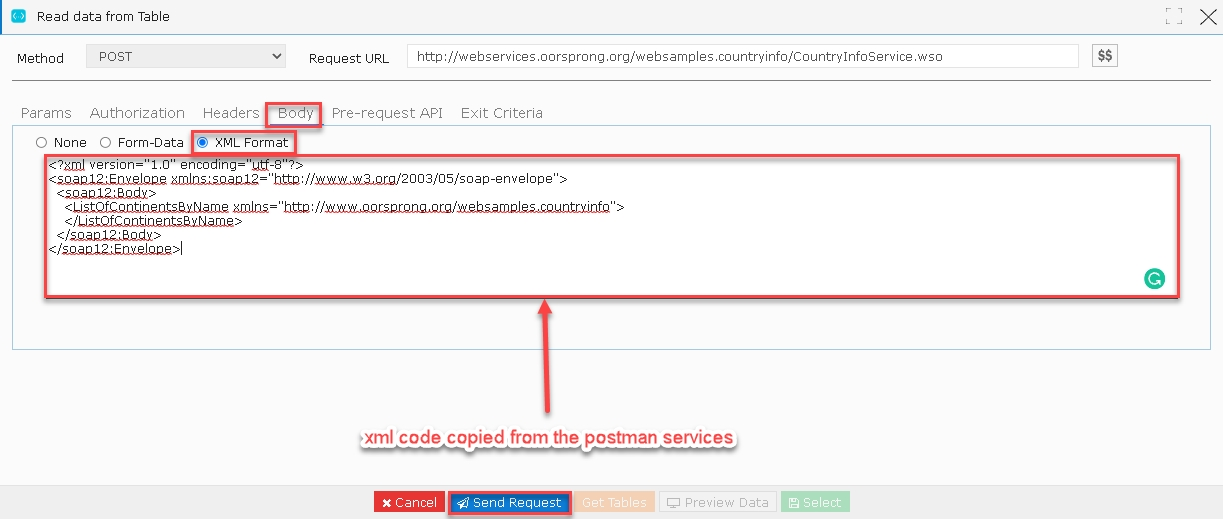
- Open the Postman services and input the request URL (http://webservices.oorsprong.org/websamples.countryinfo/CountryInfoService.wso) used above and extract the raw xml code from it.
- Copy the above Body code from the Postman services.
- Add this same piece of code in the ‘Body’ session within the SOAP API widget under XML Format.
- Click the ‘Send Request’ button.
- A response is generated as shown here:
Note: The contents/nodes under the <soap:Body> keep on changing based on the request.
Note: Once the code is generated after clicking the Send Request button, then consequently the Get Tables button is enabled for you to perform next action.
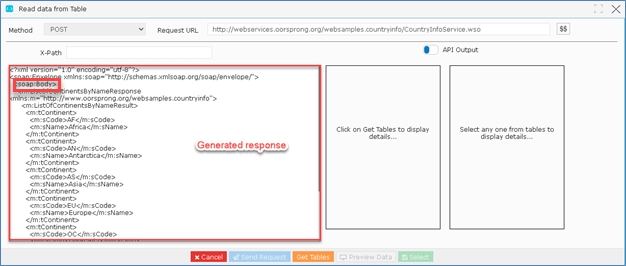
- Before clicking on ‘Get Tables’ button from the requested URL, the user needs to configure the X-Path as below:
- Parent node/main node: soap:Envelope
- Subsequent node: soap:Body
- Sub-sub node: m:ListOfContinentsByNameResponse
- Sub-sub-sub node: m:ListOfContinentsByNameResult
- repetitive node/tag: m:tContinent (The repetitive node will be converted into a table to extract the columns present in it)
- X-Path configuration will be “soap:Envelope/soap:Body/m:ListOfContinentsByNameResponse/m:ListOfContinentsByNameResult/m:tContinent”
Note: x-path can be configured by adding the main/parent node (soap:Envelope) followed by subsequent node (soap:Body) and so on, until you see a repetition node under “<soap:Body>.” If you find a repetition node under subsequent node (<soap:Body>) then you can stop here configuring the X-Path”.“m:tcontinent” is the repetitive node here under the subsequent node “<soap:Body>”.
- Now, add the X-Path configuration.
- Click the ‘Get Tables’ button as shown here.
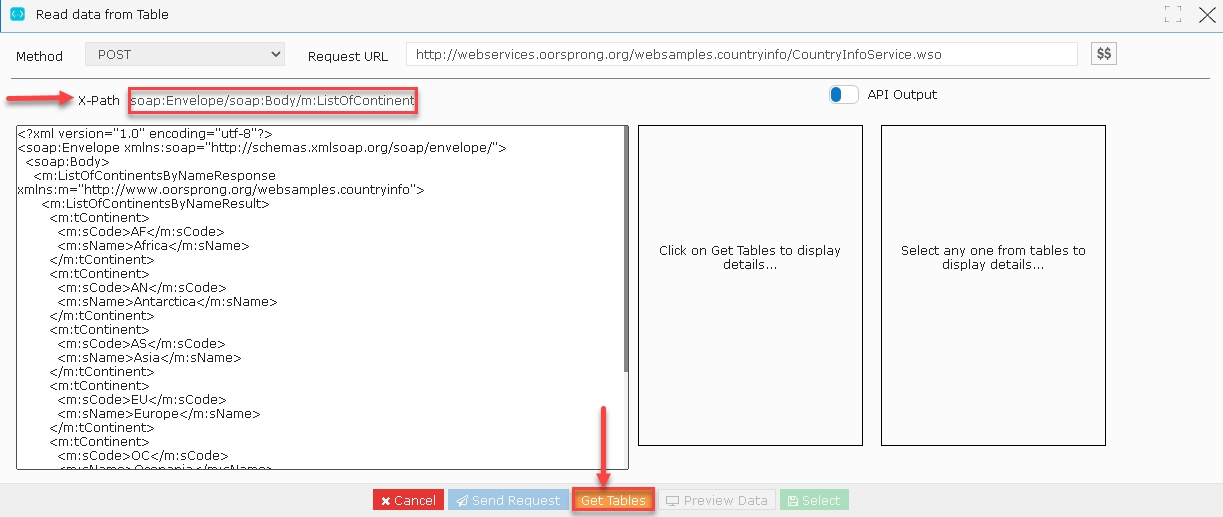
- The user gets the following screen.
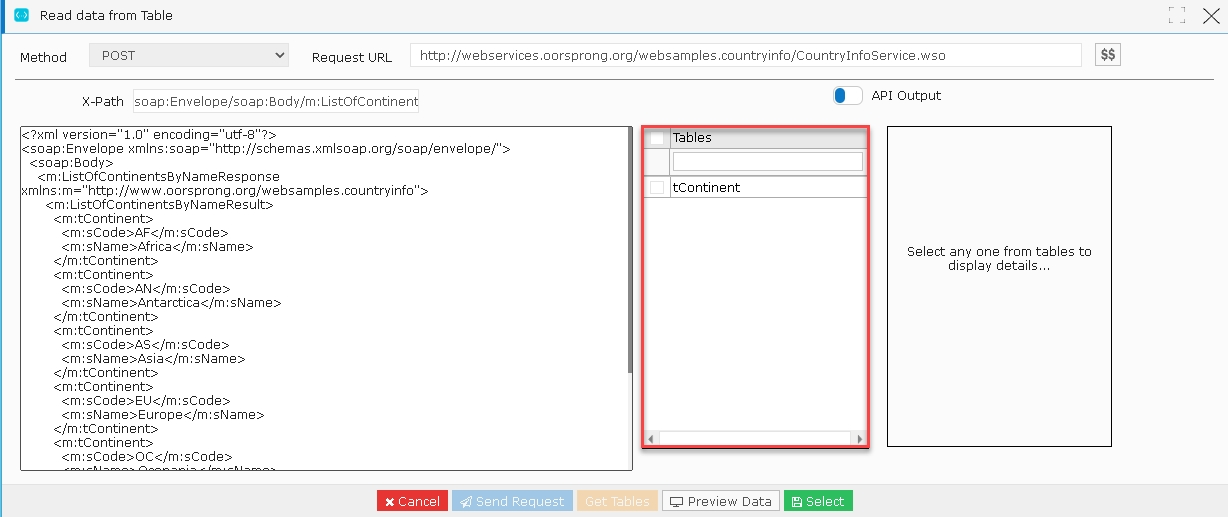
- Check the ‘Tables’ option.
- ‘tContinent’ will be selected automatically.
- The Column Names appear beside the ‘tContinent’ section.
- The Column Names in ‘tContinent’ are shown below:
- _id
- sCode
- sName
Note: _id is not the column but the identification number of that particular xml file. Simultaneously, you must select at least one column to save the SOAP API widget (except _id).
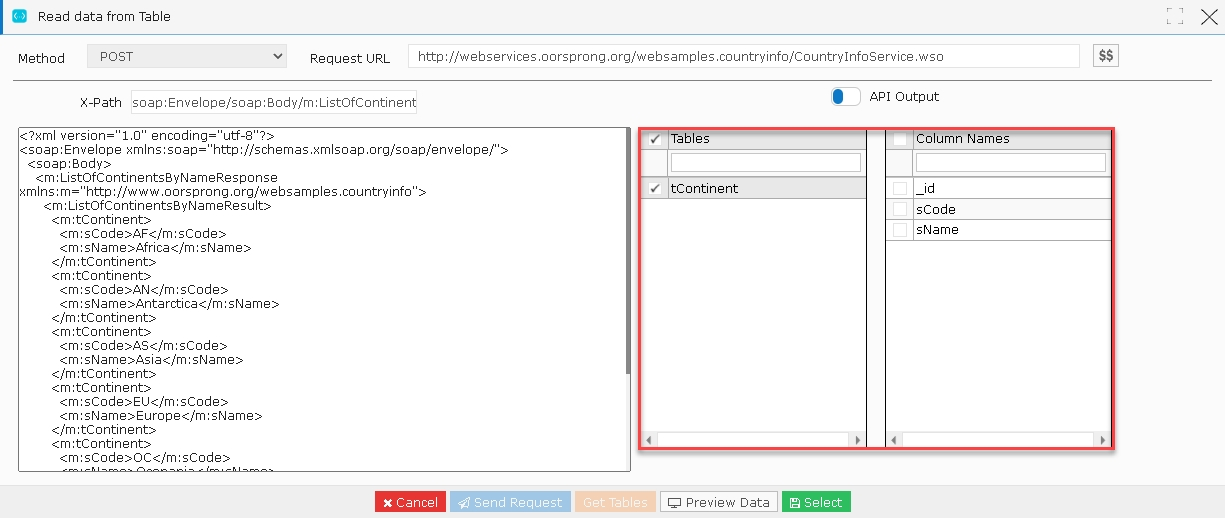
- The user can either individually select the Column Names ( sCode, sName) or else select all the Column Names except _id as it’s only an identification number.
- For instance, the user selected Column Names ‘sCode and sName’ from ‘tContinent’ table.
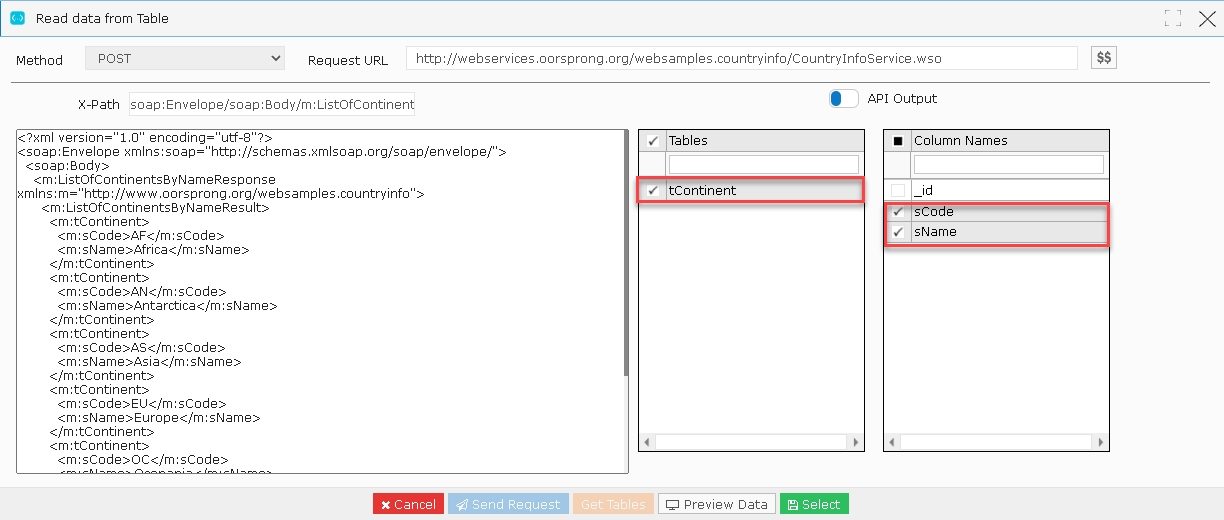
- The user can preview the data using a ‘Preview Data’ button.
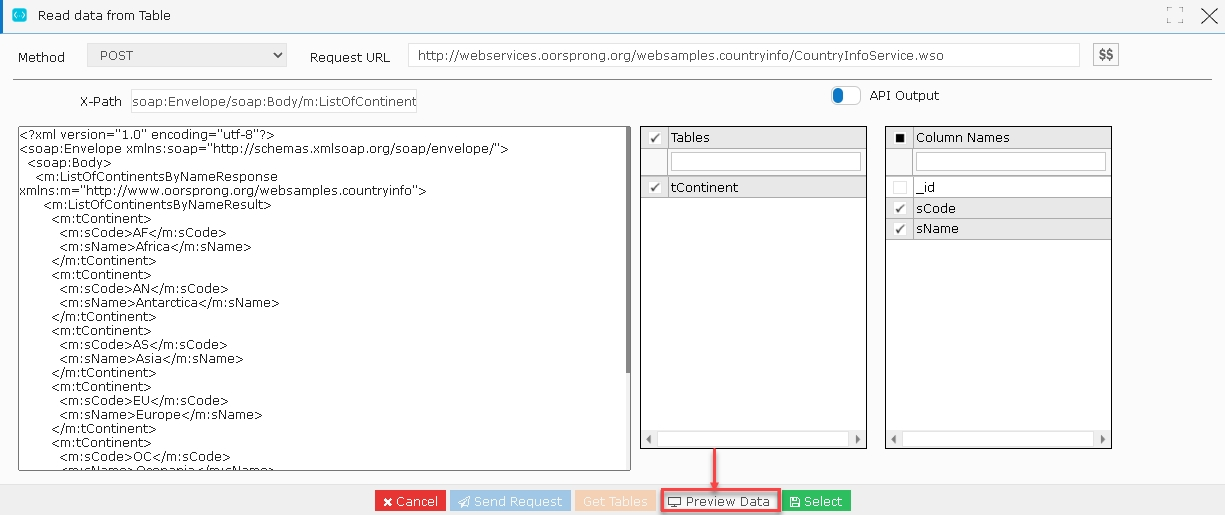
- An ‘Existing Query’ pop-up window is displayed where in sCode and sName data are displayed.
- Close this window and navigate back to the ‘Read data from Table’ window.
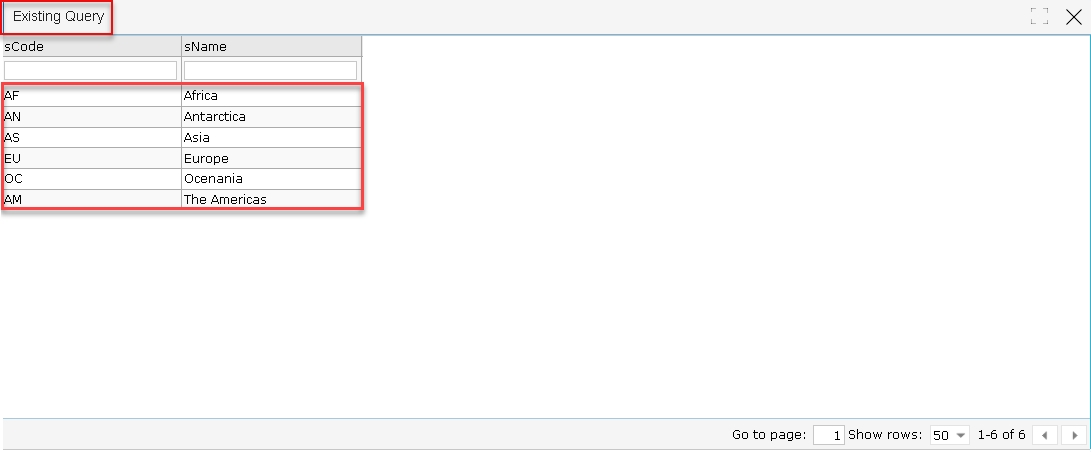
- Click the ‘Select’ button to save the SOAP API widget data.
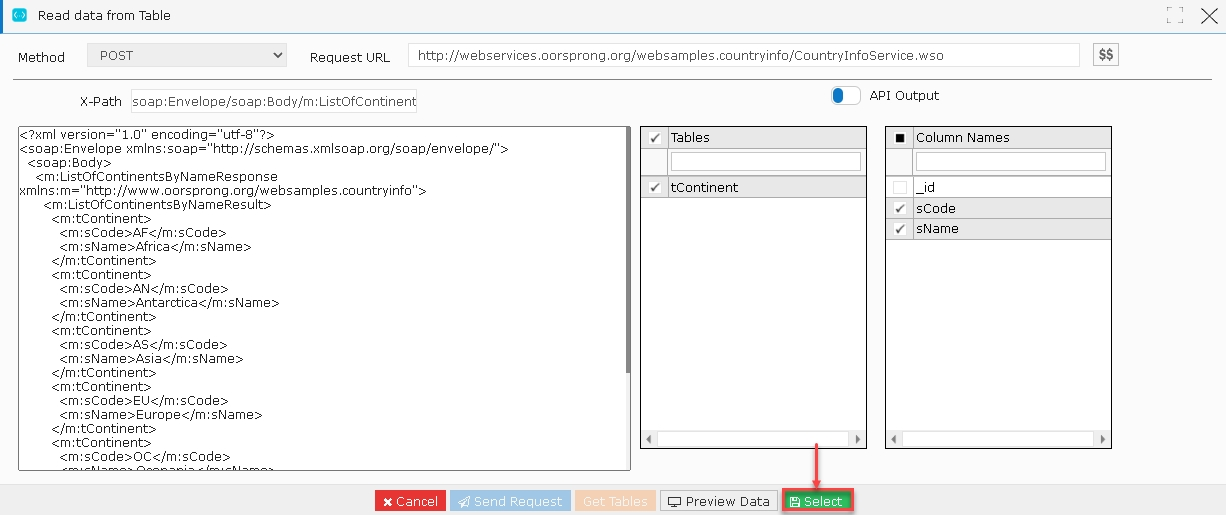
- The ‘SOAP API’ widget will collapse in the create and edit FDR page saving the widget.
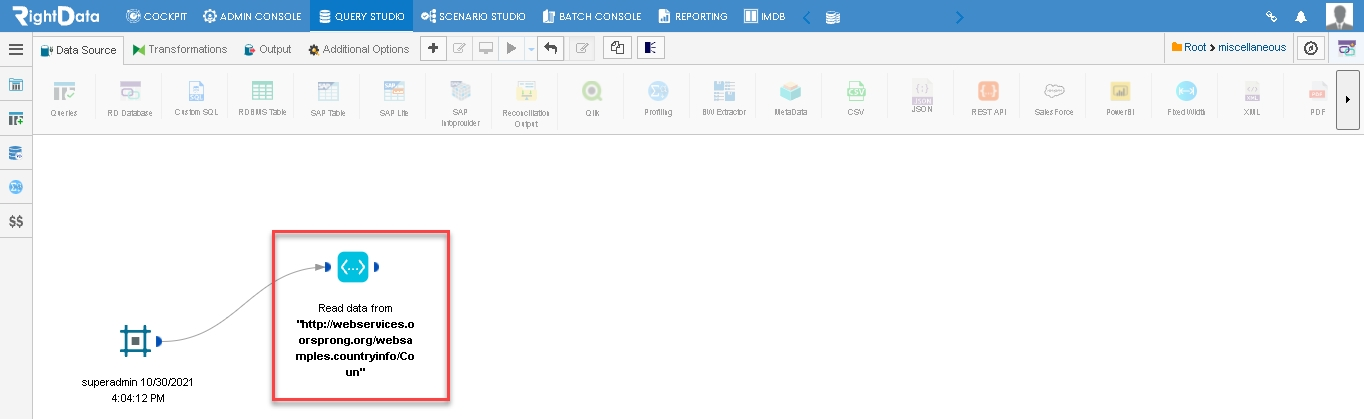
- From the Data Source, drag and drop RESP API widget in the target selection.
Note: As the user drags another icon from the ‘Data Source’ tab, all the icons from it gets disabled.
- Click the ‘REST API widget’ which results in a pop-up window.
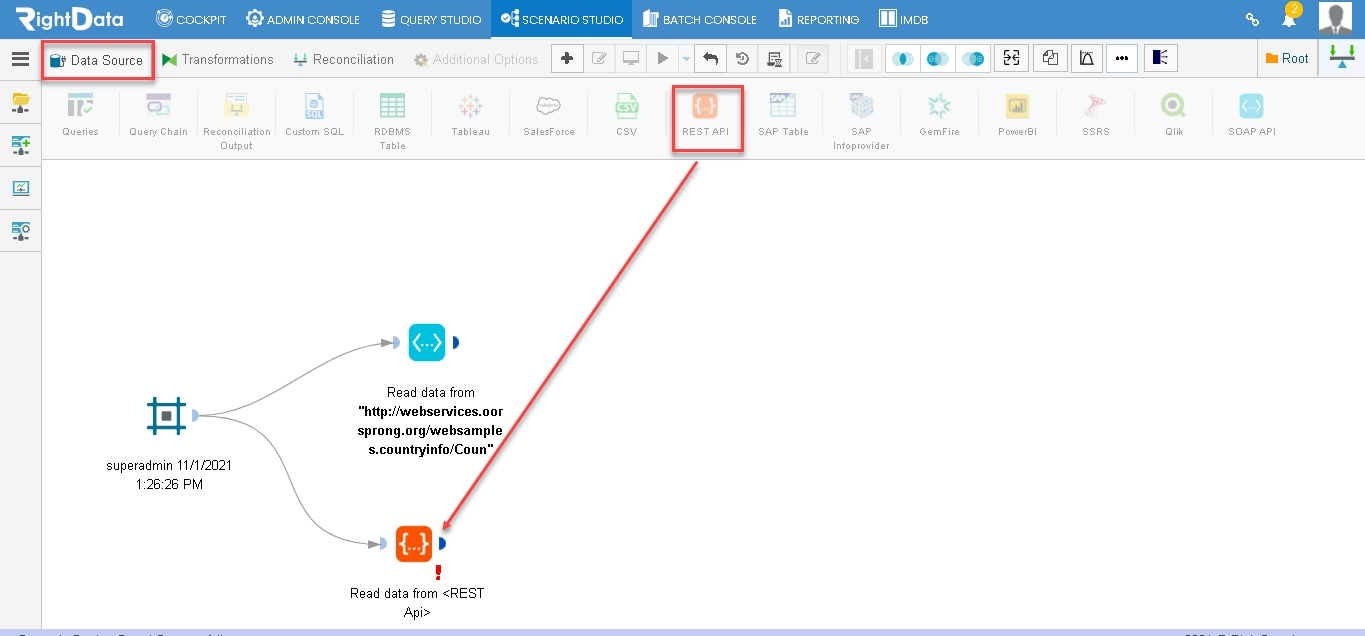
- A ‘Read data from REST Api’ Pop-up window is displayed.
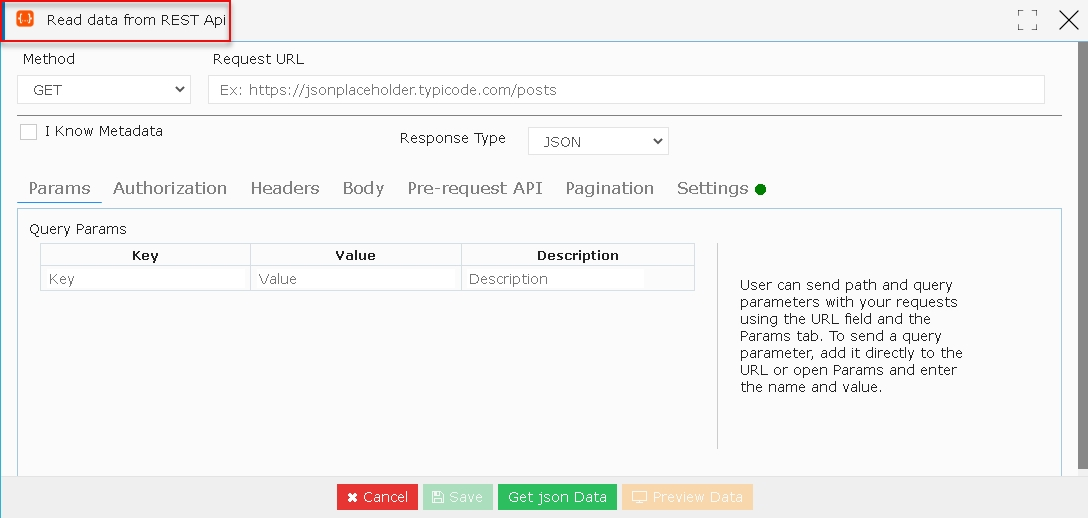
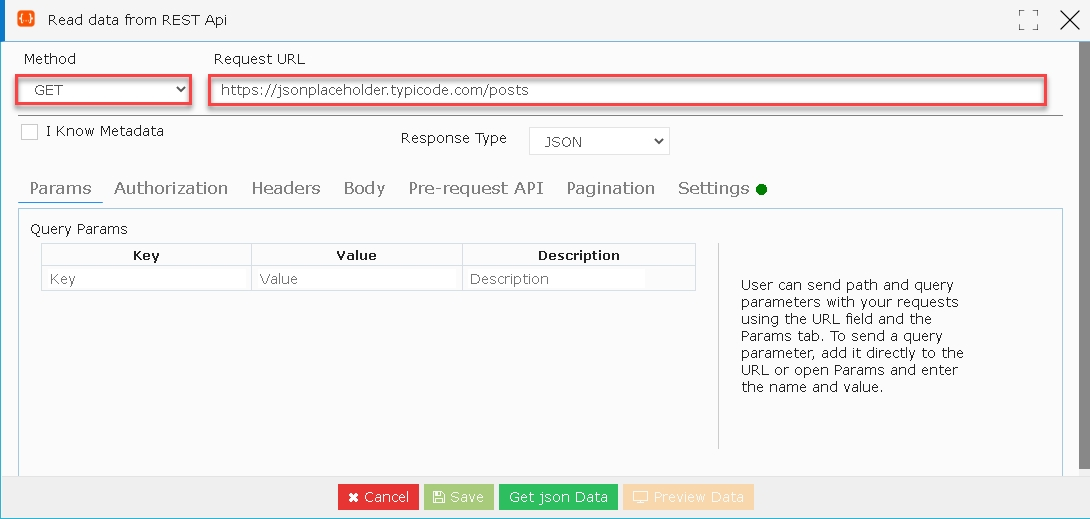
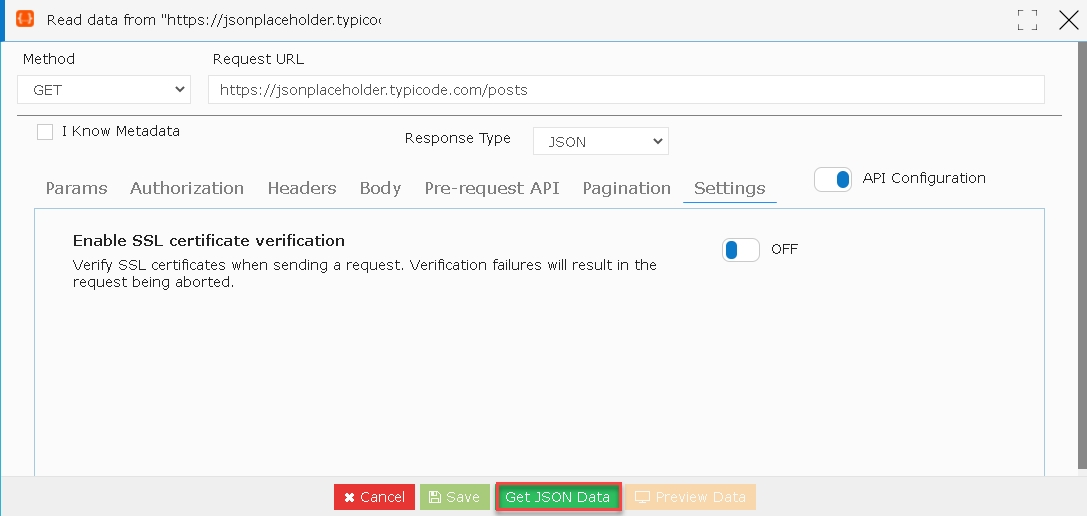
- Select ‘GET’ Method from the drop-down list and let’s consider https://jsonplaceholder.typicode.com/posts as the Request URL.
- Check the box ‘I Know Metadata’ in case you wish to add the known Metadata.
- Two options, Column Name and STRING (by default) appear.
- A plus (+) button is located adjacent to STRING to add additional Metadata columns.
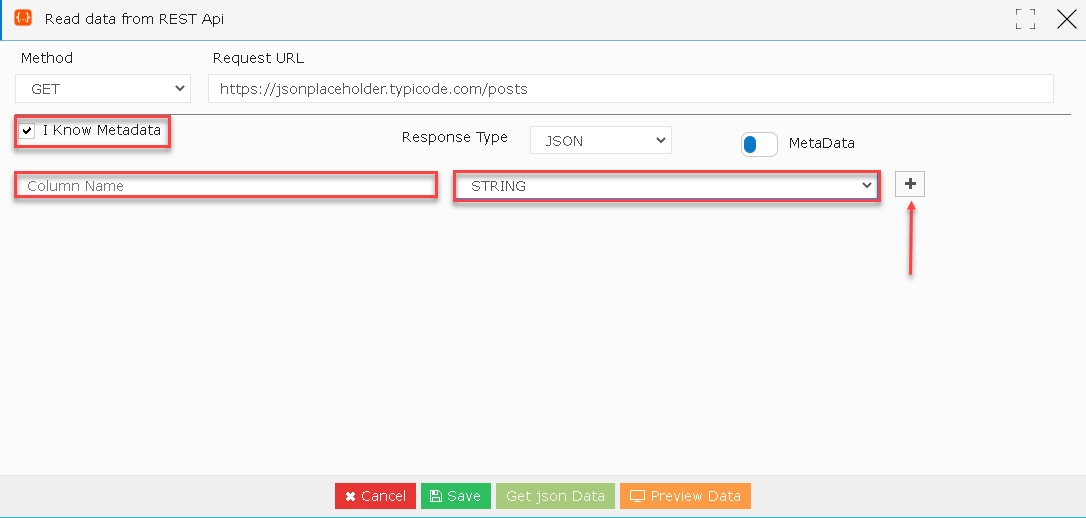
- Click the drop-down option, if you wish to change the Data source type.
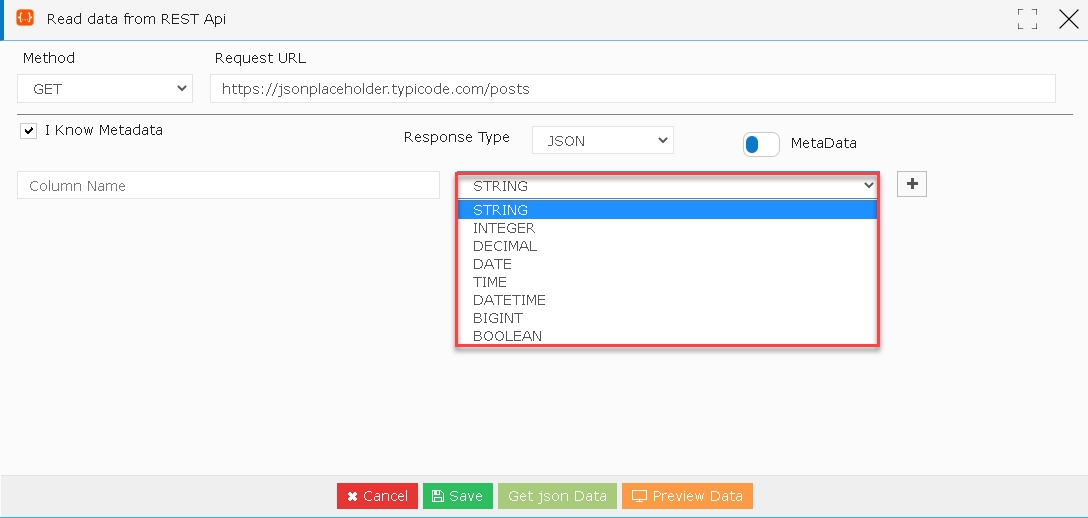
- Uncheck the box ‘I Know Metadata’ to restore the REST Api to its default page.
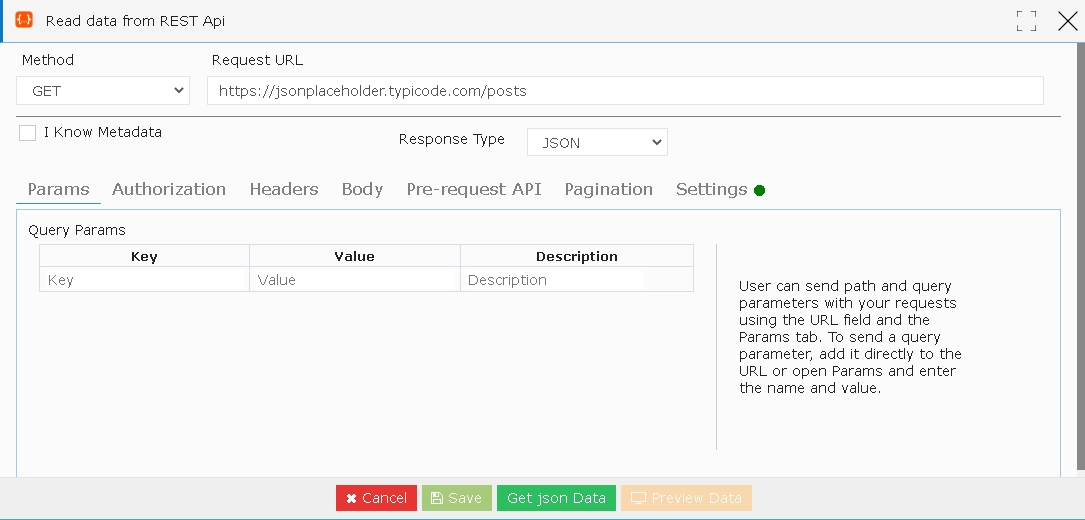
- Params, Authorization, Headers, Body, Pre-request API, Pagination and Settings are the different parameters that can be used with the REST Api Request URL.
- Click the ‘Settings’ tab.
- ‘Enable SSL Certificate verification’ is toggled ‘ON’ by default with a green dot besides Settings option.
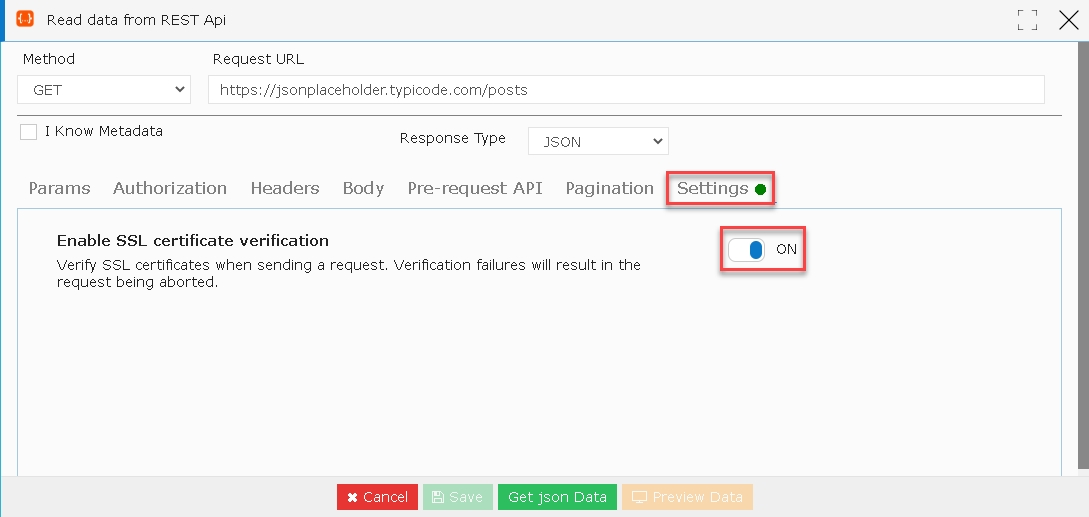
- Click the ‘Enable SSL certificate verification’ toggle OFF from the ‘settings’ tab.
- The green color dot besides ‘Settings’ option will be disabled as the user toggles OFF ‘Enable SSL Certificate verification.’
- Now from the ‘Settings’ option, toggle OFF ‘Enable SSL certificate verification.’
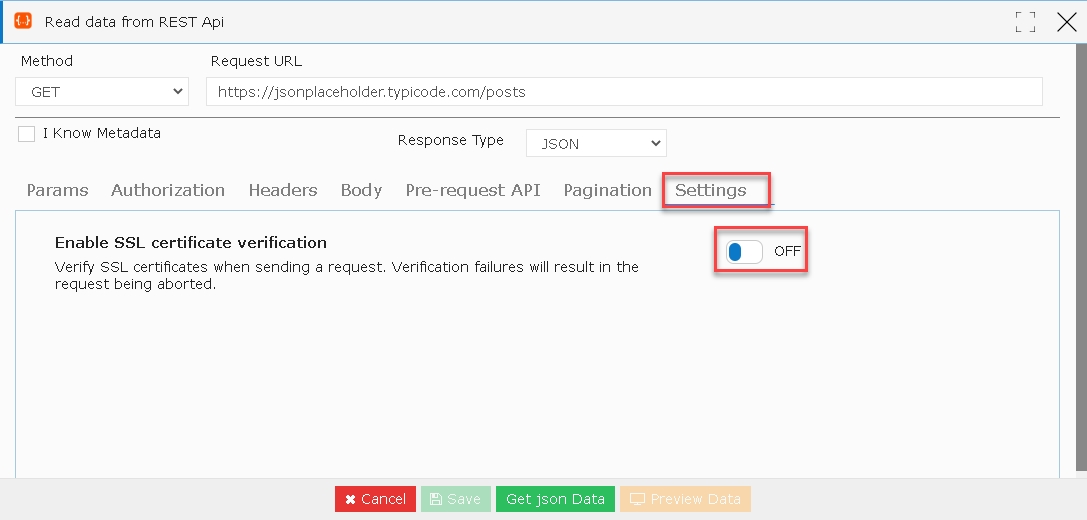
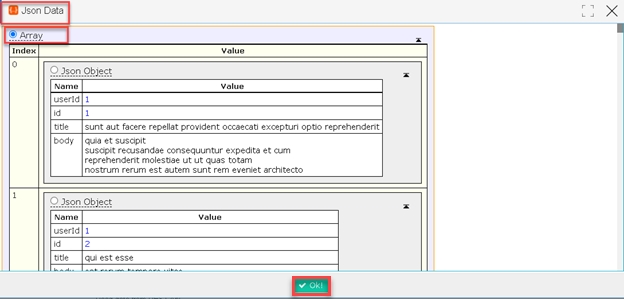
- Click the ‘Get json Data’ button to get the Json Data with Array and a list of indices.
- A ‘JSON Data’ pop-up window is displayed.
- Click ‘OK’ button to disclose the Json Data pop-up screen.
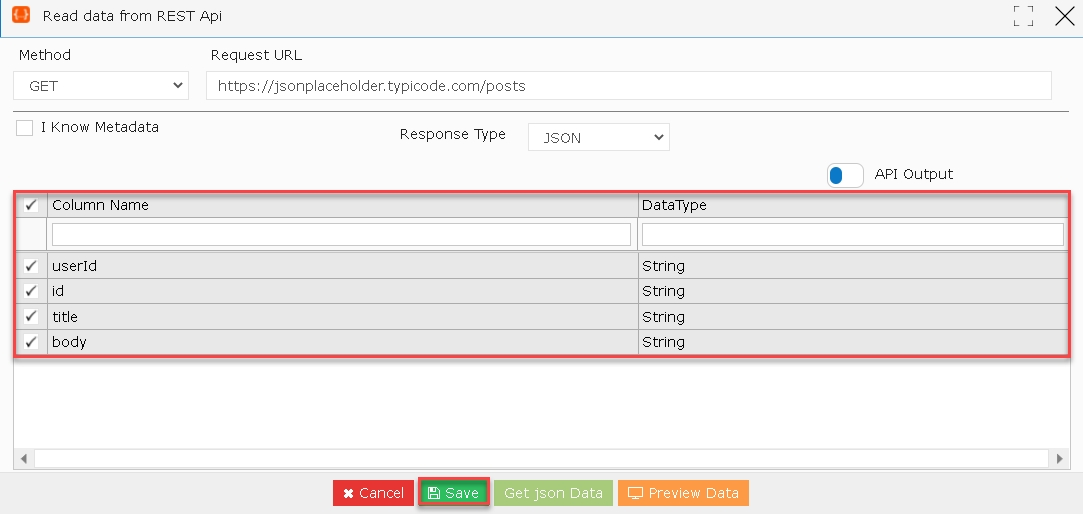
- The user gets the Column Name and Data Type.
- Click the ‘Save’ button to save the REST Api widget.
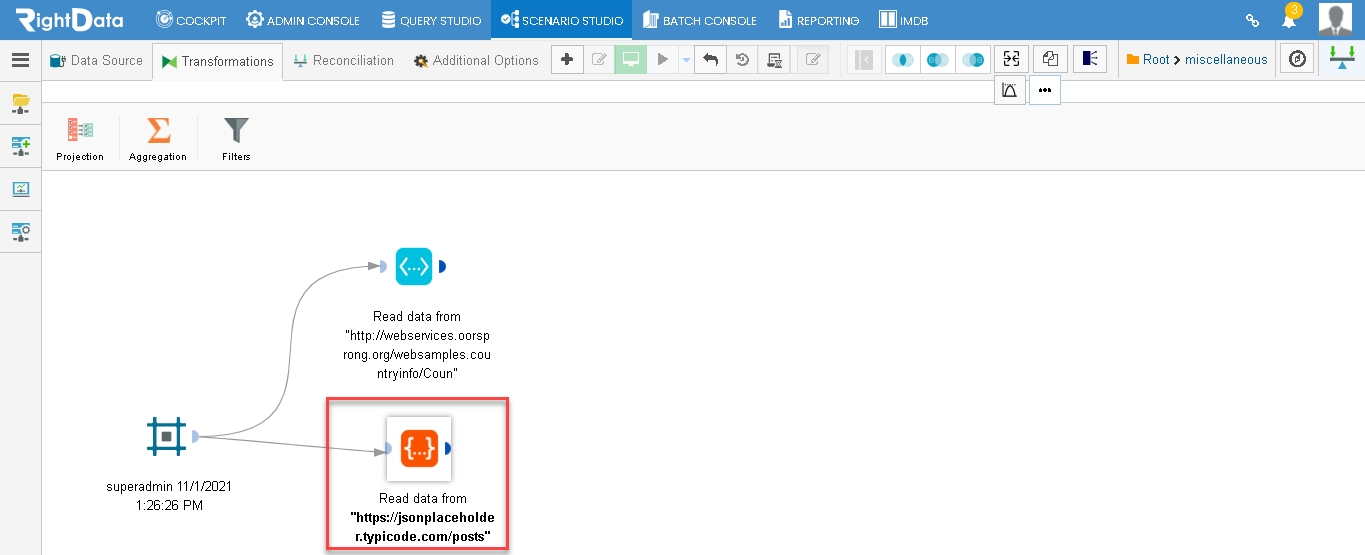
- The user is navigated to the FDR session page.
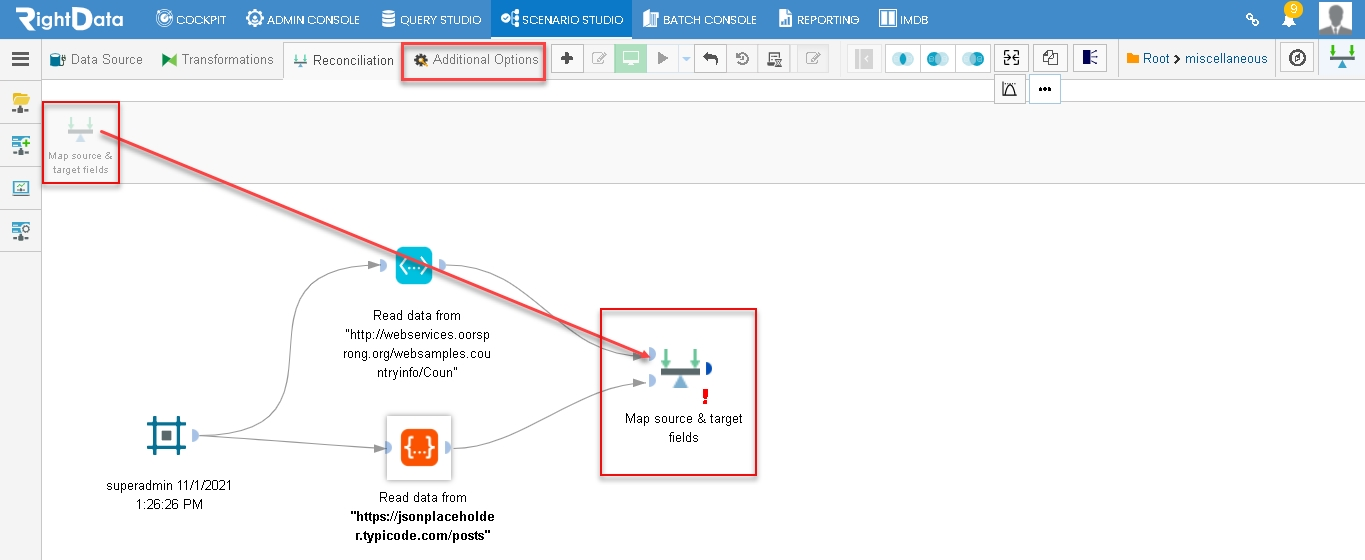
- From the ‘Additional Options’ tab, drag and drop ‘Map source and target fields’ icon.
Note: The ‘Map source and target fields’ icon gets disabled as the user drags it onto FDR session page.
- Click the ‘Map source and target fields’ widget.
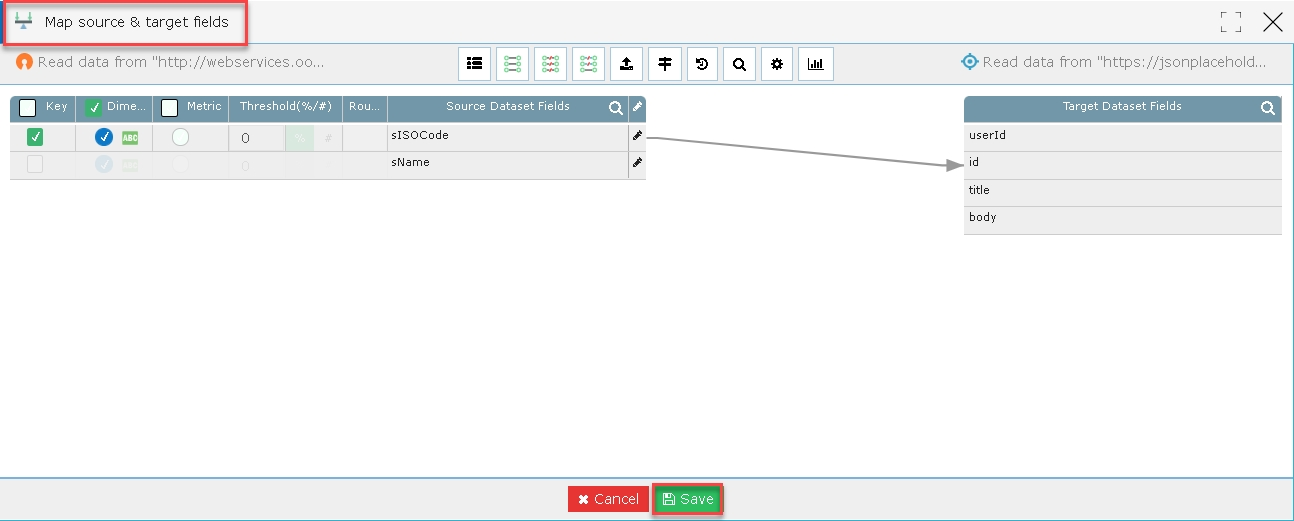
- A ‘Map source and target fields’ pop-up window is displayed.
- Click the ‘Save’ button.
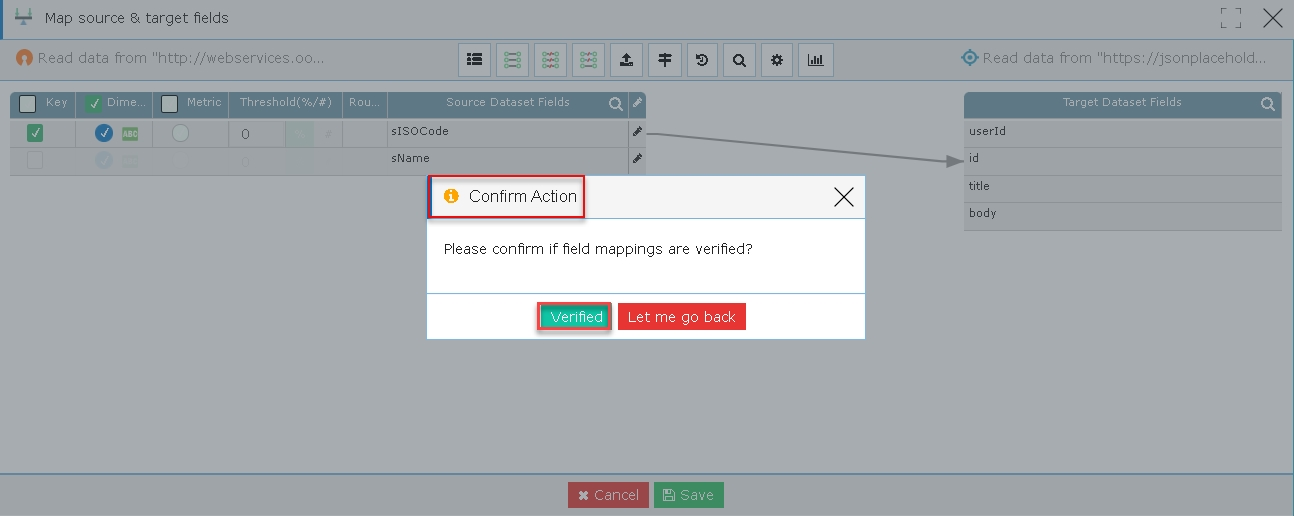
- A ‘Confirm Action’ pop-up window appears to verify the field mappings.
- Click the ‘Verified’ button.
- The ‘Map source and target fields’ widget is closed saving the data.
- The user is navigated to the FDR session page.
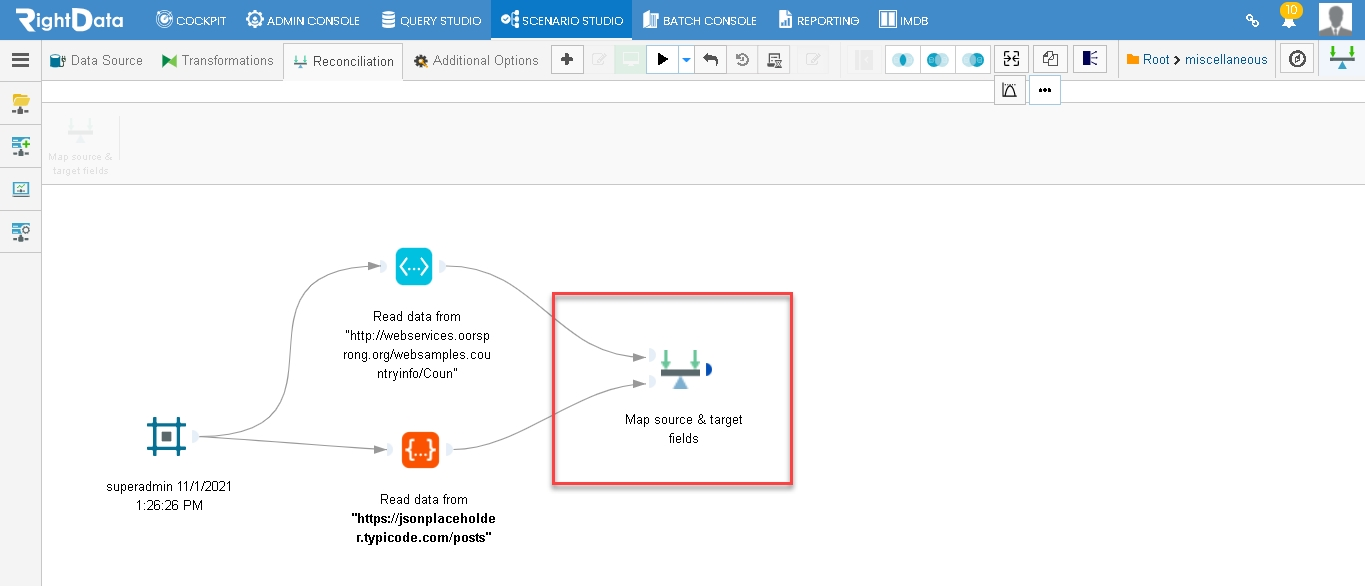
- Click the ‘Execute Now’ button.
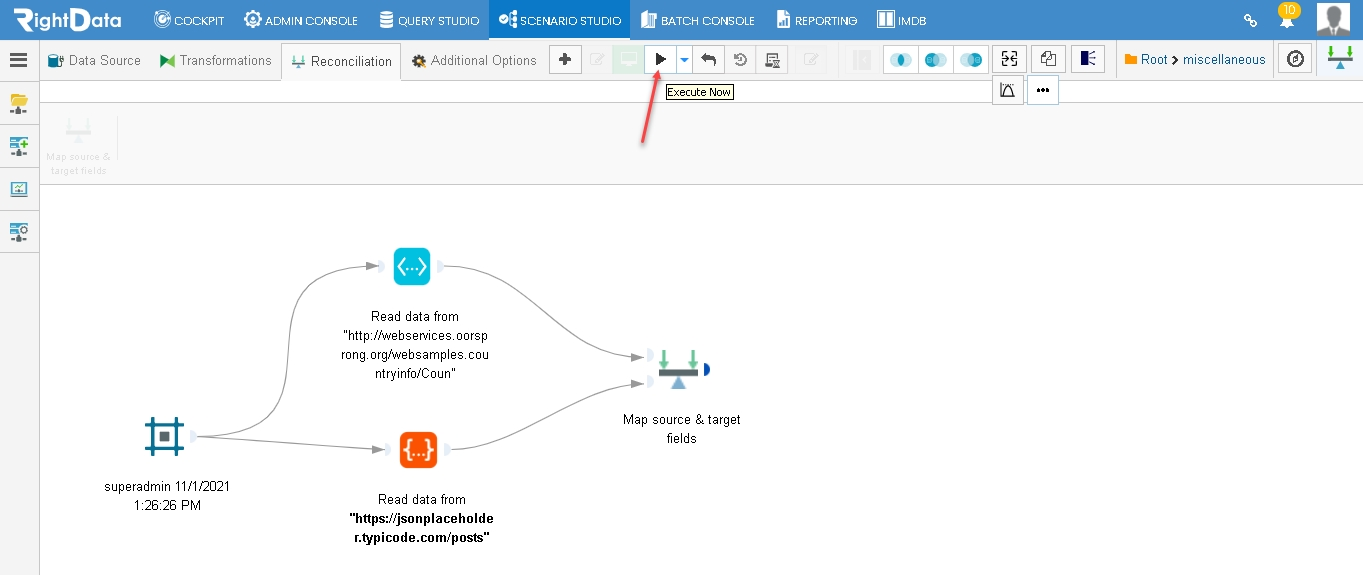
- An execution is performed with FDR scenario exception results.
- A ‘Monitor mode’ is enabled immediately after the execution process.
- Click the count on the ‘Map source & target fields’ widget.
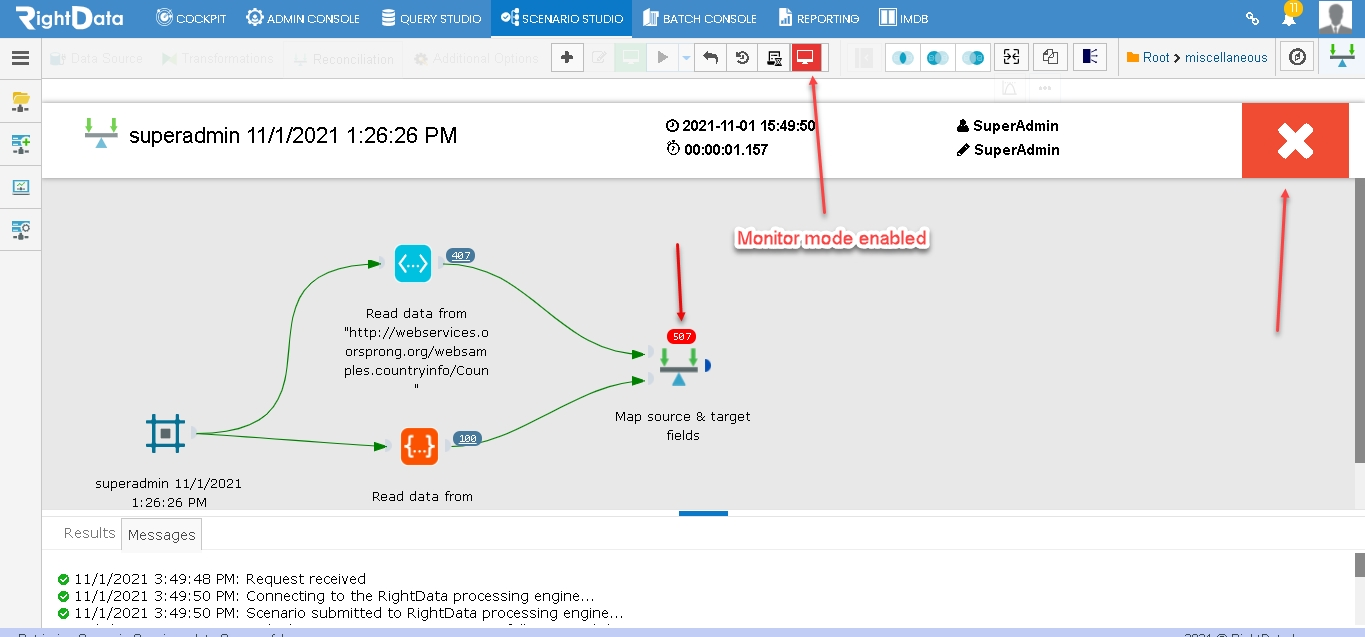
- The user is navigated to the ‘Exception records with matching keys’ tab.
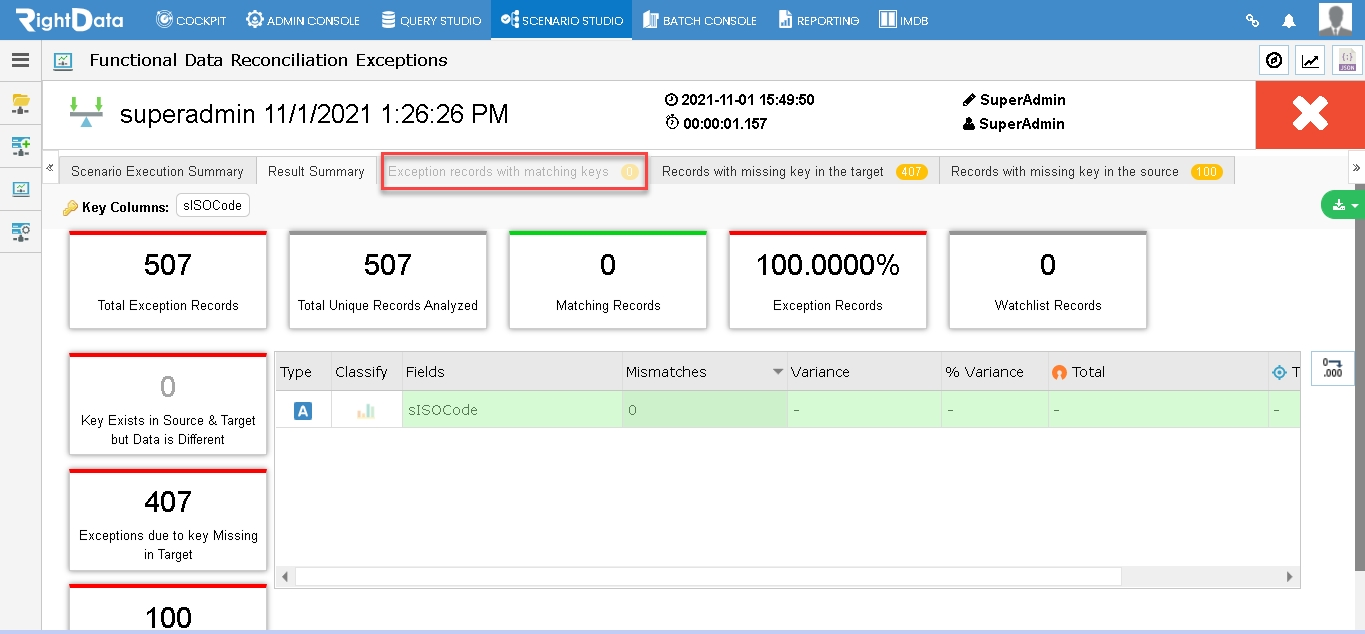
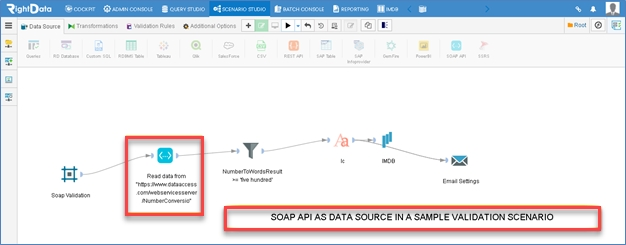
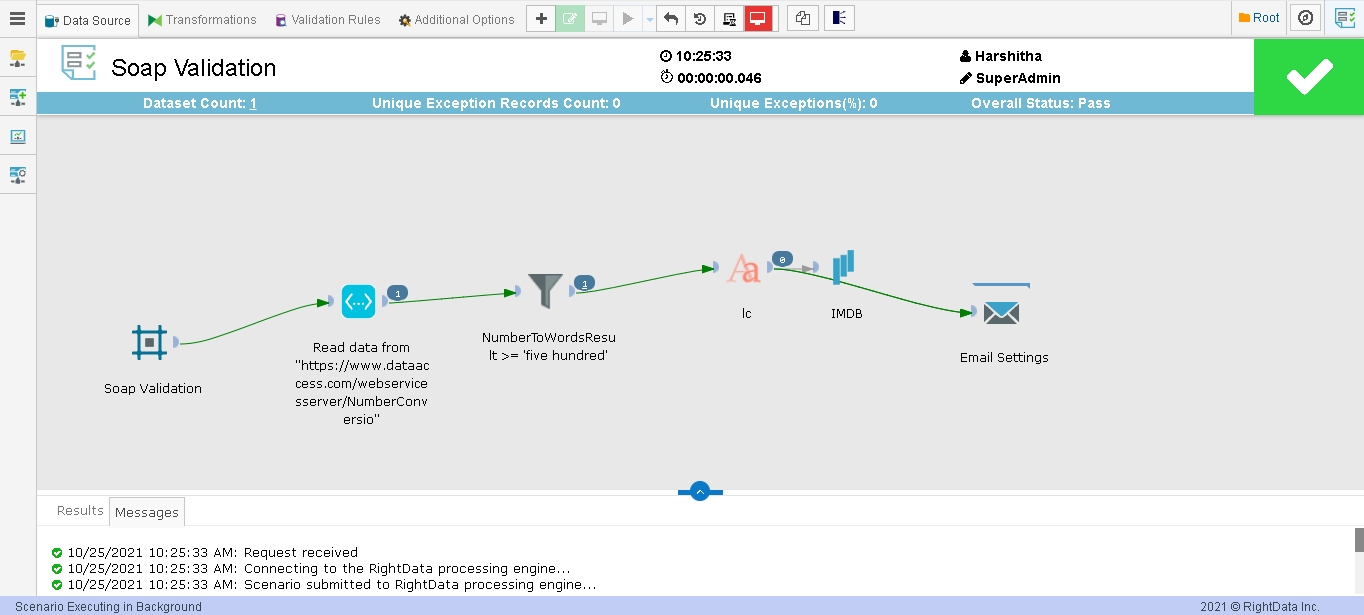
Note: In a similar way, the user can also add ‘SOAP API’ as a ‘Data source’ in any validation scenario and a sample has been represented as a screenshot below: