The users can now add Double quote (“) or Back quote (‘) during new profile creation for all RDBMS-related profiles having JDBC connection types.
To learn more, let us walk through the below procedure:
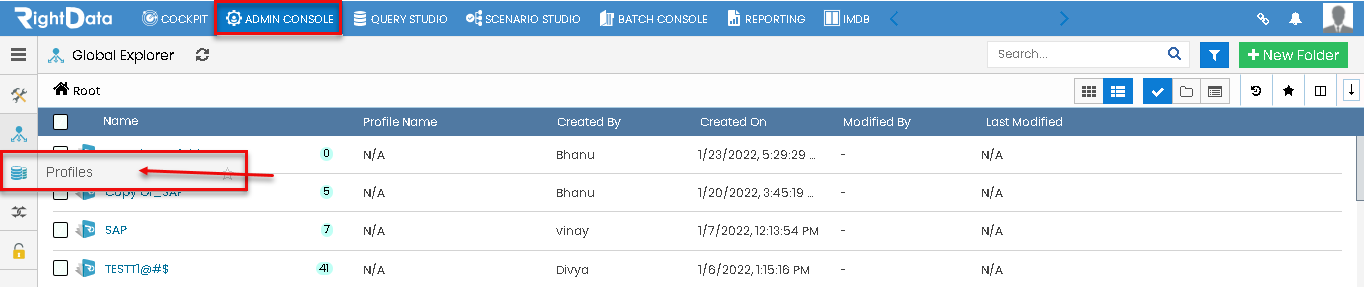
- Click the ‘ADMIN CONSOLE’ tab.
- Hover on the left pane options and select the ‘Profiles’ snippet.
- Click the ‘Profiles’ option.
Path: ADMIN CONSOLE > Profiles
- A ‘Profiles’ session page is displayed.
- A ‘Refresh’ button is used to refresh the ‘Profiles’ session page.
- An ‘Export to CSV’ button is used to download all the Profiles-related information into a CSV file.
- A ‘Search’ box field is used to search for any profile-related information from the tabular grid.

- Click the plus ‘(+) Profile’ button.

- A ‘Create Profile’ session page is displayed with two text fields such as ‘Profile Name’ and ‘Source Name.’
Path: ADMIN CONSOLE > Profiles > (+) Profile

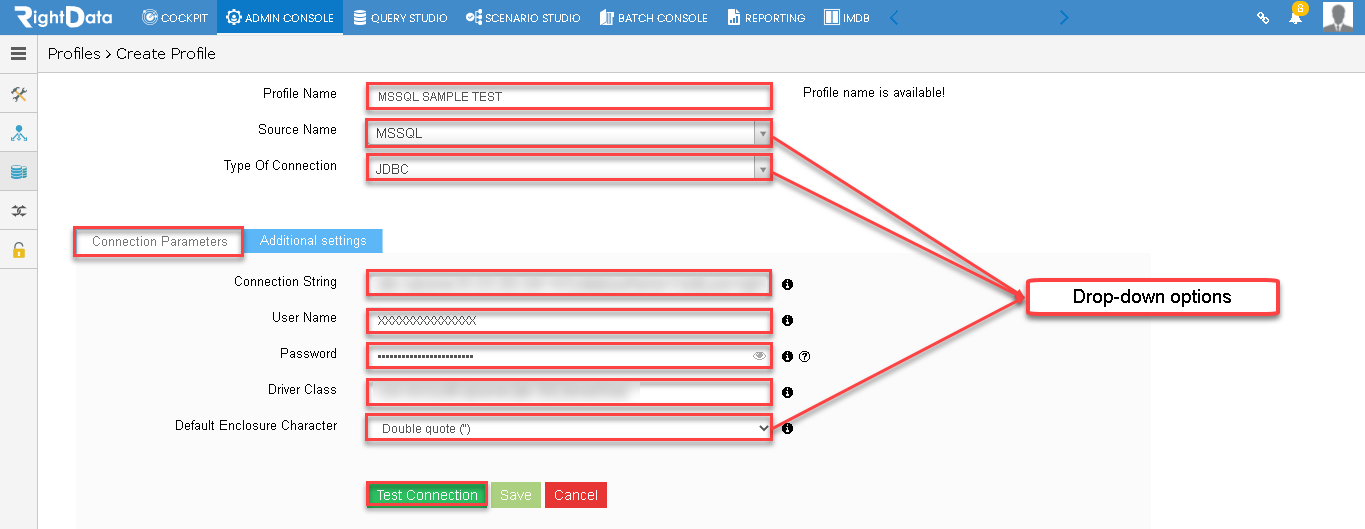
- Let’s create a new Profile named ‘MSSQL SAMPLE TEST.’
- Enter ‘MSSQL SAMPLE TEST’ in the ‘Profile Name’ text field.
- Let’s assume the user selected ‘MSSQL’ from the ‘Source Name’ drop-down list.
- Select JDBC connection from the ‘Type Of Connection’ drop-down list.
- Under the Connection Parameters tab, a new ‘Default Enclosure Character’ drop-down list is added.
Note: By default, the Connection Parameters tab is shown when the user selects any Source Name from the drop-down list.
Note: By default, the Double quote option is shown within the ‘Default Enclosure Character’. A Back quote (‘) from the drop-down list can also be selected.
- Let’s add the connection parameters like Connection String, User Name, Password, and Driver Class.
Note: ‘Connection String’ and ‘Driver Class’ columns are blurred due to confidential data.
- Click the ‘Test Connection’ button after adding the Additional Settings tab ‘Connection Parameters’.
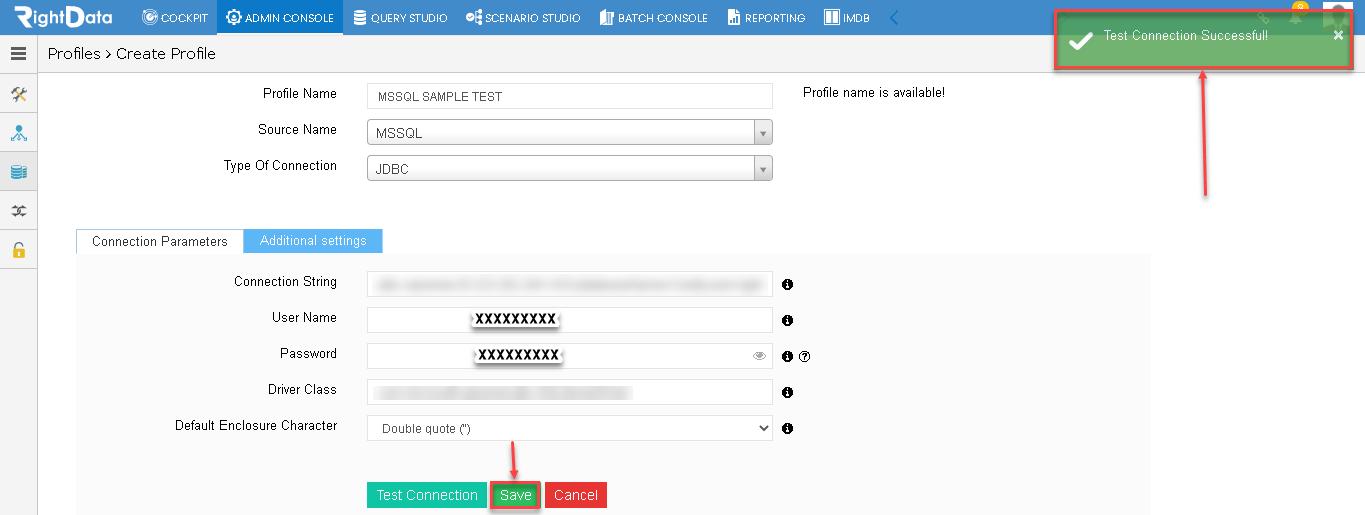
- A toaster message ‘Test Connection Successful’ is displayed on the top right corner of the page indicating that the new profile was connected successfully.
- Click the ‘Save’ button.
- The user is navigated to the ‘Profiles’ session page.
- This new profile is included under the ‘Profile Name’ column as shown here.

Steps involved while Using ‘MSSQL SAMPLE TEST’ profile in the Query Builder:
- Click the ‘QUERY STUDIO’ tab.
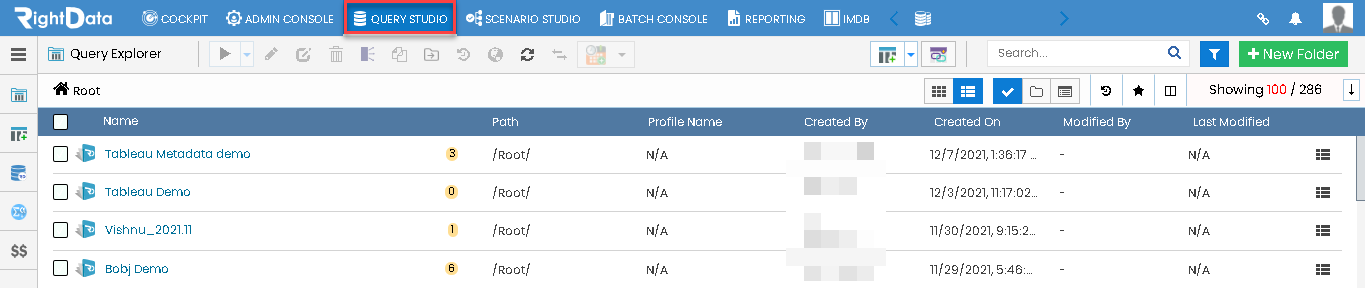
- Hover on the ‘Query Builder’ snippet
- Click the ‘Query’ option.
Note: You can either click the ‘Query’ option or the ‘Query Builder’ button icon to navigate to a new Query Builder session page.
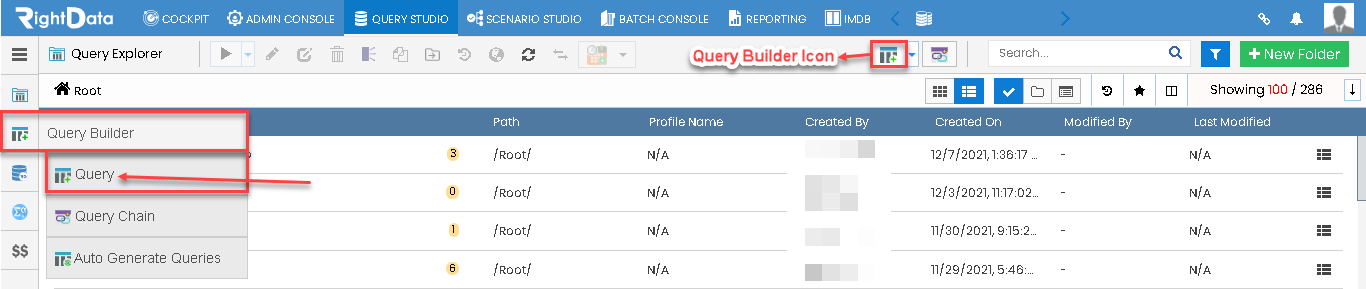
- This redirects to a new Query session page.
- A ‘Profile’ drop-down list is displayed.

- Let’s select the created profile ‘MSSQL SAMPLE TEST’ from the Profile drop-down list.
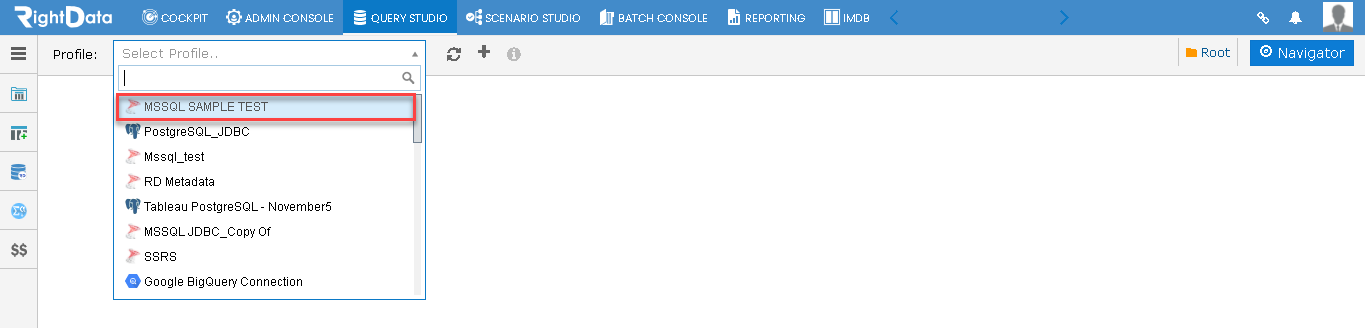
- Click the ‘Navigator’ button.
Note: A new Custom Query page is displayed after selecting the Profile drop-down list.
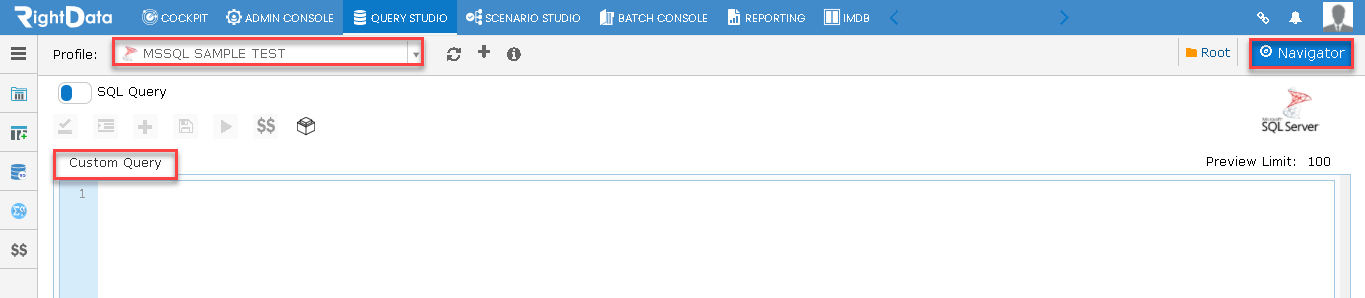
- An ‘MSSQL SAMPLE TEST’ with Schemas and Data tables are displayed.
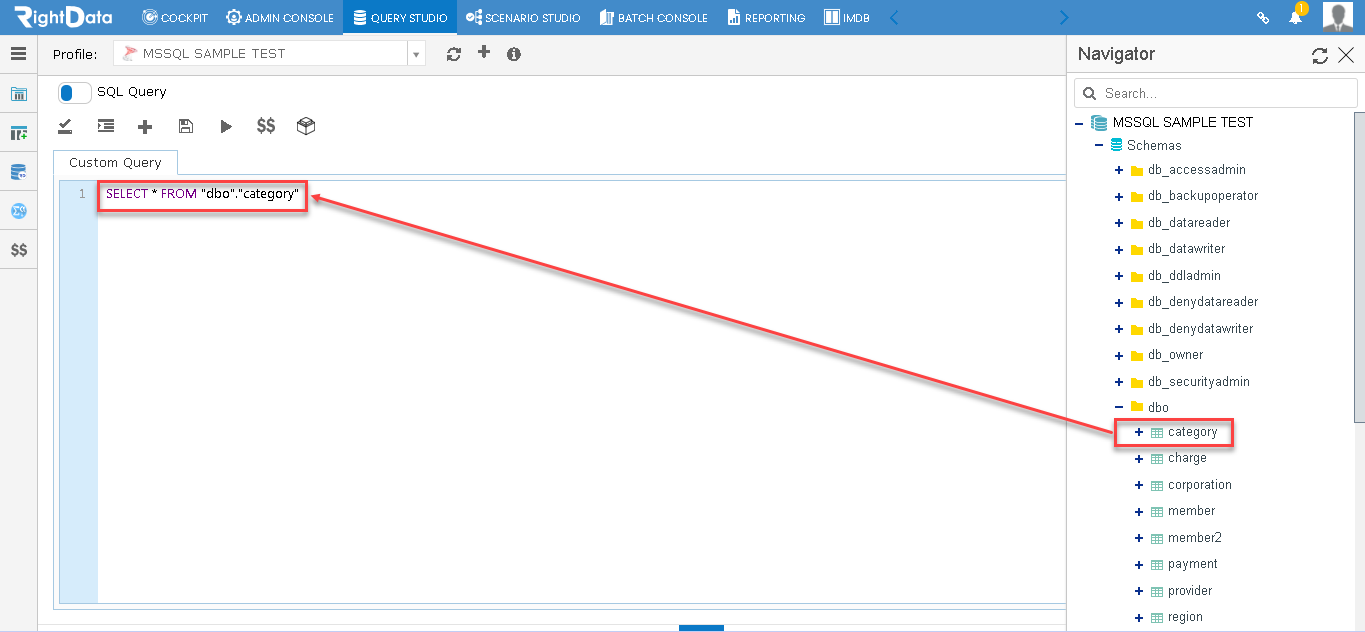
- Let’s suppose, select the ‘category’ column from the ‘dbo’ data table. (MSSQL SAMPLE TEST-Schemas-dbo-category)
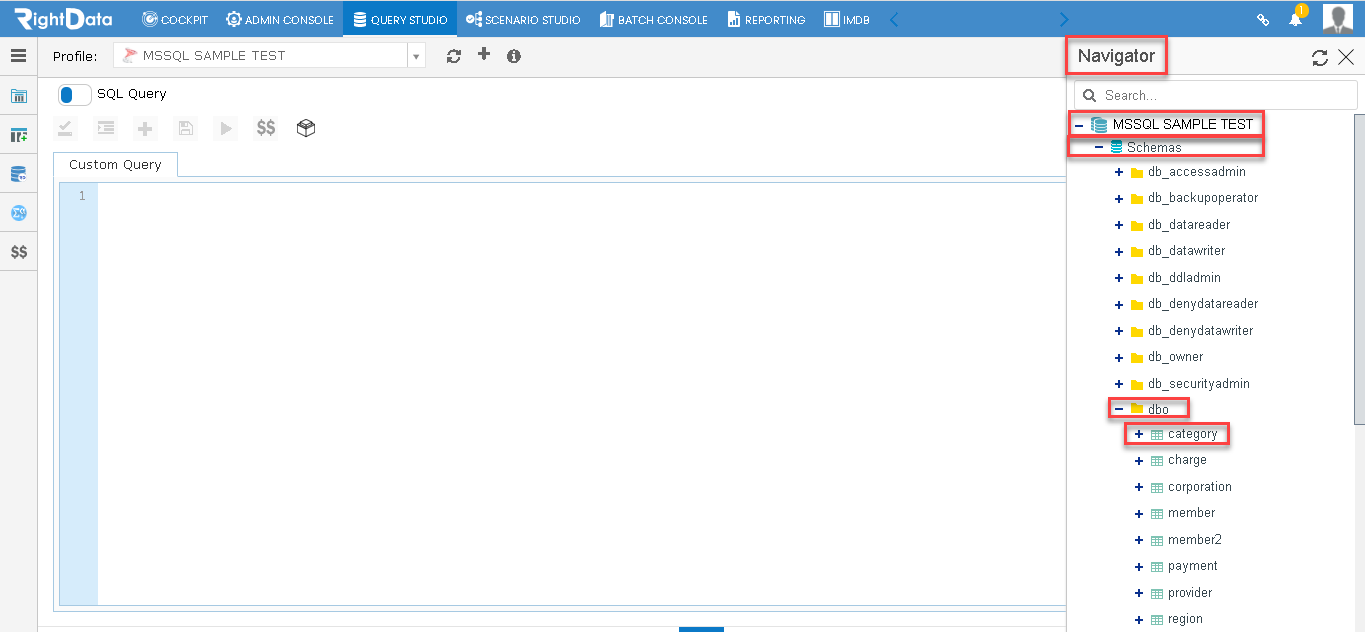
- Click the ‘Category’ column to add it to the ‘Custom Query’.
- The user notices a double quote already added for the ‘dbo’ data table and ‘category’ column.
Note: If you recall, this double quote was added during profile creation (MSSQL SAMPLE TEST).
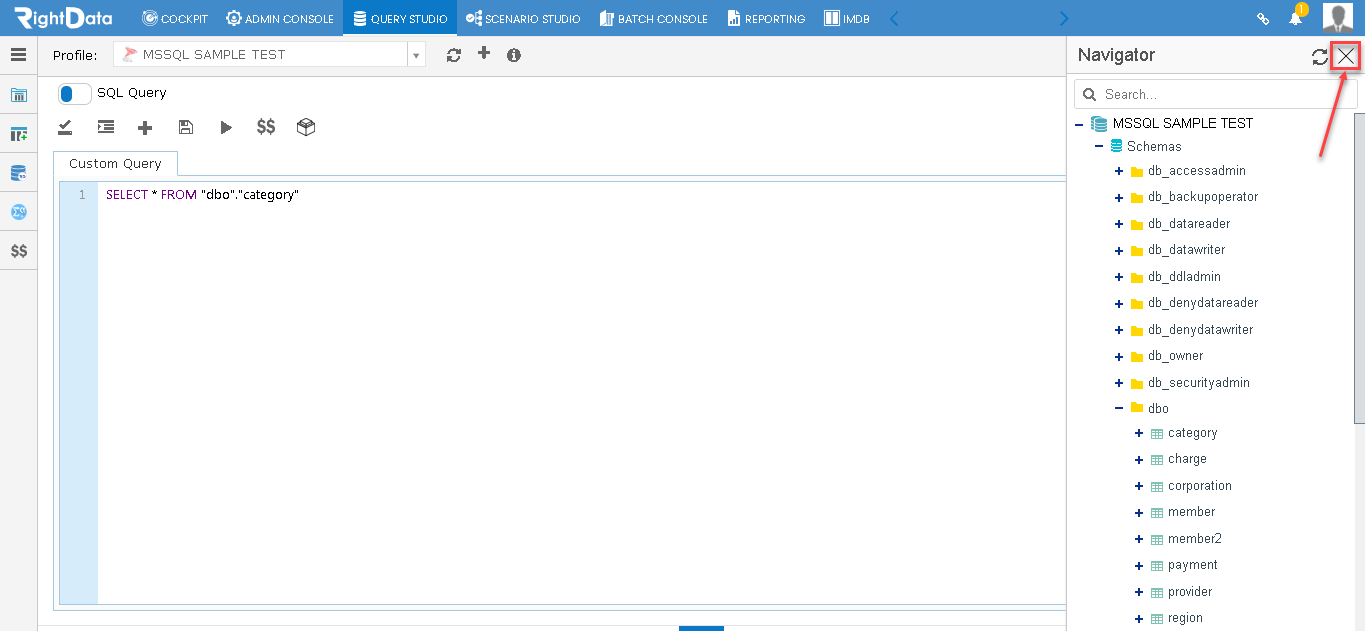
- Click the ‘X’ button to close the ‘Navigator’ slide screen.
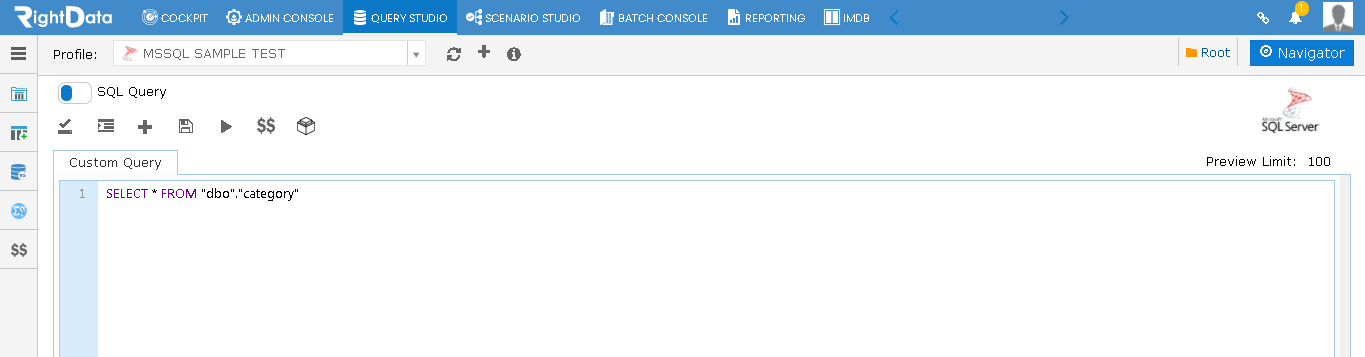
- The following screen is displayed.
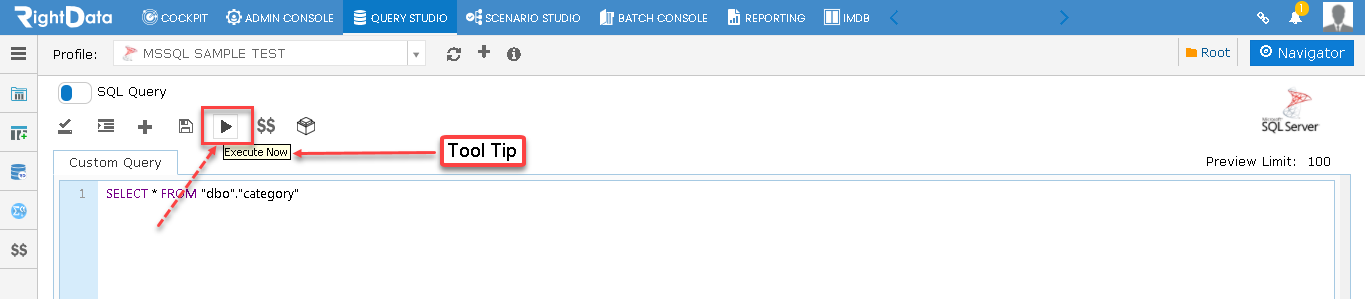
- Click the ‘Execute Now’ button.
Tool Tip: When hovered on this button, the ‘Execute Now’ text is displayed.
- The user is navigated to the ‘Results’ tab displaying the execution data.
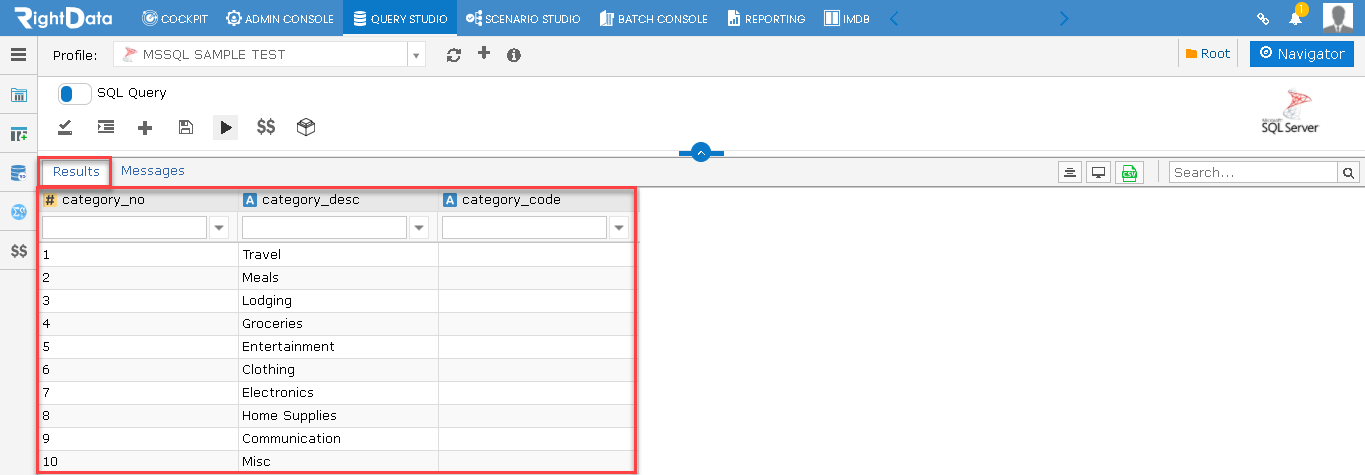
Note: The user can also use this Profile (MSSQL SAMPLE TEST) in any Query Chain, FDR, Validation Scenario, QPT, etc., wherever a Profile drop-down list option is available.