An enhancement regarding the addition of visual query patterns is included for all JDBC connection type profiles. Now, the user can drag the required SQL visual queries from the navigator drop-down button and execute them accordingly.
To learn more, let us walk through the below procedure:
- Click the ‘QUERY STUDIO’ tab.
- Hover on the ‘Query Builder’ snippet.
- Click the ‘Query’ option.

- The user is navigated to the Query session page.
- A ‘Profile’ drop-down list is displayed.

- Let’s suppose, from the ‘Profile’ drop-down selection, the user selected the ‘JDBC-QA_AWS’ profile.
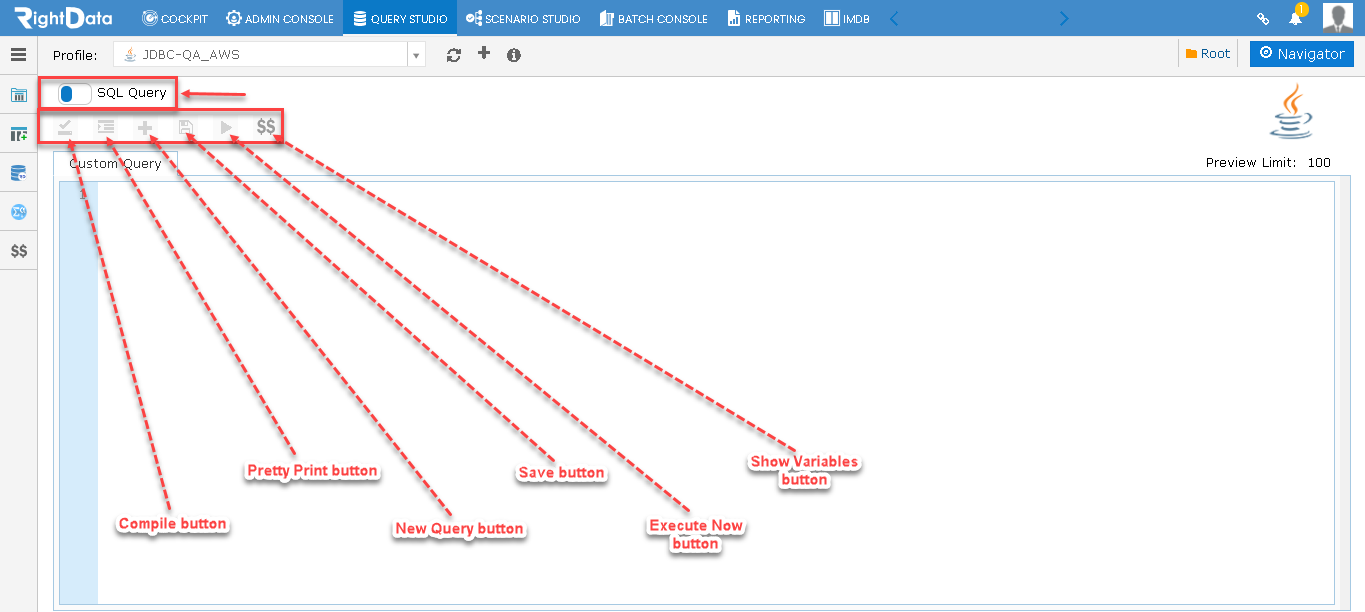
- The user notices an SQL Query which is toggled ON by default.
- Below the SQL Query text, different buttons namely Compile, Pretty Print, New Query, Save, Execute Now, and Show Variables are displayed.
Note: The above buttons are in disabled mode but when once the user drags an SQL Query, these buttons get enabled
- Now, toggle OFF SQL Query.
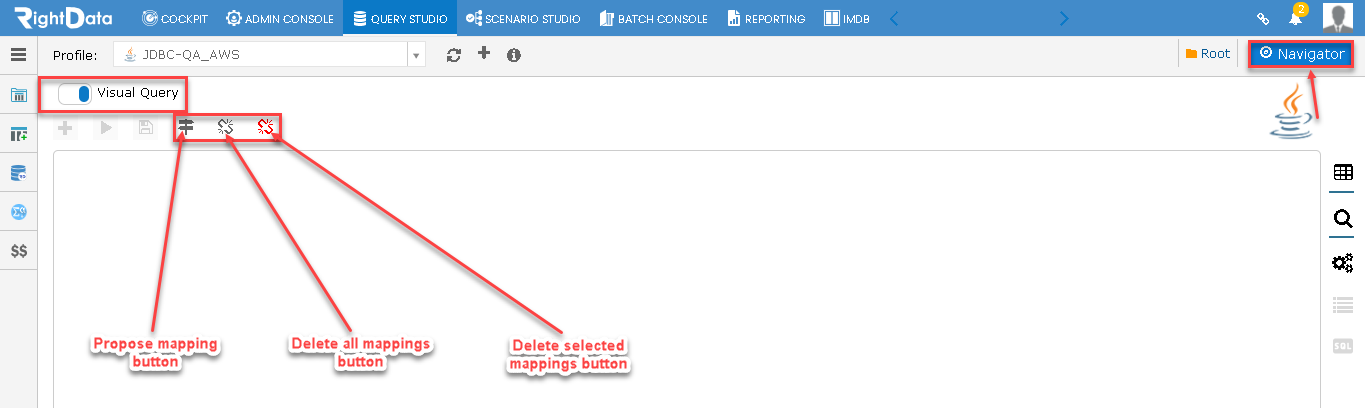
- Once the SQL Query is toggled OFF, Visual Query is toggled ON.
- Three new buttons are added and enabled as the user toggles from SQL Query to Visual Query mode namely Propose mapping, Delete all mappings, and Delete selected mappings.
- Now, click the ‘Navigator’ button.
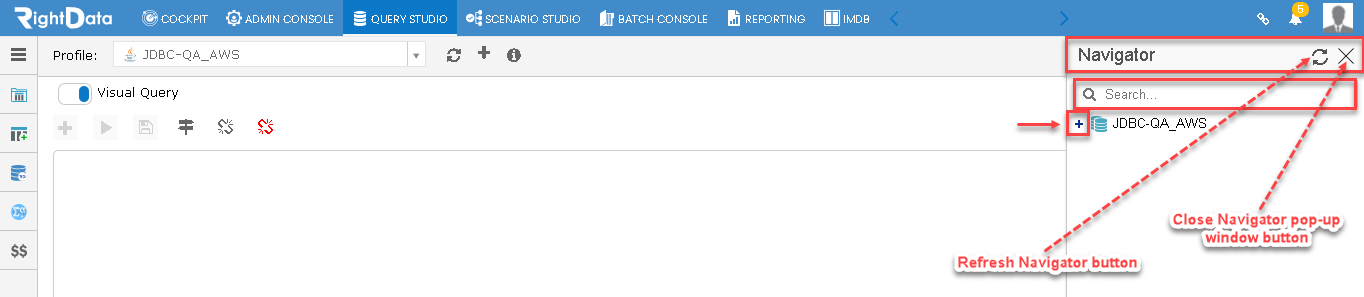
- A ‘Navigator’ slide screen is displayed.
- Below the Navigator text, a ‘Search box’ option is displayed.
- A ‘Refresh Navigator’ button is used to refresh the contents of the Navigator slide screen.
- Click the plus (+) button of the ‘JDBC-QA_AWS’ profile.
- The ‘JDBC-QA_AWS’ profile displays its corresponding Schemas.
- Click the plus (+) button of Schemas.
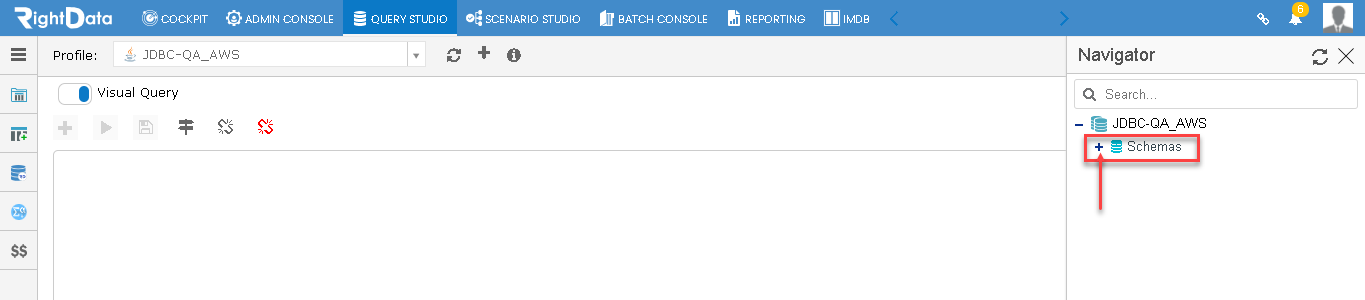
- This displays the Schema tables.
- Let’s suppose click the plus (+) button of the ‘APPQOSSYS’ table.
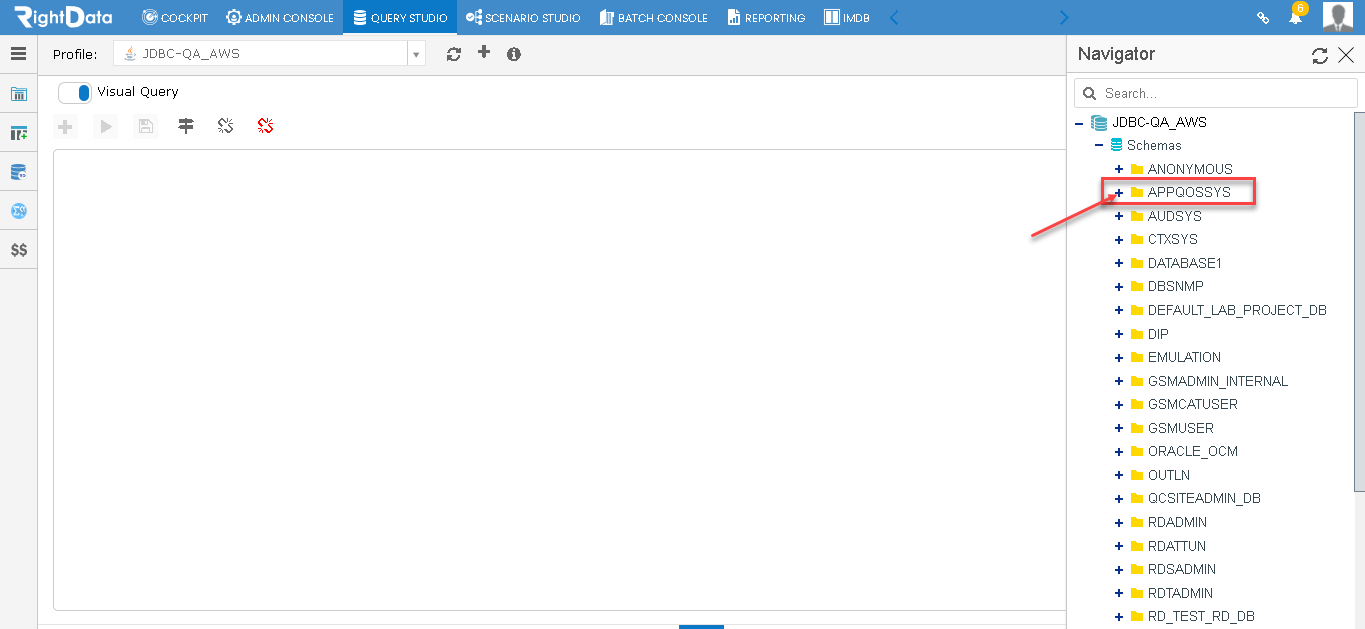
- The ‘APPQOSSYS’ table displays its corresponding columns.
- Let’s, click the column ‘WLM_CLASSIFIER_PLAN’.
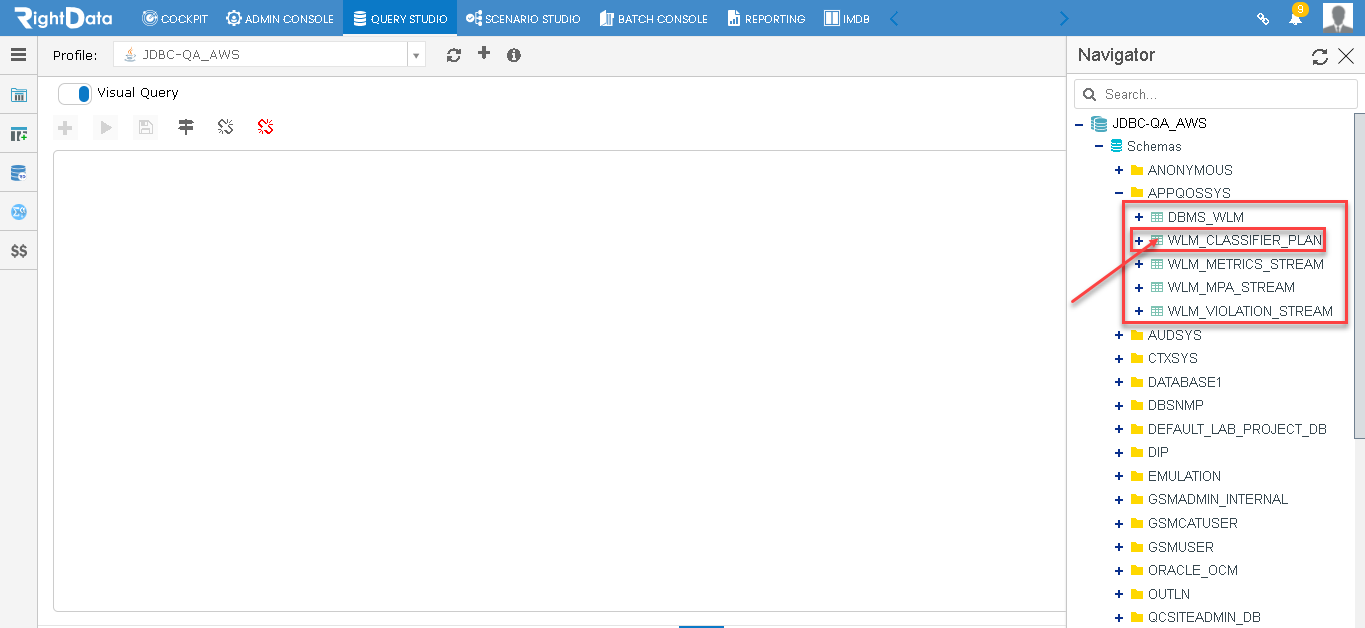
- This adds its Column Names in the Visual Query pattern.
- In the Visual Query pattern, the user sees different buttons like Create Derived Column, Show selected columns only, Local Filter, and Expand.
- Click the ‘Expand’ button.
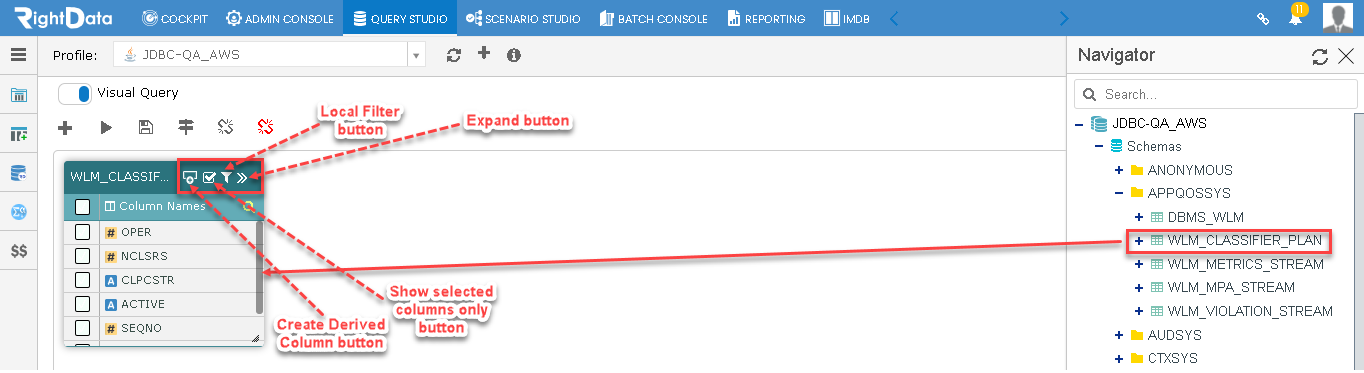
- This expands showing all the other column names.
- Click the ‘Expand’ button again to collapse it back.
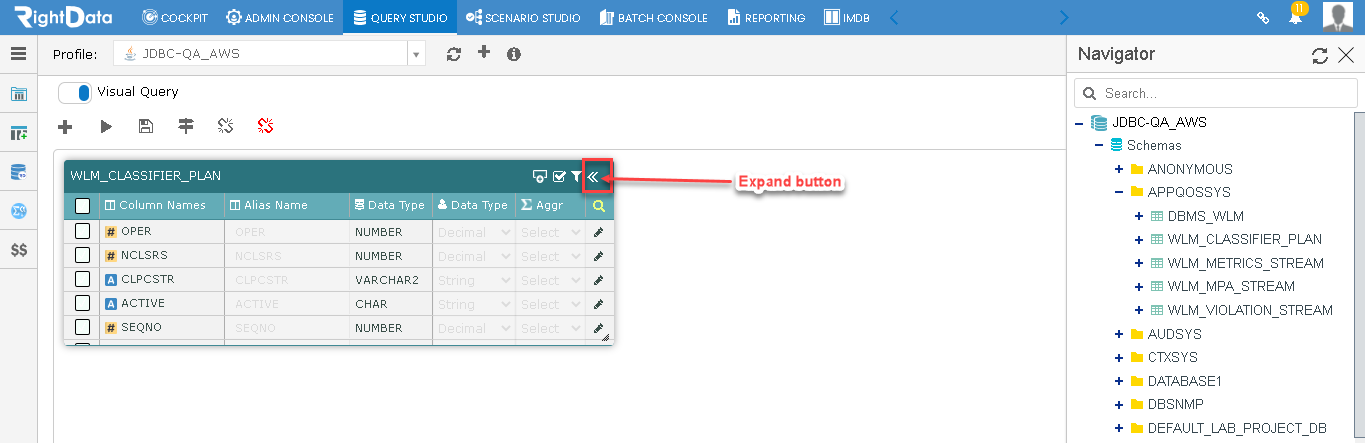
- This again collapses the complete view.
- Select the checkbox beside ‘Column Names’.
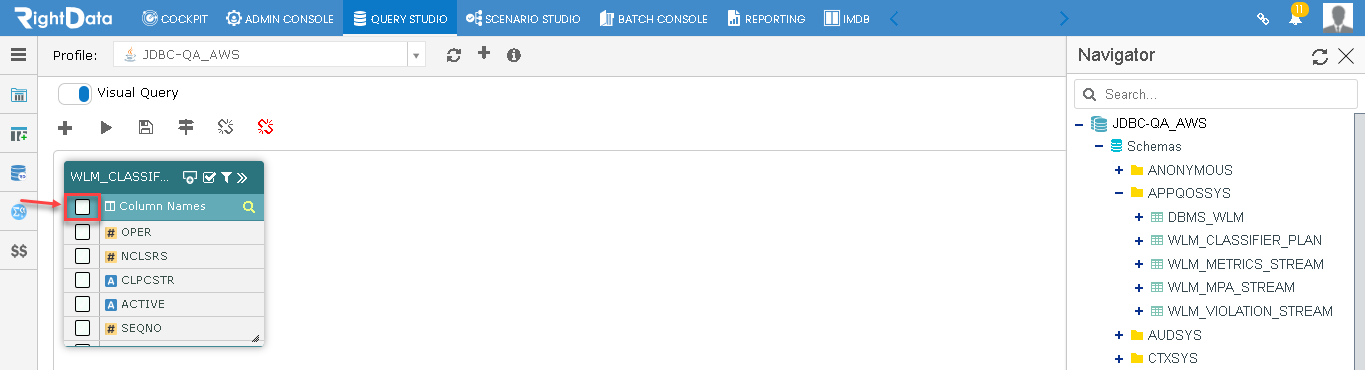
- This action selects all the rows present in that column.
- Now click the ‘Execute Now’ button.
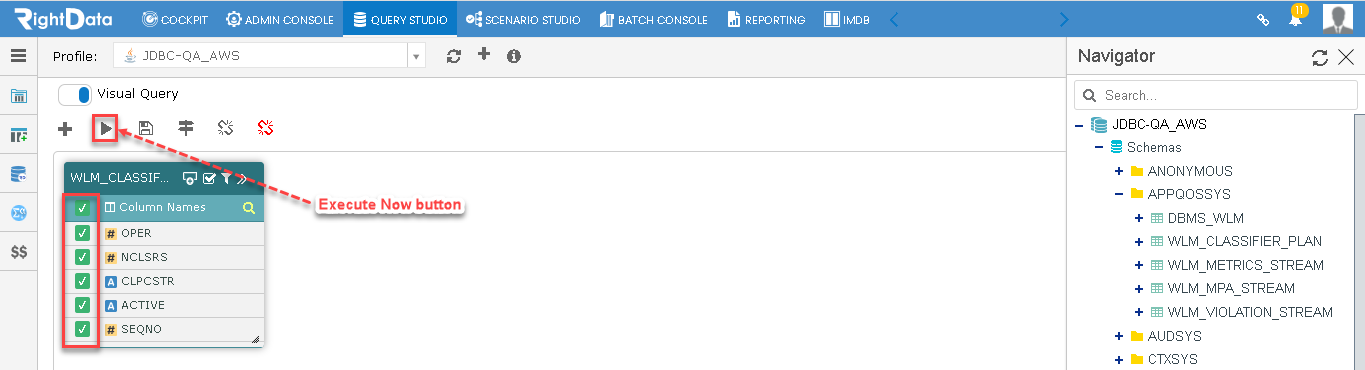
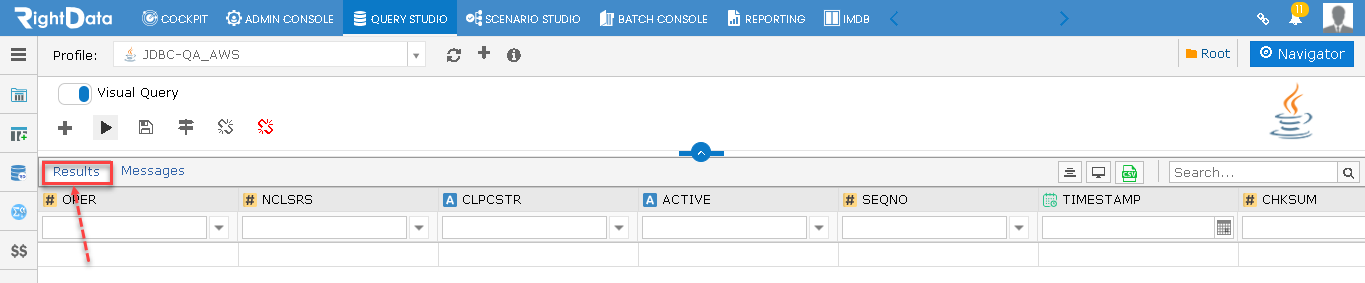
- This executes the Visual Query displaying the ‘Results’ page.