When the user adds or deletes any records from the ‘Custom SQL’ Data Source widget, the changes get automatically updated in the downstream components, especially the transformation widgets.
Note: Presently, this smart design change works only with the ‘Query Chain’ and that too with the ‘Custom SQL’ data source widget. Shortly, it will be implemented in FDRs, Validations, and Batch Jobs and also with the rest of the Data Source widgets.
To learn more, let us walk through the below procedure:
- Click the ‘QUERY STUDIO’ tab.
- Hover on the ‘Query Builder’ snippet from the left pane options.
- Click the ‘Query Chain’ option.
Note: Users can either click the ‘Query Chain’ option or ‘New Query Chain’ button to open a new Query Chain in create and edit mode.
Path01: QUERY STUDIO > Query Builder > Query Chain
Path 02: QUERY STUDIO > New Query Chain
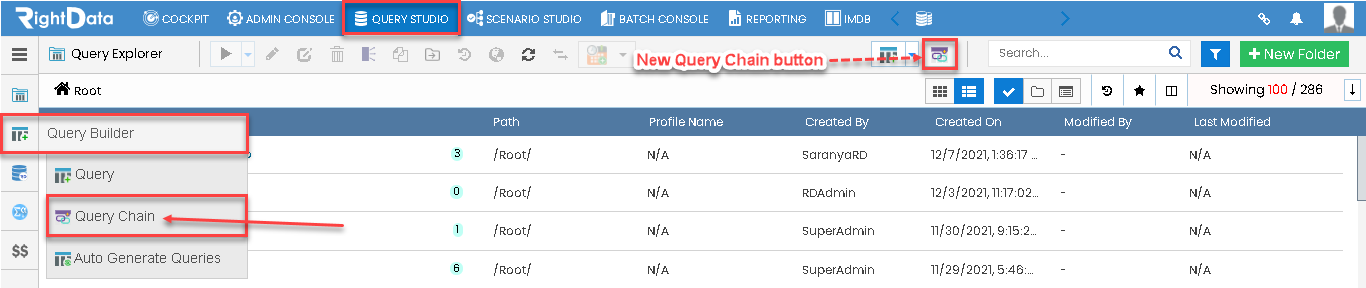
- The user is navigated to the new Query Chain session page in create and edit mode.
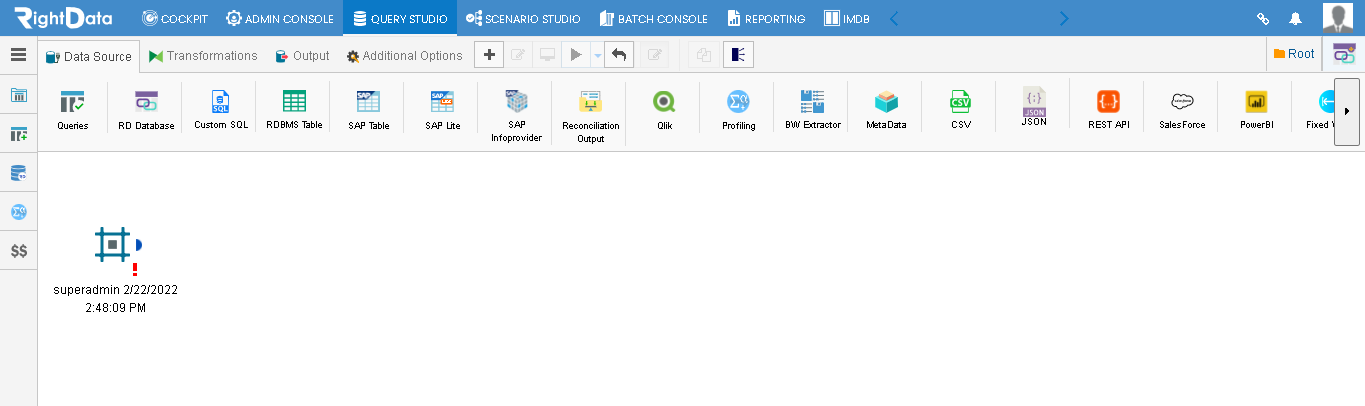
- From the ‘Data Source’ tab, drag and drop the ‘Custom SQL’ icon onto the Query Chain page.
Note: All the icons including the ‘Custom SQL’ get disabled as the user drags and drops the ‘Custom SQL’ icon on to Query Chain page.
- Click the ‘Custom SQL’ widget.
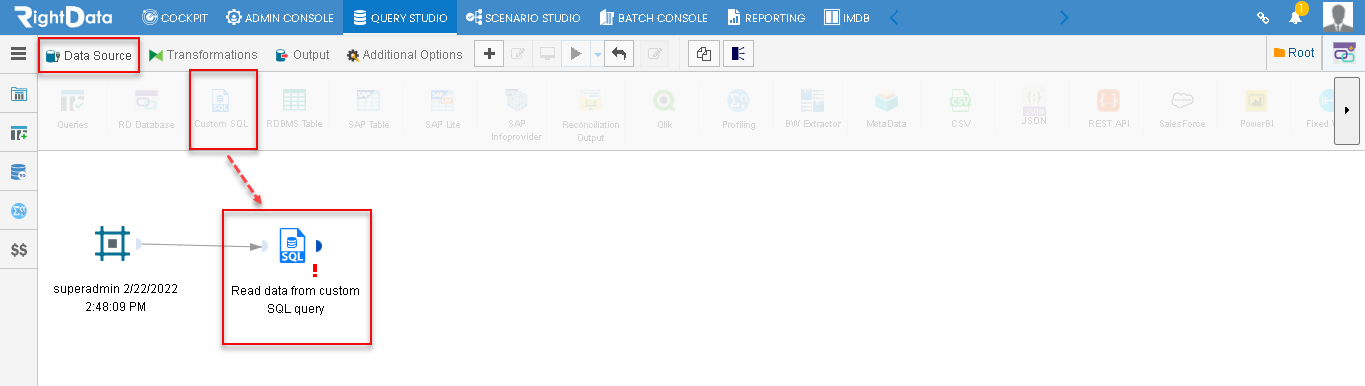
- A ‘Read data from custom SQL query is displayed and has two drop-down lists such as ‘Database Type’ and ‘Connection Name.’
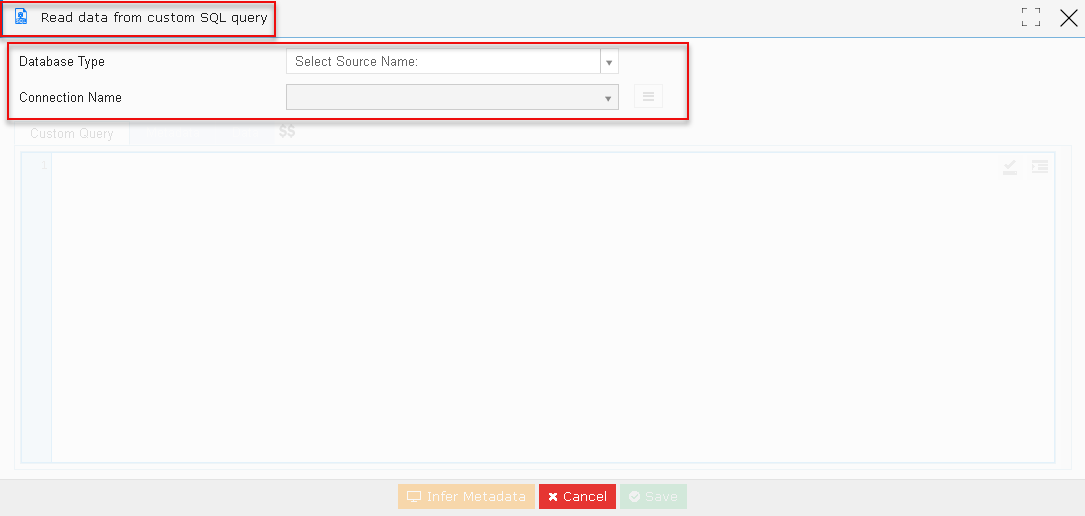
- Let’s select ‘MSSQL’ for the ‘Database Type’ drop-down list.
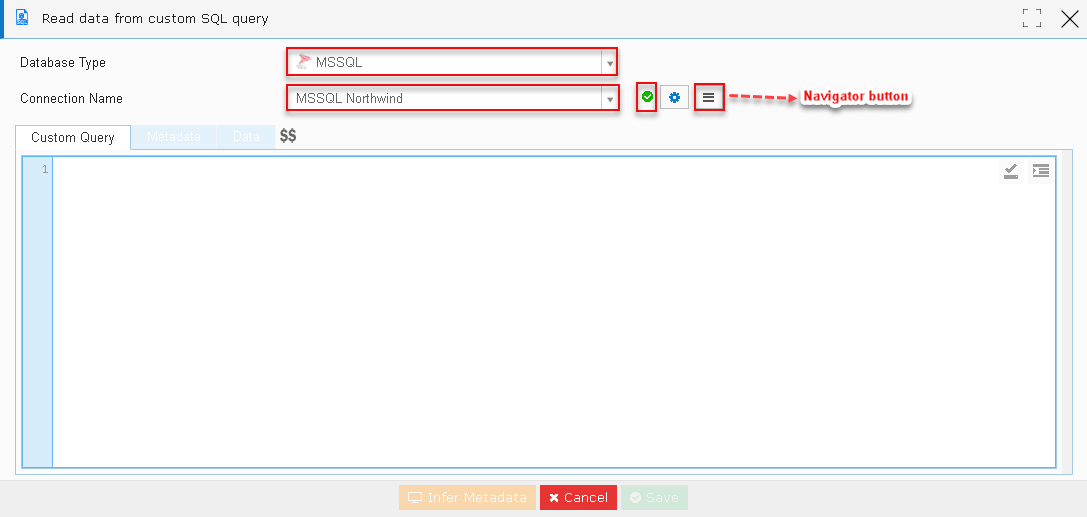
- Let’s select ‘MSSQL Northwind’ for the ‘Connection Name’ drop-down list.
- As the user selects the ‘Connection Name’ drop-down list, a green tick mark is displayed indicating the ‘Connection Name’ drop-down list selection is successful.
- An ‘Additional Settings’ and ‘Navigator’ buttons are enabled.
- Click the ‘Navigator’ button.
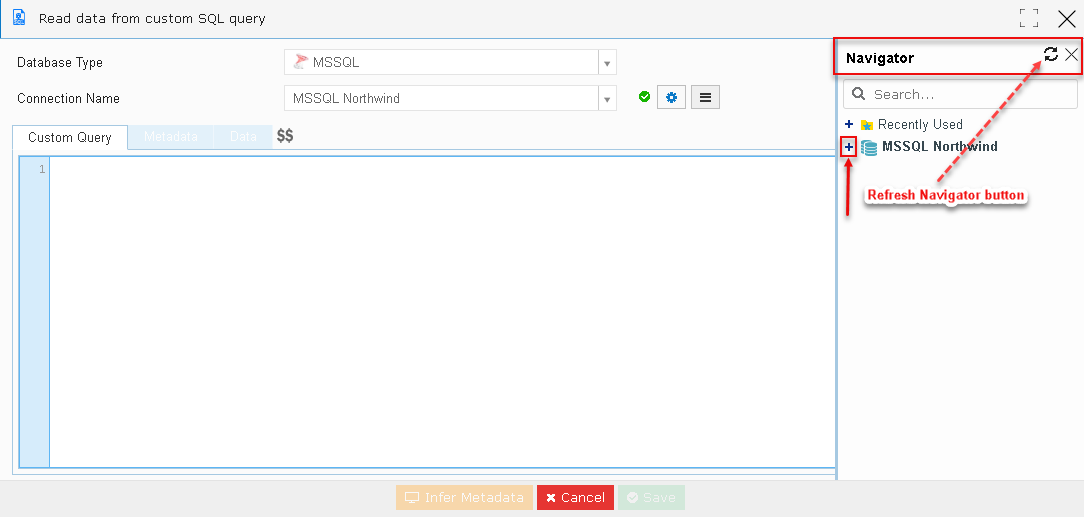
- A ‘Navigator’ slide screen is displayed showing the Schema.
- A ‘Refresh Navigator’ button is used to refresh the Navigator session page.
- Click the plus (+) button to expand the ‘MSSQL Northwind’ schema.
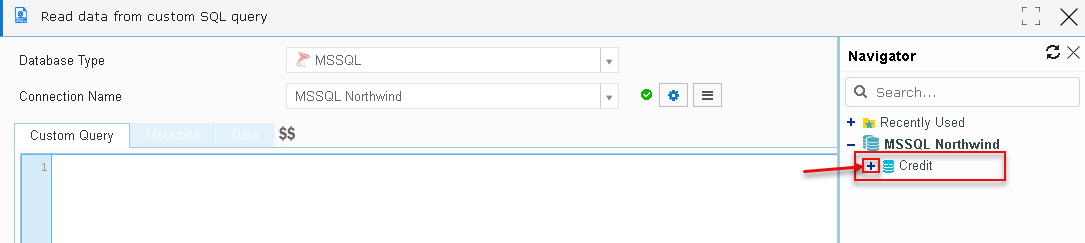
- A ‘Credit’ schema is displayed.
- Click the plus (+) button to expand the ‘Credit’ schema.
- Tables, Views, and Procedures tables are displayed.
- Click the plus (+) button to expand the ‘Tables’ table.
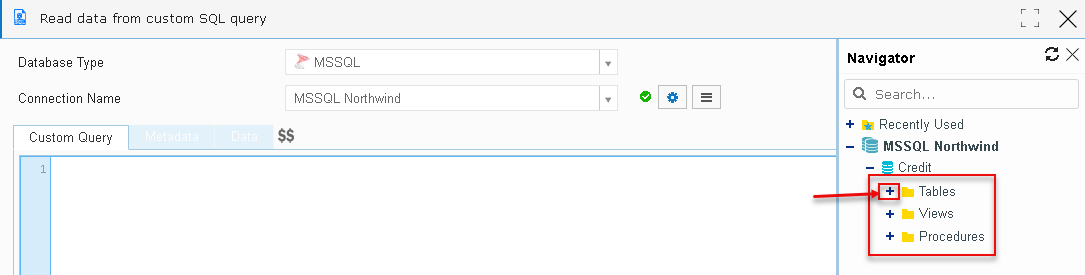
- A list of columns is displayed under the ‘Tables’ table.
- Let’s select and click the ‘dbo. payment’ column.
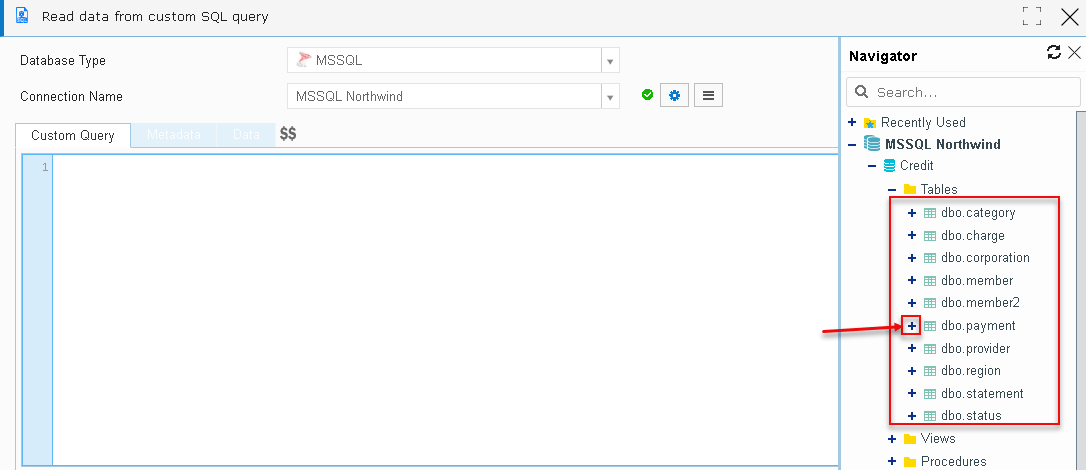
- The Custom Query for the ‘dbo. payment’ is added.
- Click the ‘Infer Metadata’ button.
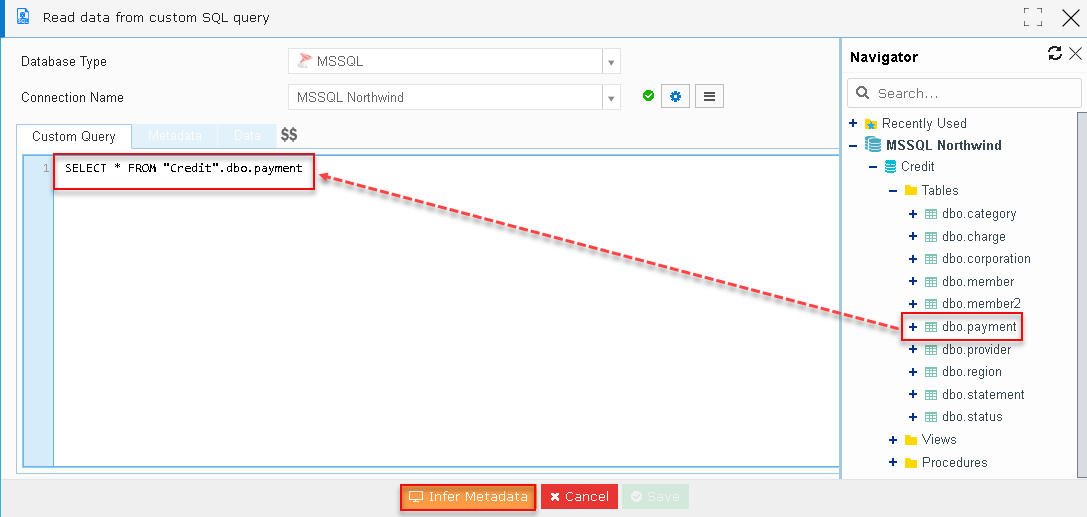
- The ‘Metadata’ tab is selected showing the ‘Column Name’ and ‘Data Type.’
Note: By default, all the column names are checked.
- Click the ‘Save’ button.
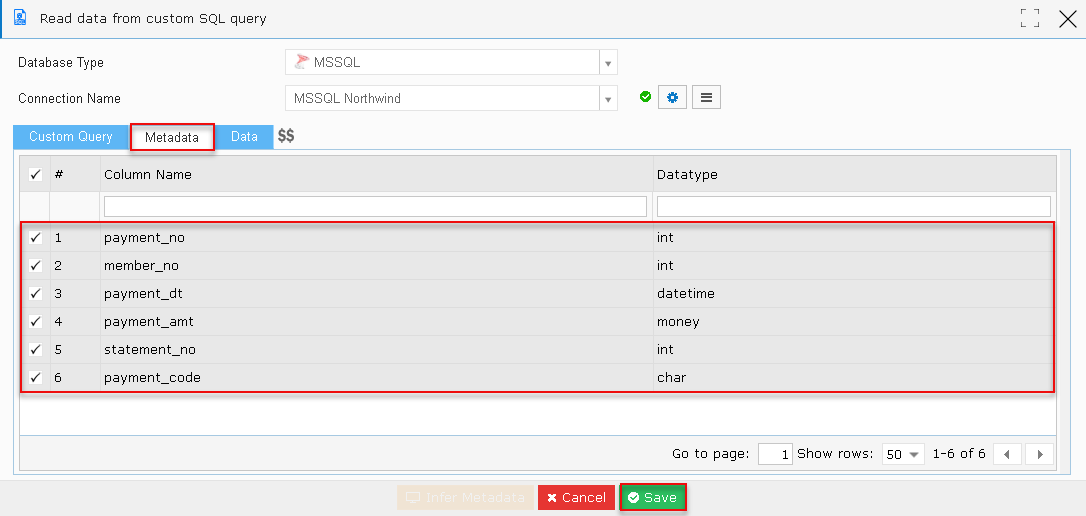
- The ‘Custom SQL’ widget is closed saving the widget data.
- The user is navigated to the Query Chain session page.
- Click the ‘Transformations’ tab.
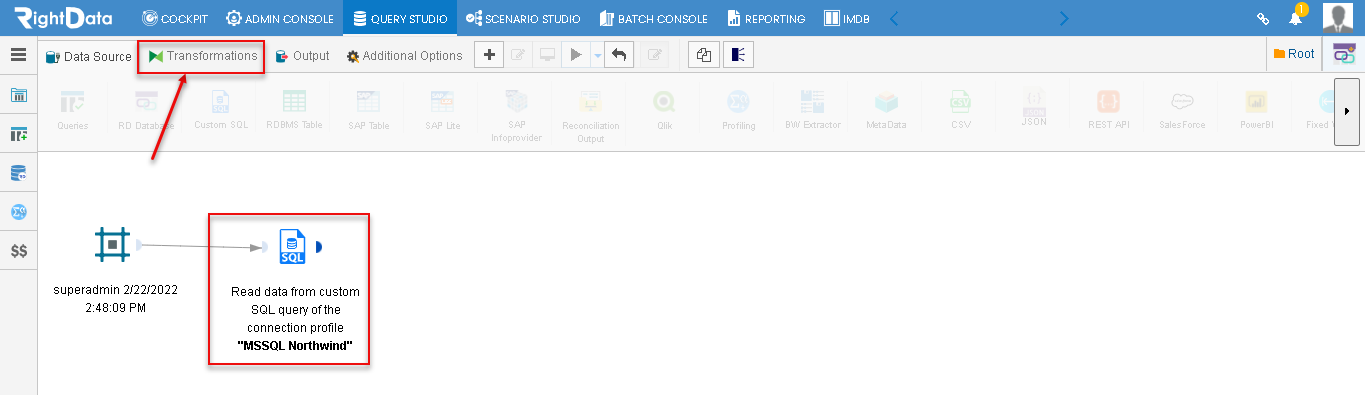
- The user can view different transformations such as Projection, Aggregation, Filters, DeDups, Pivot, UnPivot, Join, Union, and Fuzzy Lookup.
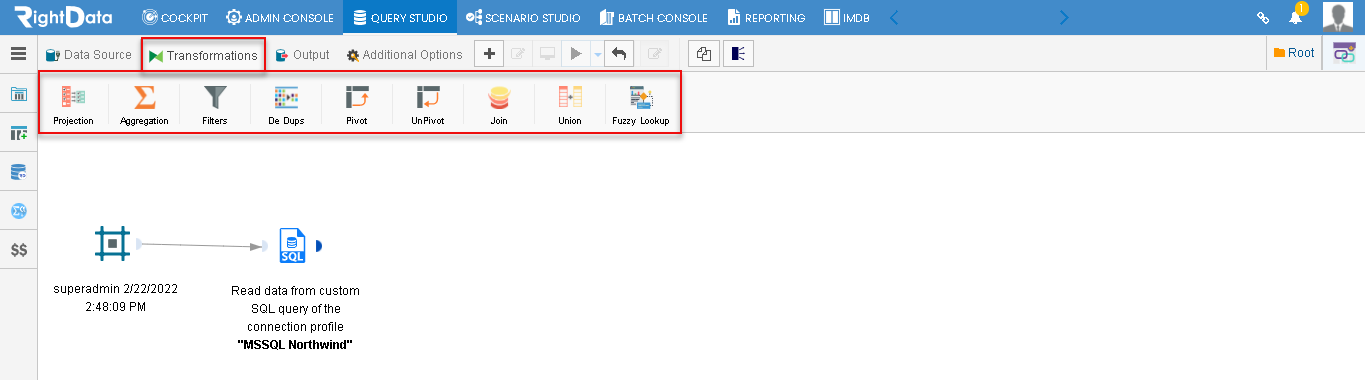
- Let’s drag and drop the ‘Projection’ icon from the ‘Transformations’ tab.
- Click the ‘Projection’ widget.
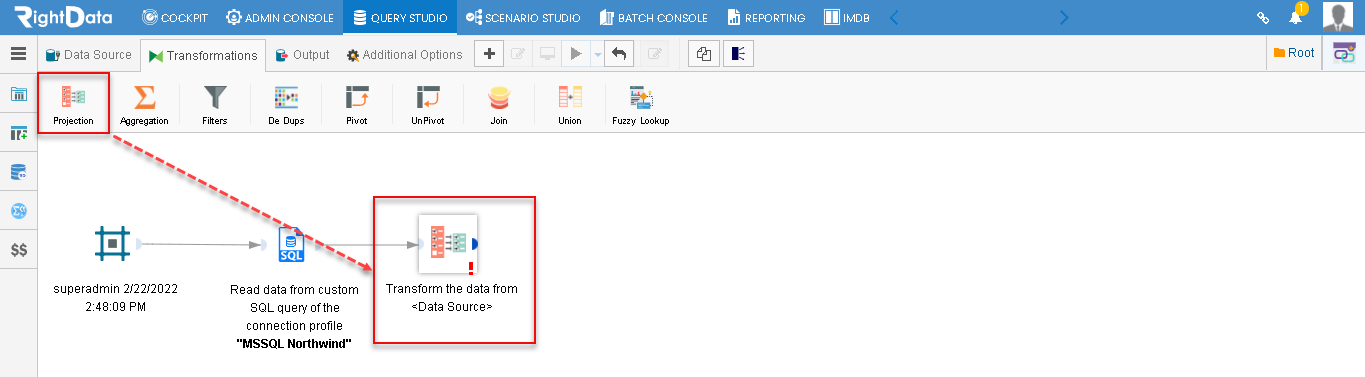
- A ‘Transform the data from the Data Source’ pop-up window is displayed.
- Click the ‘Save’ button.
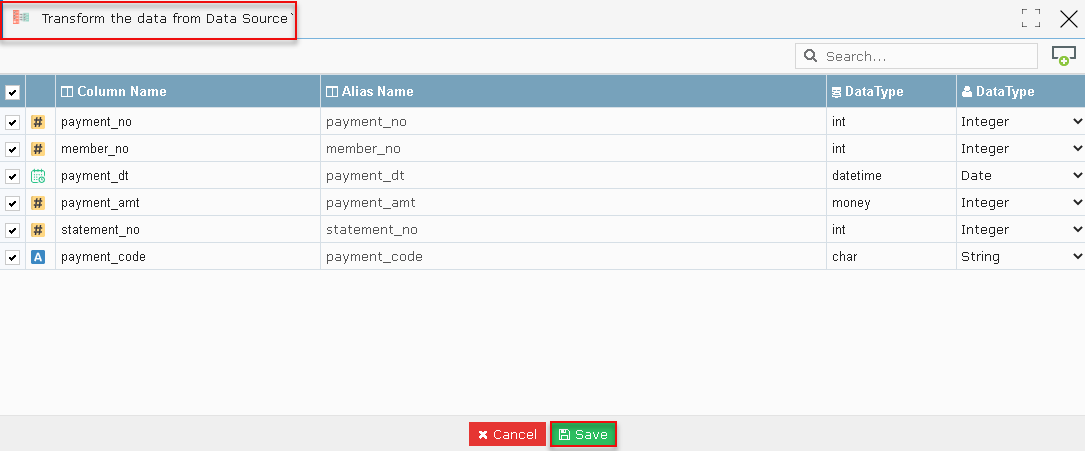
- The ‘Projection’ widget is closed saving the data.
- The user is navigated to the Query Chain session page.
- Click the ‘Output’ tab.
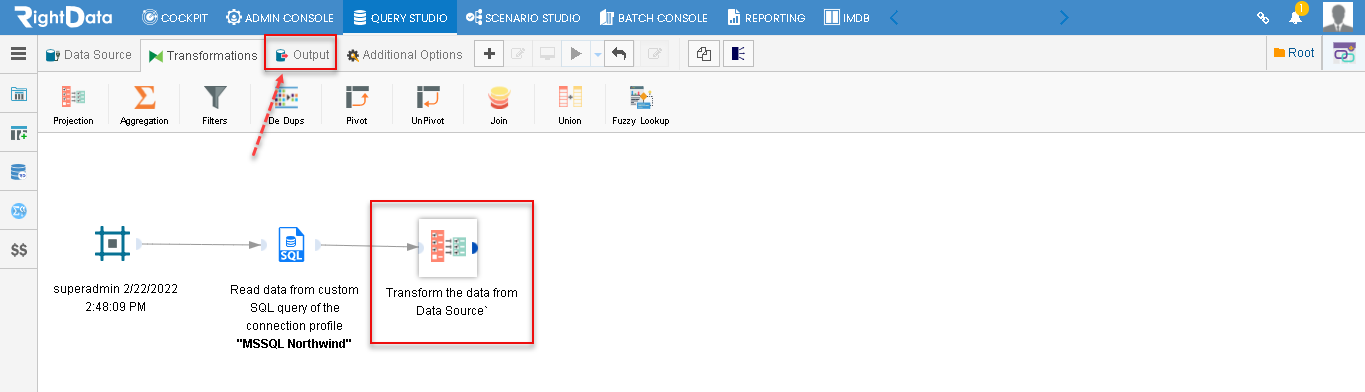
- An RD Output, Data Profiling, and Offload File icons are displayed.
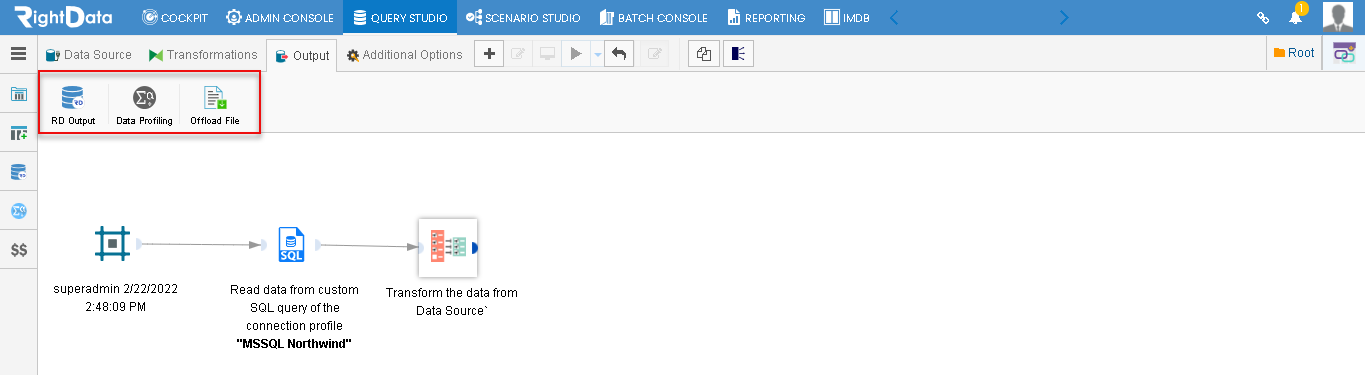
- Let’s drag and drop an ‘RD Output’ icon from the ‘Output’ tab onto the Query Chain session page.
- Click the ‘RD Output’ widget.
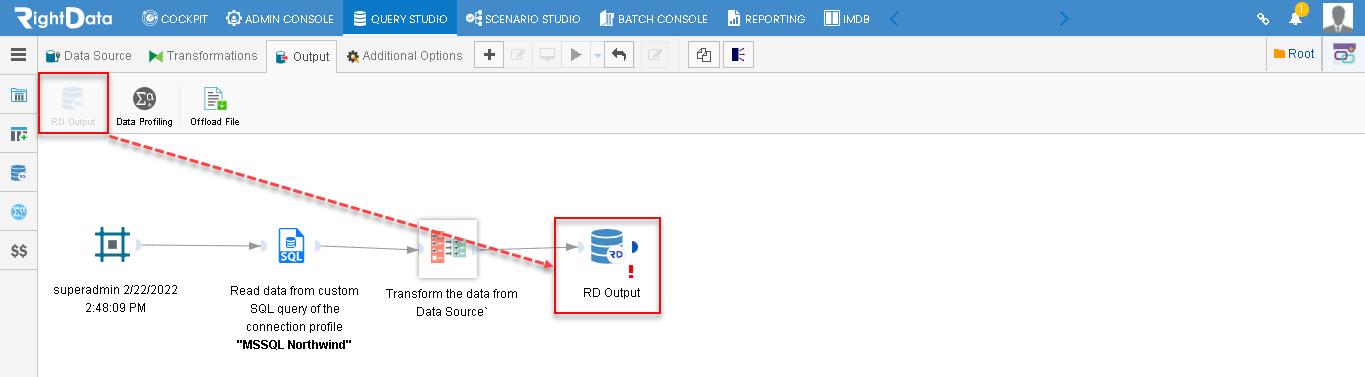
- An ‘RD Output’ pop-up window is displayed.
- Click the ‘Select’ button.
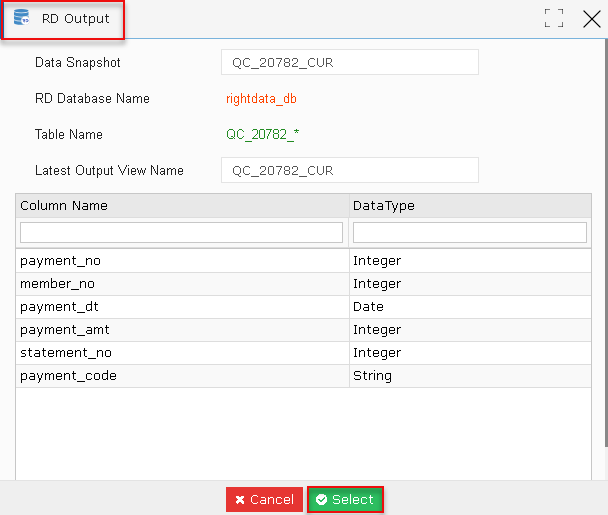
- The ‘RD Output’ widget is closed saving the data.
- The user is navigated to the Query Chain session page.
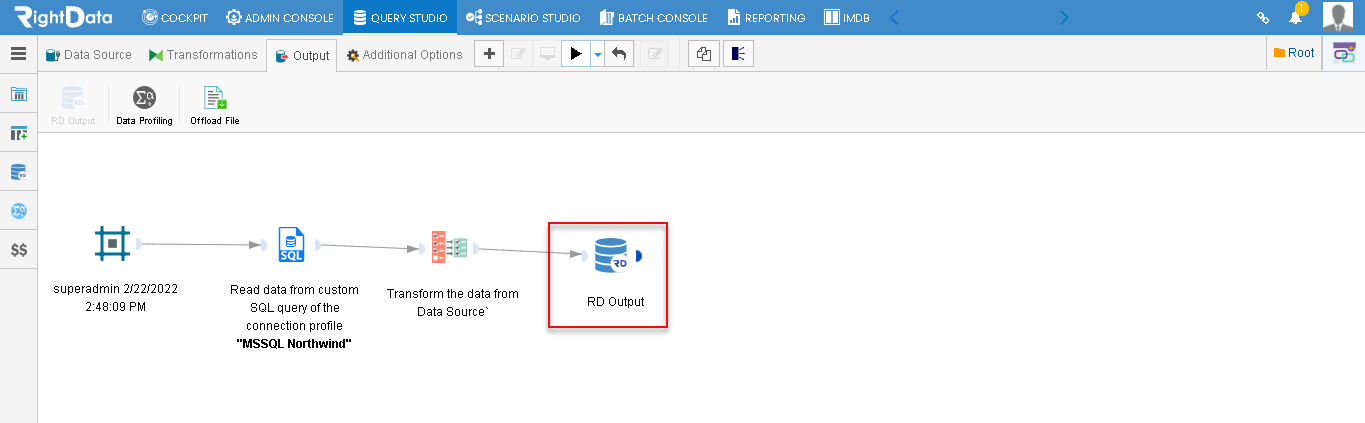
- Now let’s click the ‘Custom SQL’ widget.
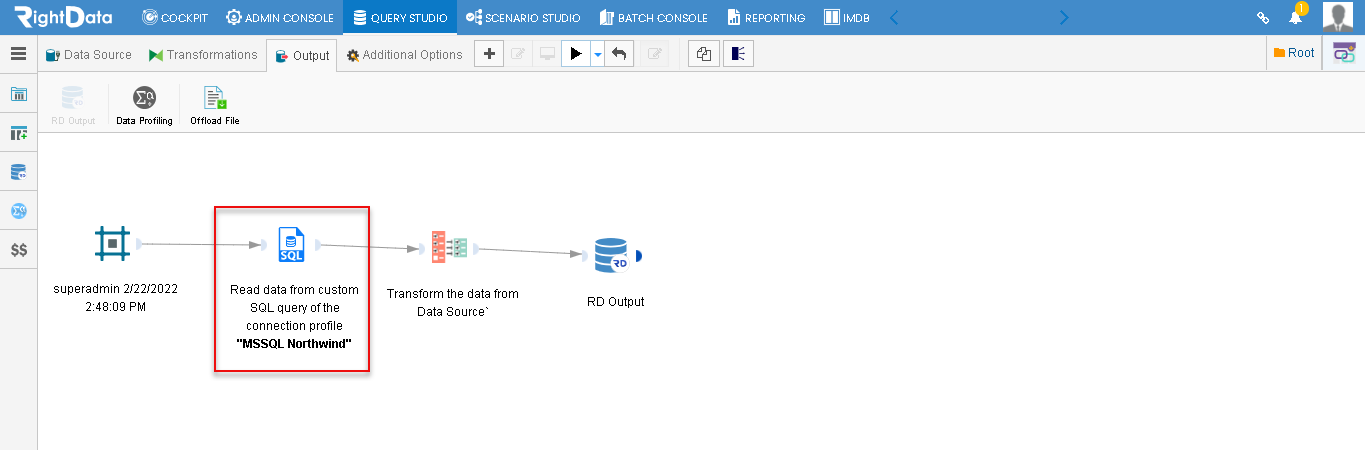
- Click the ‘Infer Metadata’ button.
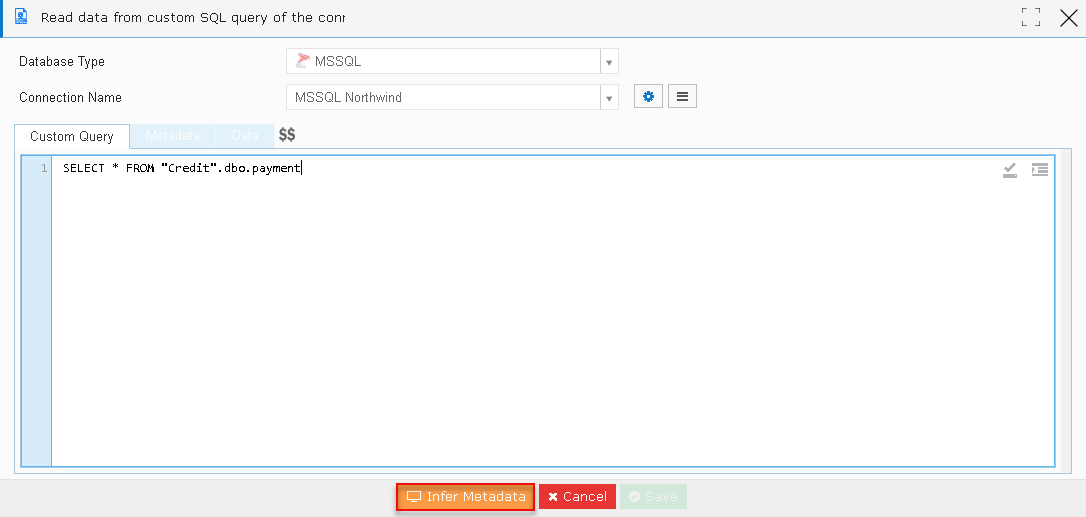
- Immediately the ‘Metadata’ along with ‘Column Name’ and Data Type’ is displayed.
Note: By default, all the column names are checked.
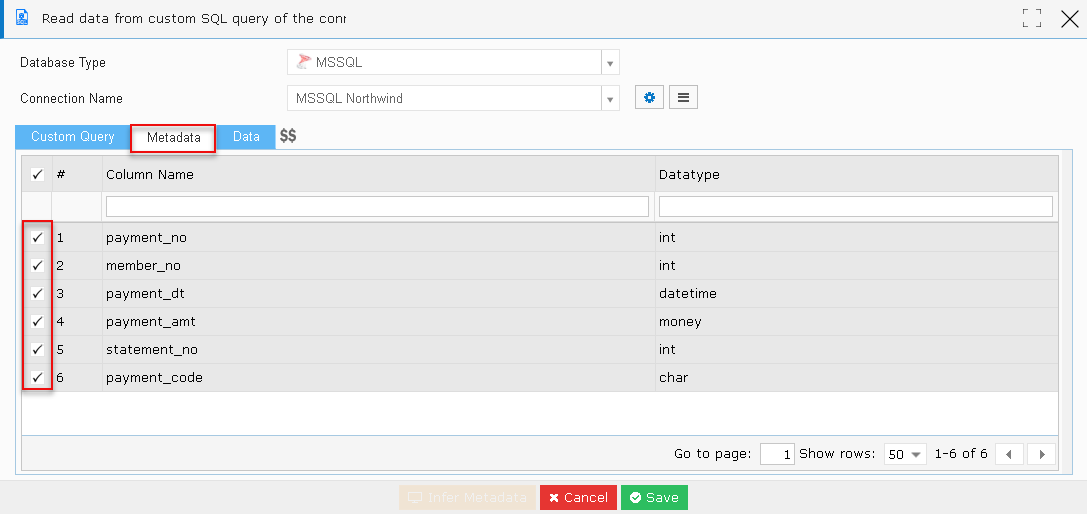
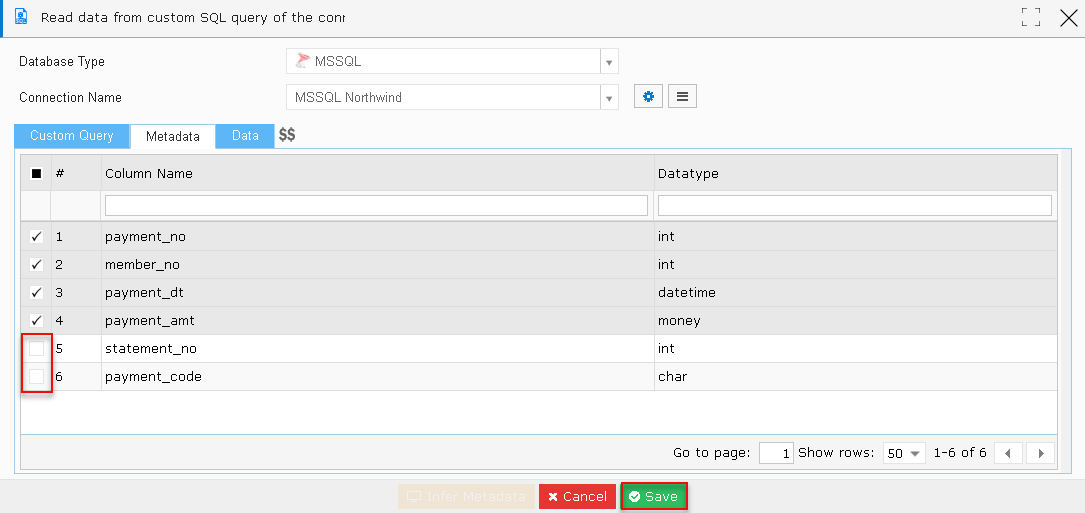
- Let’s suppose uncheck the last two column names (Statement_no and Payment_code).
- Click the ‘Save’ button.
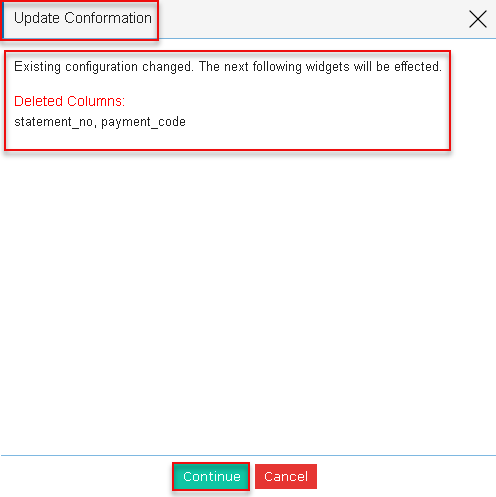
- An ‘Update Conformation’ pop-up window is displayed showing the details about the ‘Existing configuration changed. The next following widgets will be effected’.
- It also displays the Deleted Columns details.
- Let’s click the ‘Continue’ button.
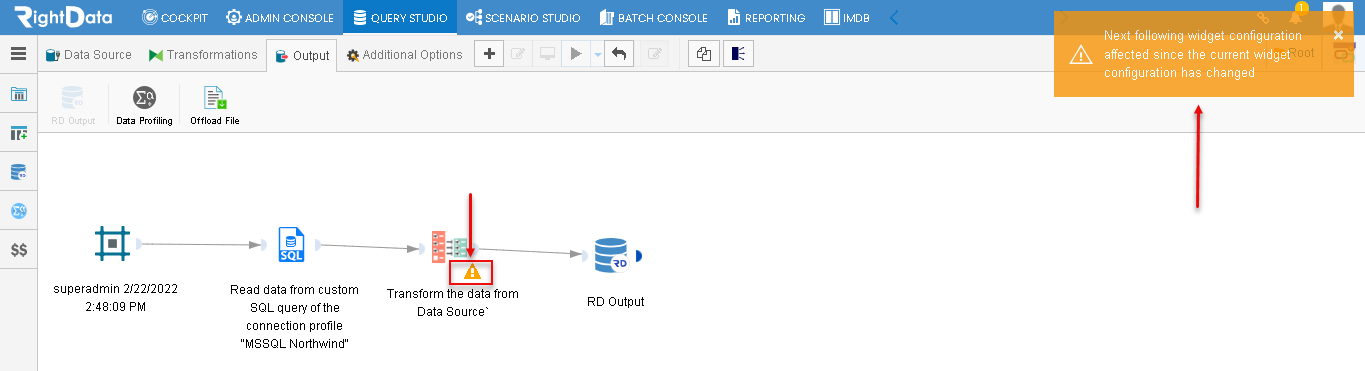
- A toaster message ‘Next following widget configuration affected since the current widget configuration has changed’ is displayed on the top right corner of the page.
- The user also notices an exclamation in the corresponding ‘Projection’ widget.
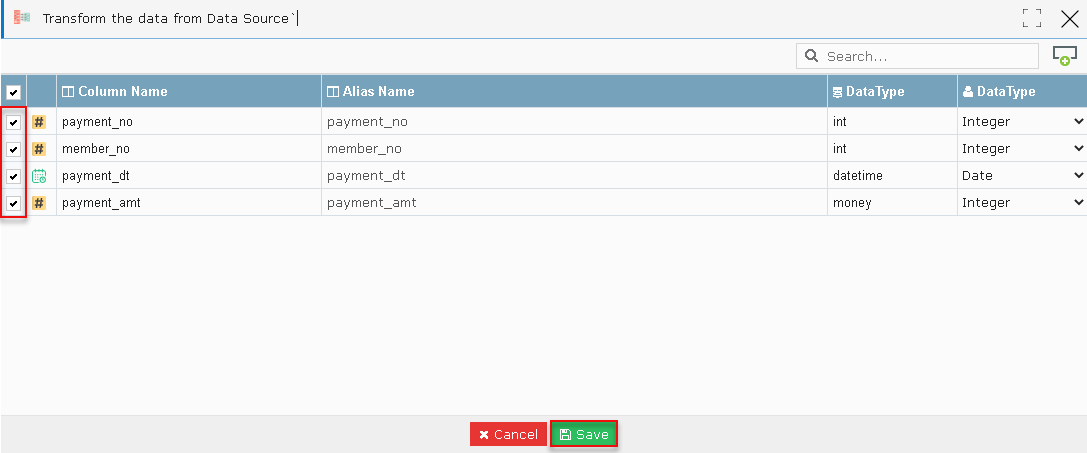
- Now, click the ‘Projection’ widget.
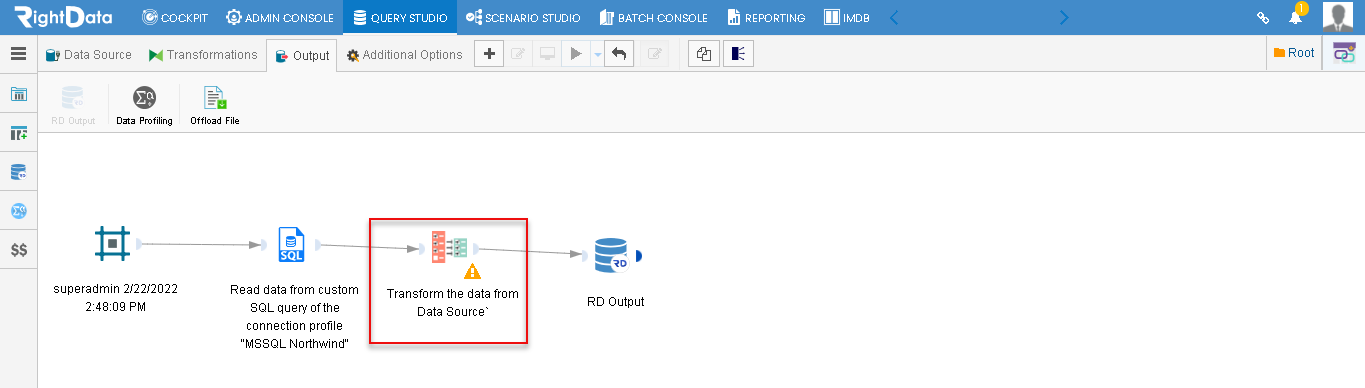
- The user notices only four columns and the last two columns (Statement_no and Payment_code) are deleted here.
- Click the ‘Save’ button to confirm the changes.
- The user is navigated to the Query Chain session page.
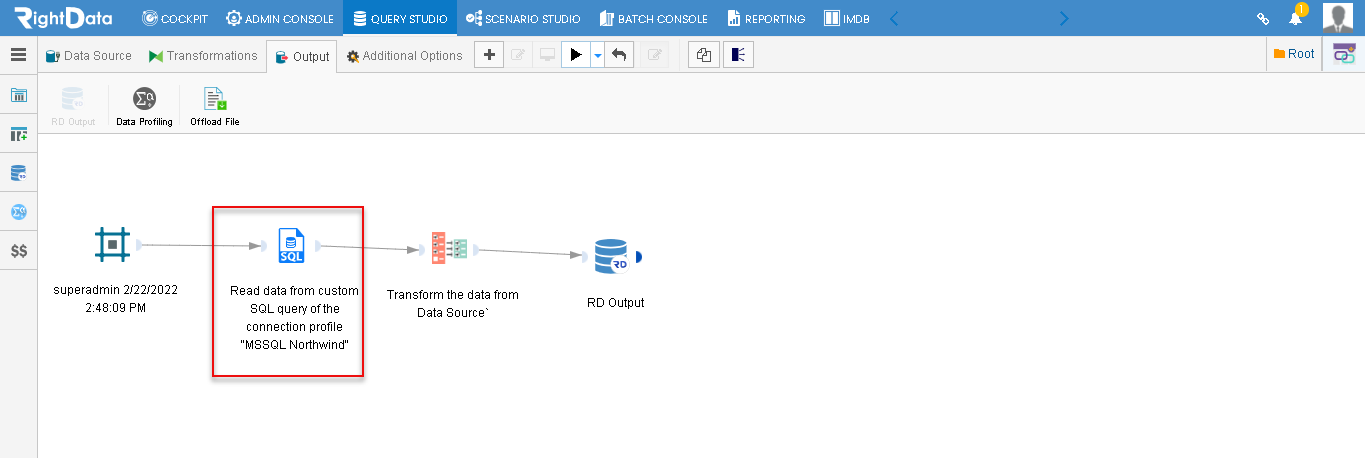
- Now, let’s again click the ‘Custom SQL’ widget.
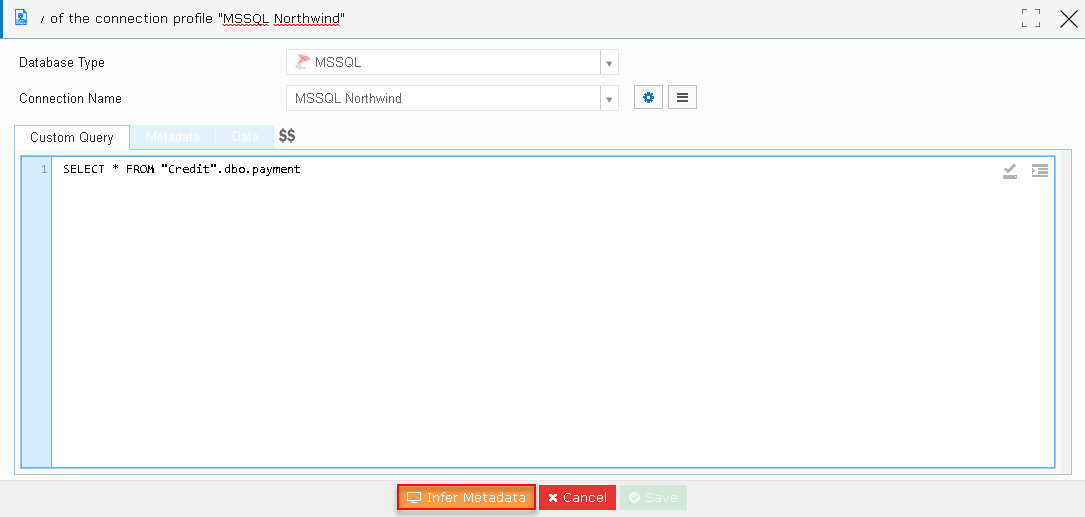
- Click the ‘Infer Metadata’ button.
- The ‘Metadata’ is displayed.
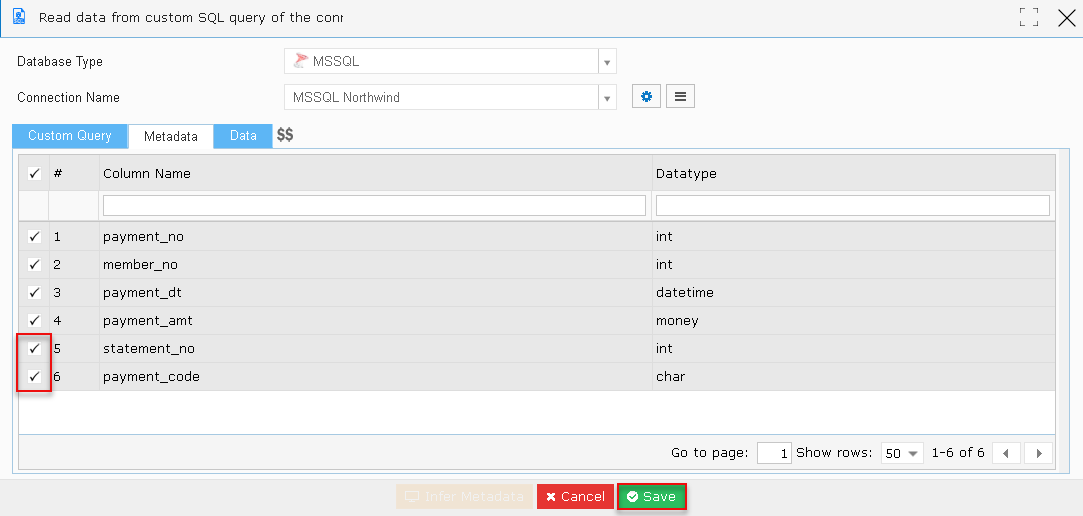
- Let’s go through the last two checkboxes.
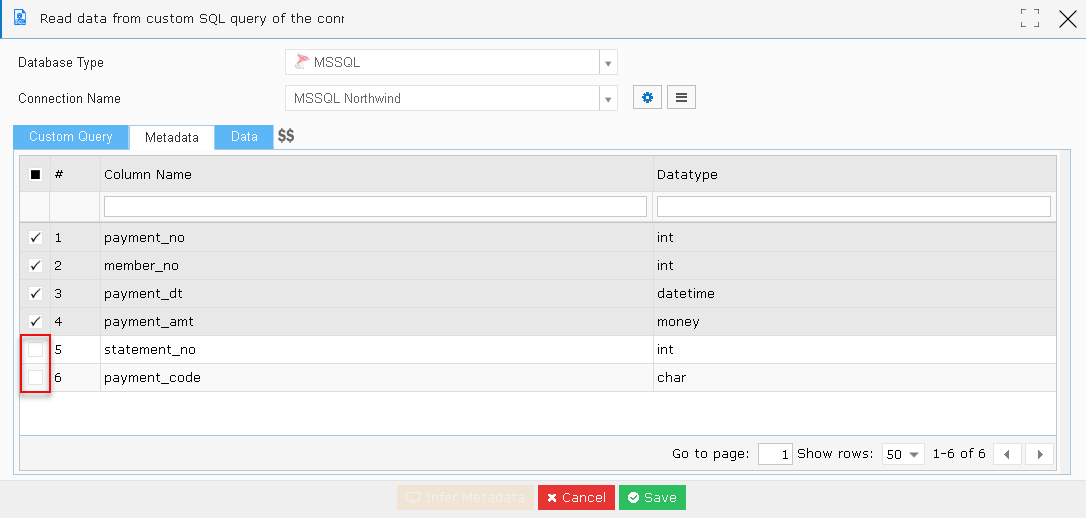
- Let’s suppose select the last two columns (Statement_no and Payment_code) checkboxes again.
Note: The user can either select the checkbox or leave it based on the requirement.
- Click the ‘Save’ button.
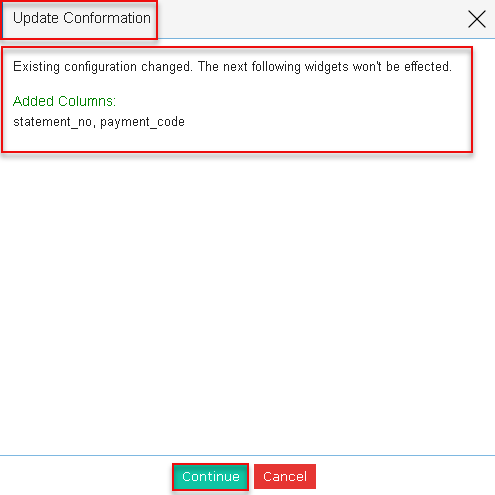
- An ‘Update Conformation’ pop-up window is displayed.
- The user can view a message ‘Existing configuration changed. The next following widgets won’t be effected.’
- The ‘Added Columns’ are also displayed below.
- Click the ‘Continue’ button.
- The ‘Custom SQL’ widget is closed saving the data.
- The user is navigated to the Query Chain session page.
- Click the ‘Transformation’ widget again.
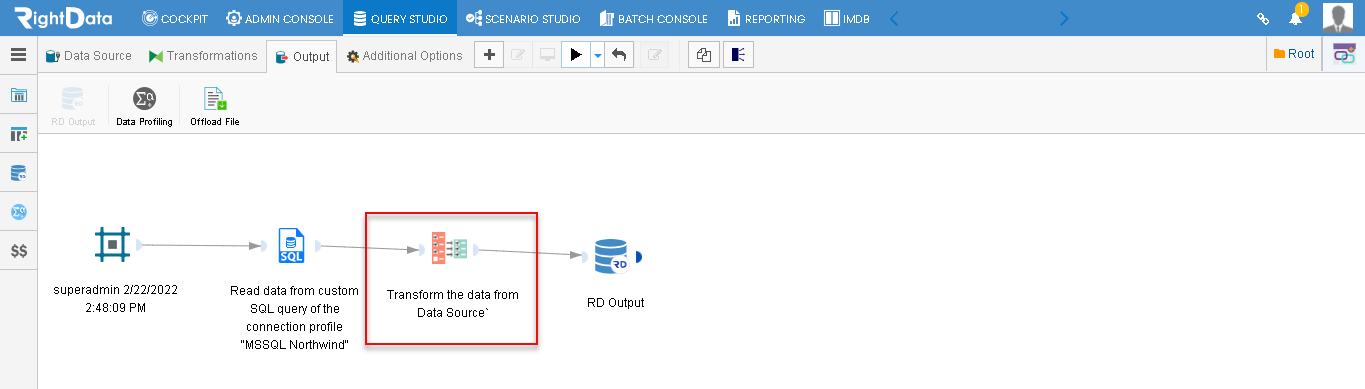
- The user notices that two columns (Statement_no and Payment_code) are added here but they are not checked in.
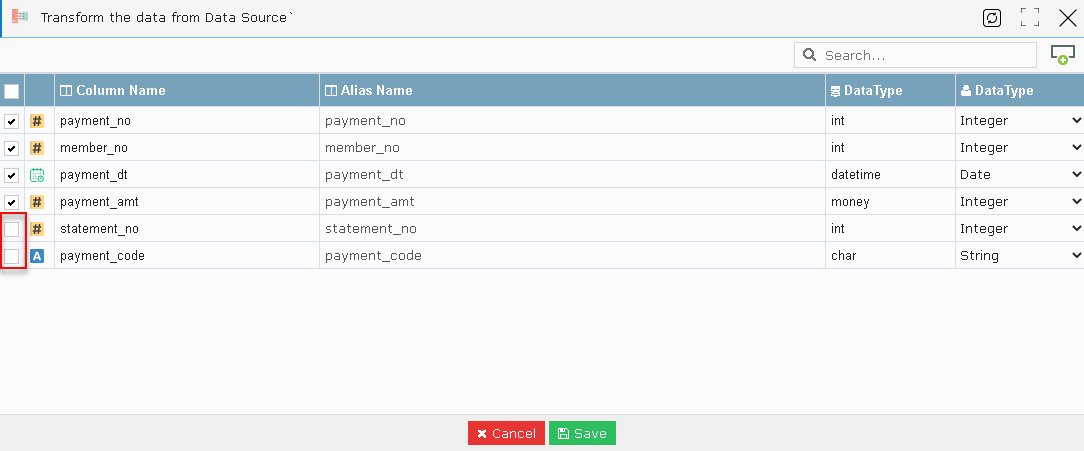
- Let’s select these two columns (Statement_no and Payment_code) checkboxes and click the ‘Save’ button.
Note: The user here has a choice whether to select the columns or not.
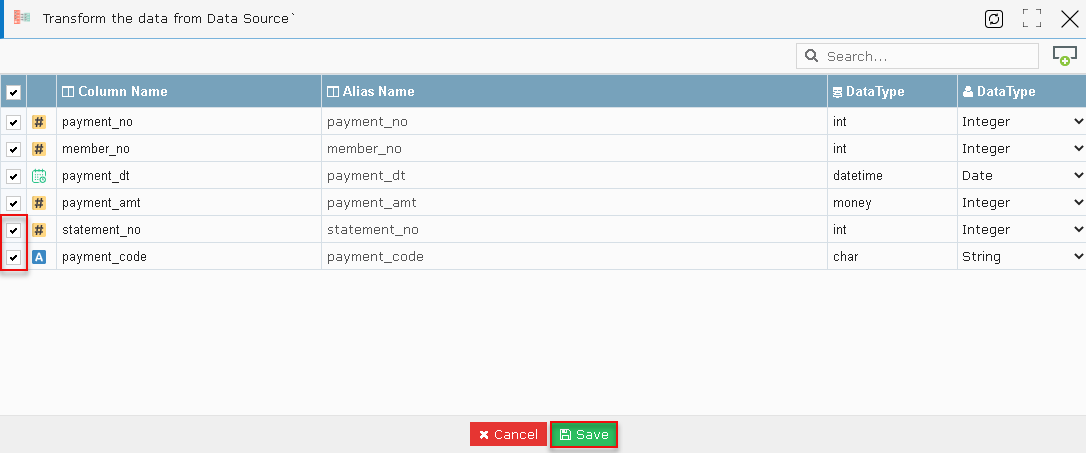
- The ‘Transformation’ widget is closed saving the data.
- The user is navigated to the Query Chain session page.
- Click the ‘Execute Now’ button.
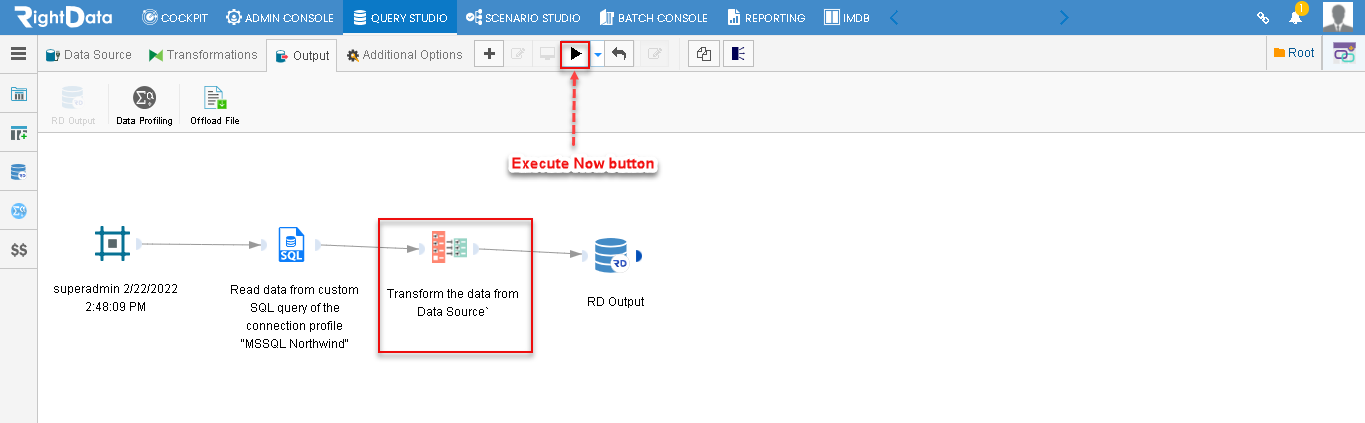
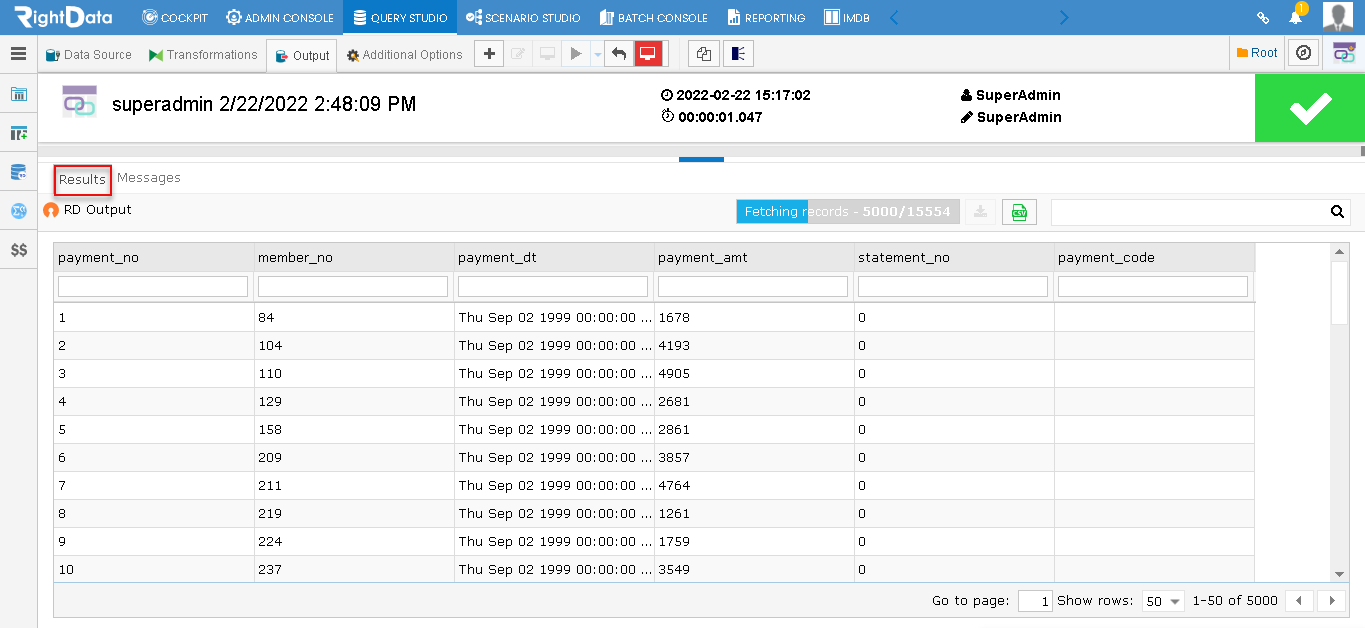
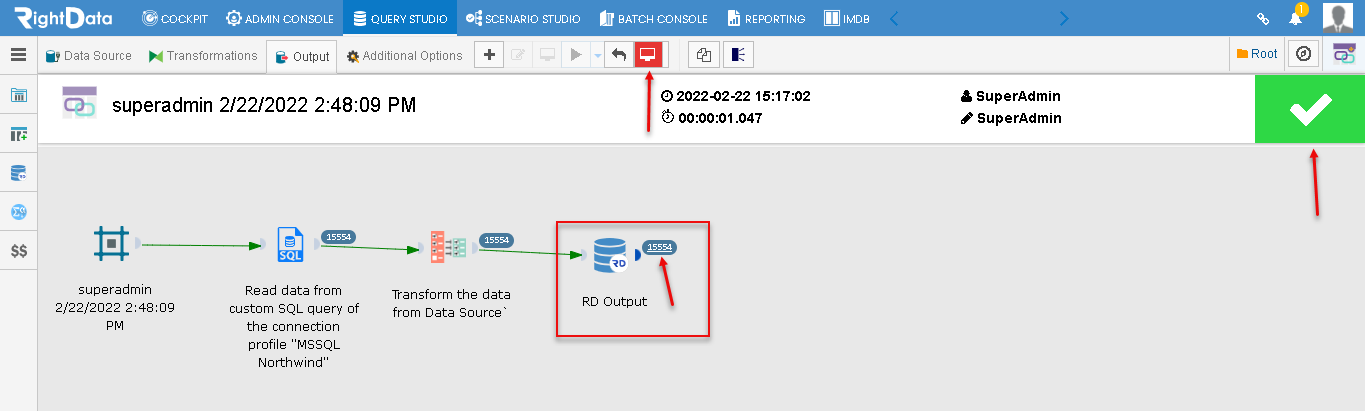
- The Query Chain is executed successfully.
- A green tick indicates the execution is successful.
- A Monitor mode is displayed.
- Click the ‘RD Output’ widget count.
- The user is navigated to the ‘Results’ tab.