Users can now send an email both from the ‘Exceptions summary page’ and the ‘Session history page’ of that particular scenario. The application provides two email sending options namely Send Email and Send Email With Changes.
- Send Email:
When the user clicks this option either in the Scenario exceptions or Session history page, the email is delivered to the default email address that was added in the Email settings widget while creating that particular scenario.
- Send Email With Changes:
When the user clicks this option either in the Scenario exceptions or Session history page, a pop-up window ‘Email With Changes’ is displayed from where the user can modify or make certain changes and send the email accordingly.
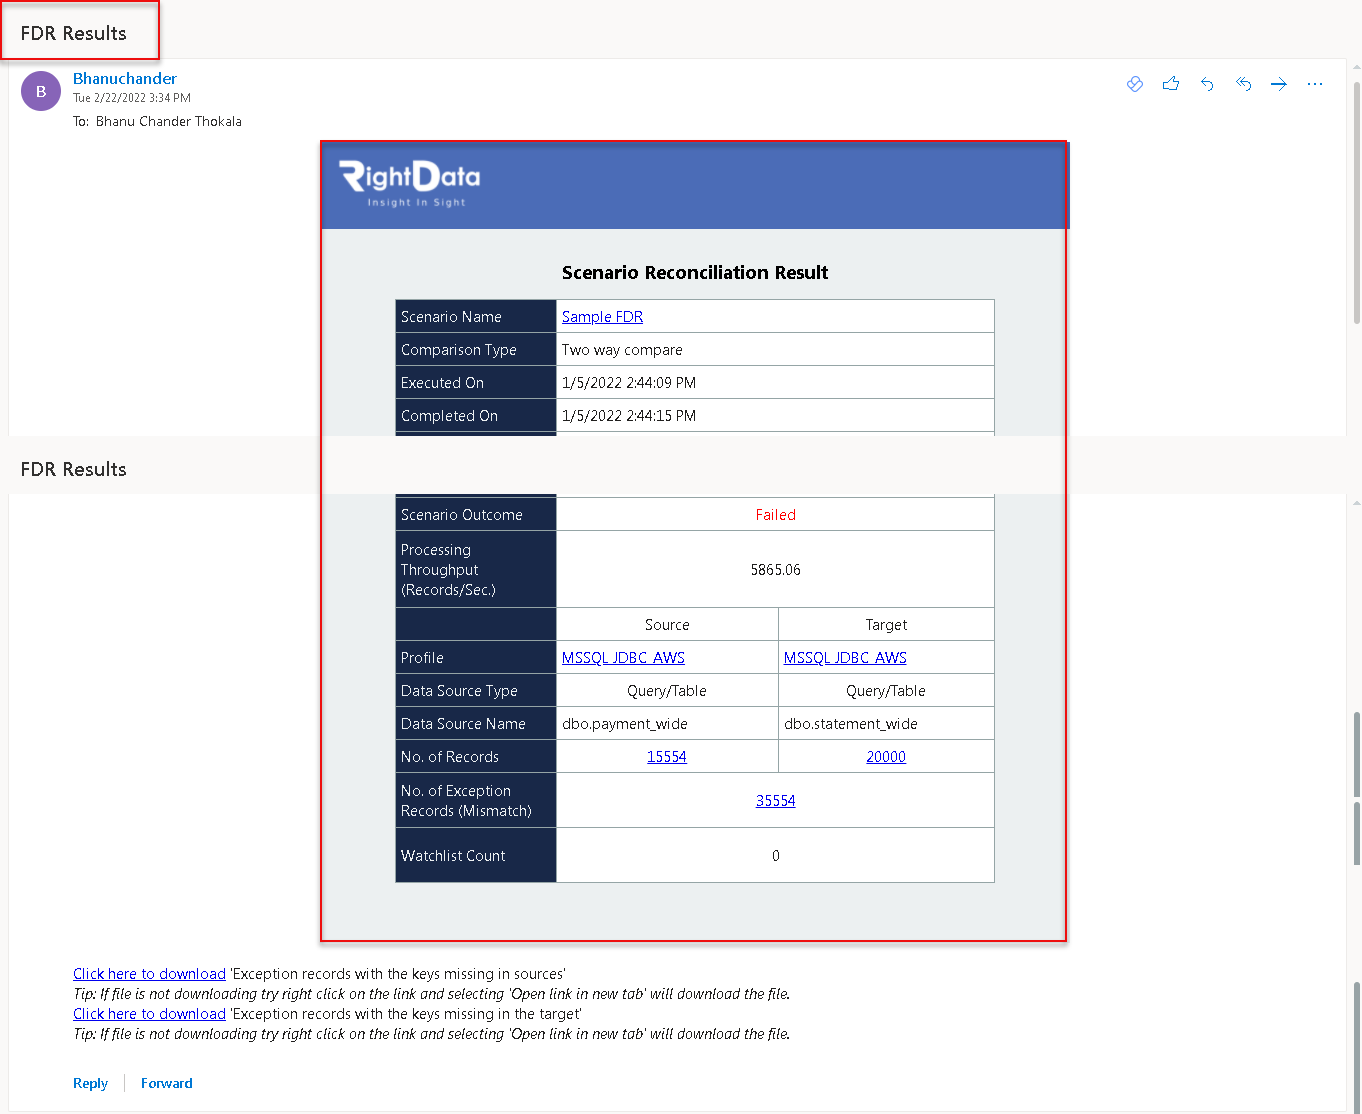
To learn more about the ‘Send Email’ option, let us walk through the below procedure:
- Click the ‘SCENARIO STUDIO’ tab.
- Let’s suppose checkbox the ‘Sample FDR’ scenario.
- Click the ‘Edit’ button.

- The FDR (Sample FDR) is opened in another tab in create and edit mode.
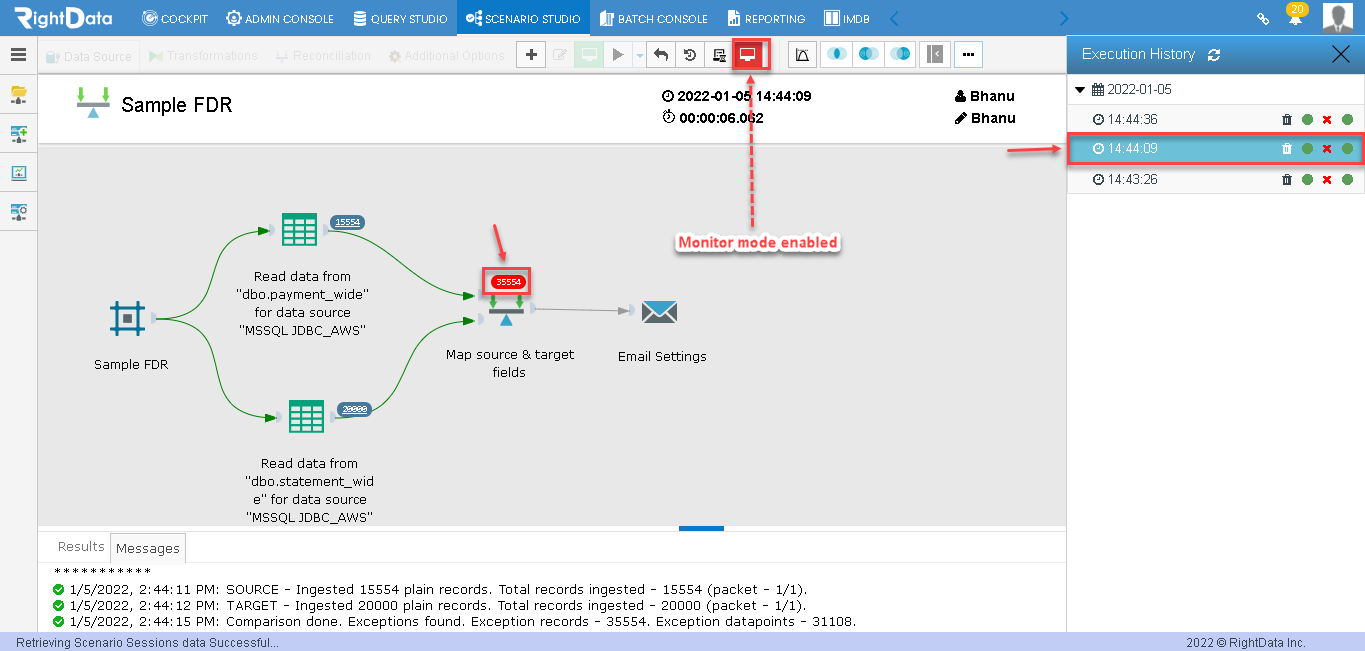
- Click the ‘Execution History’ button.
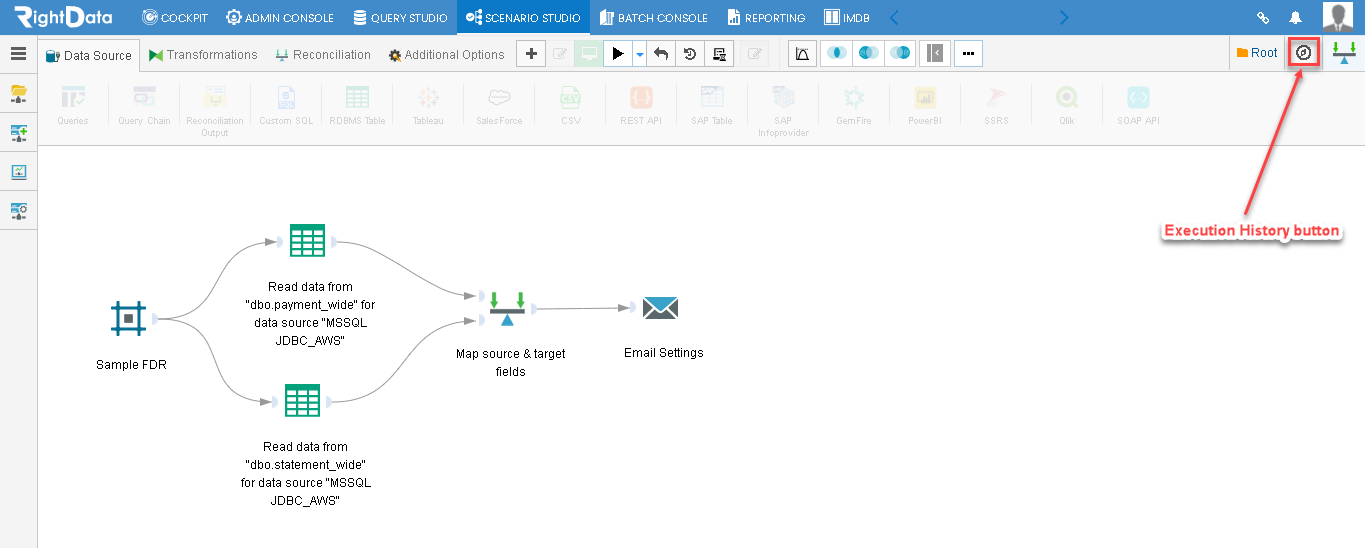
- This displays an ‘Execution History’ slide screen window.
- A ‘Refresh History’ button is available to refresh the ‘Execution History’ session page.
- The user notices the Execution History based on a specific date.
Note: Here in this ‘Sample FDR’ scenario, the user notices three executions performed on a specific date (2022-01-05)
- Hovering on any of the Execution History timings displays an Email icon.
- Let’s suppose, hover on the Execution History timing 14:44:09.
- Click the ‘Email’ icon.
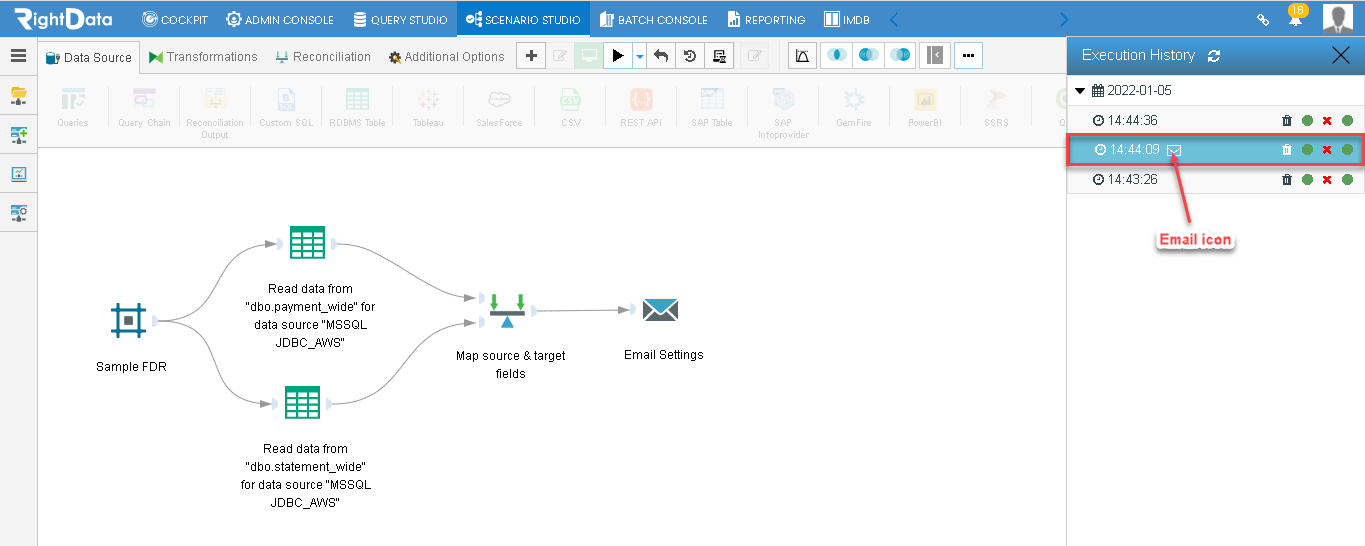
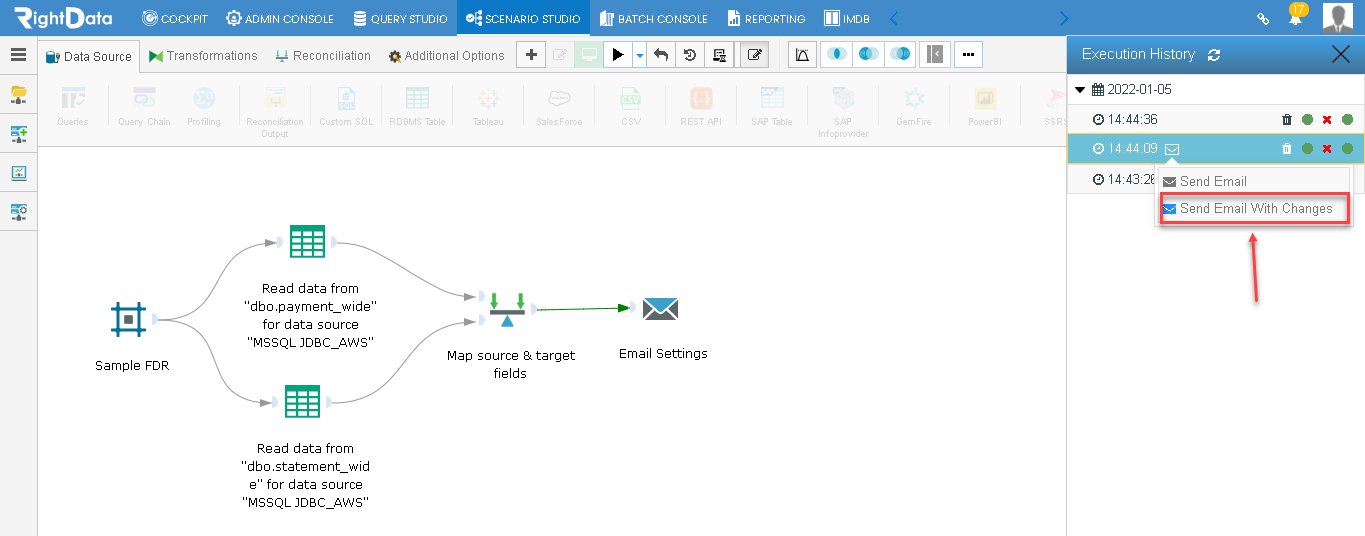
- A pop-up window with two options namely ‘Send Email’ and ‘Send Email With Changes’ is displayed.
- Click the first option ‘Send Email’ button.
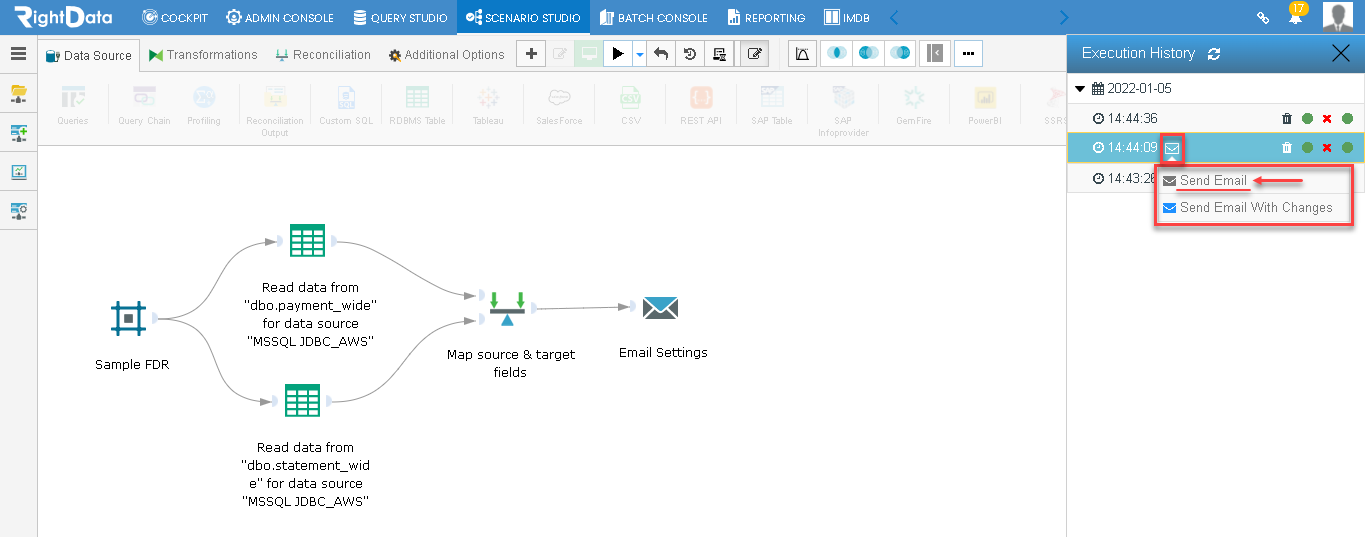
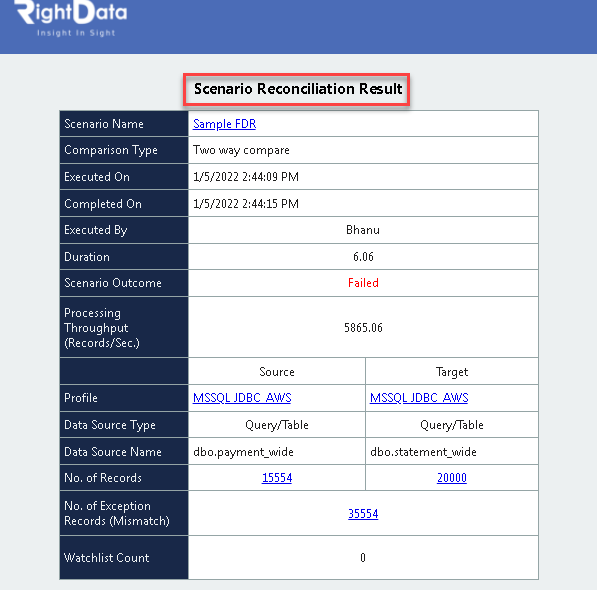
- An email (Scenario Reconciliation Result) is sent to the default email address that was included while creating that particular FDR scenario (Sample FDR here).
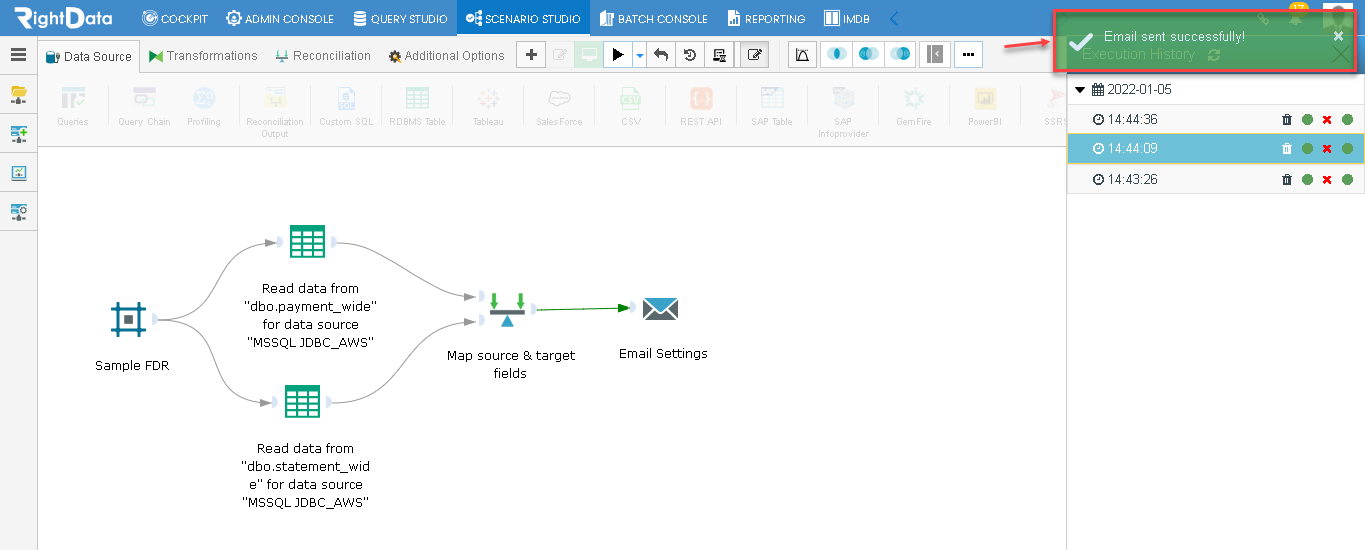
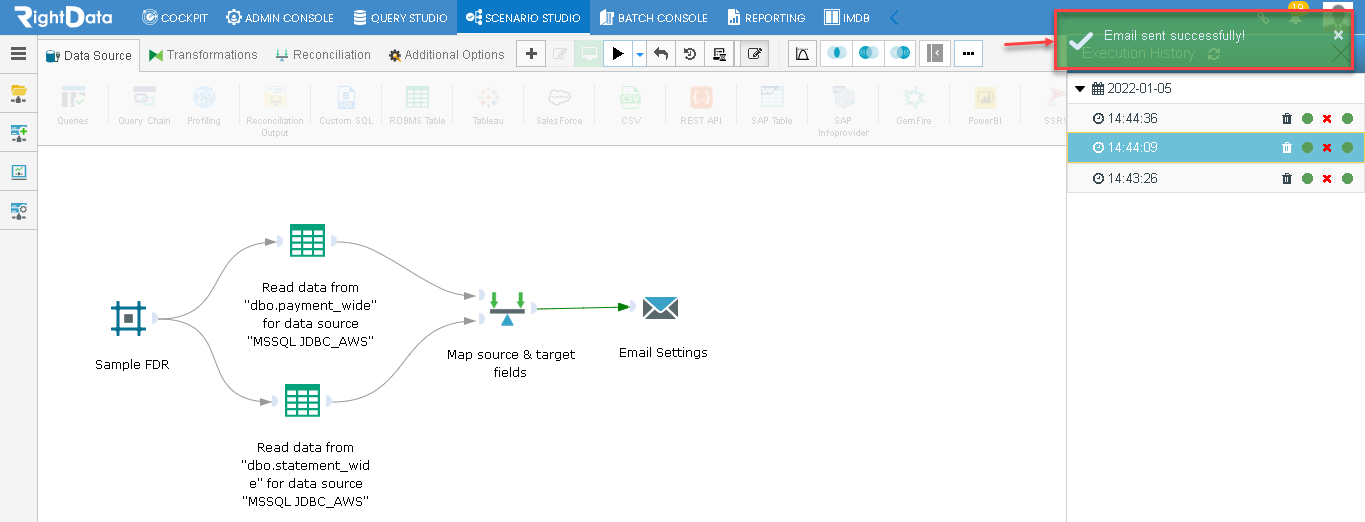
- A toaster message with ‘Email sent successfully!’ is displayed on the top right corner of the page.
- A Scenario Reconciliation Result of ‘Sample FDR’ is sent to the email as shown here.
- Now, click the second option ‘Send Email With Changes’.
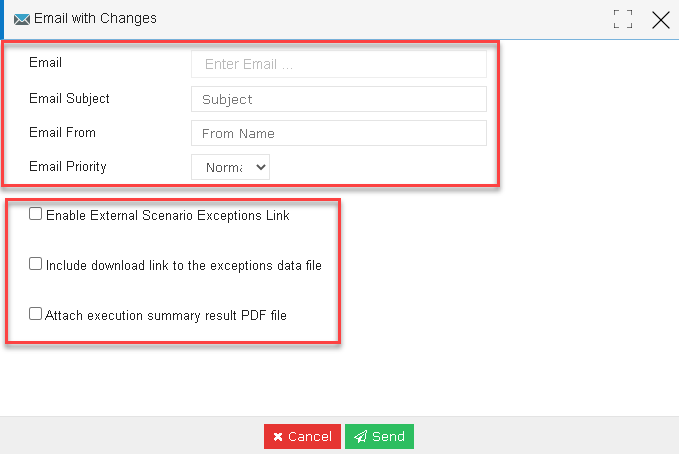
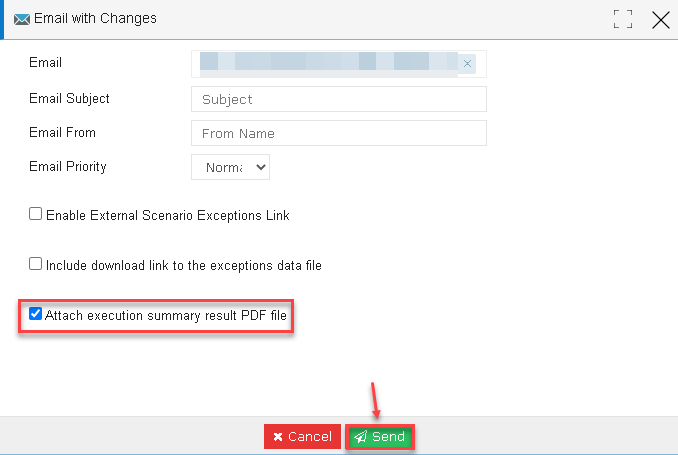
- This displays an ‘Email with Changes’ pop-up window.
- As per convenience, the user can change the following fields Email, Email Subject, Email From, and Email Priority. Apart from these field options, different options like Enable External Scenario Exceptions Link, Include download link to the exceptions data file and Attach execution summary result PDF file checkboxes are available.
- Let’s suppose, select checkbox ‘Attach execution summary result PDF file’.
- Click the ‘Send’ button.
- A toaster message ‘Email sent successfully!’ is displayed on the top right corner of the page.
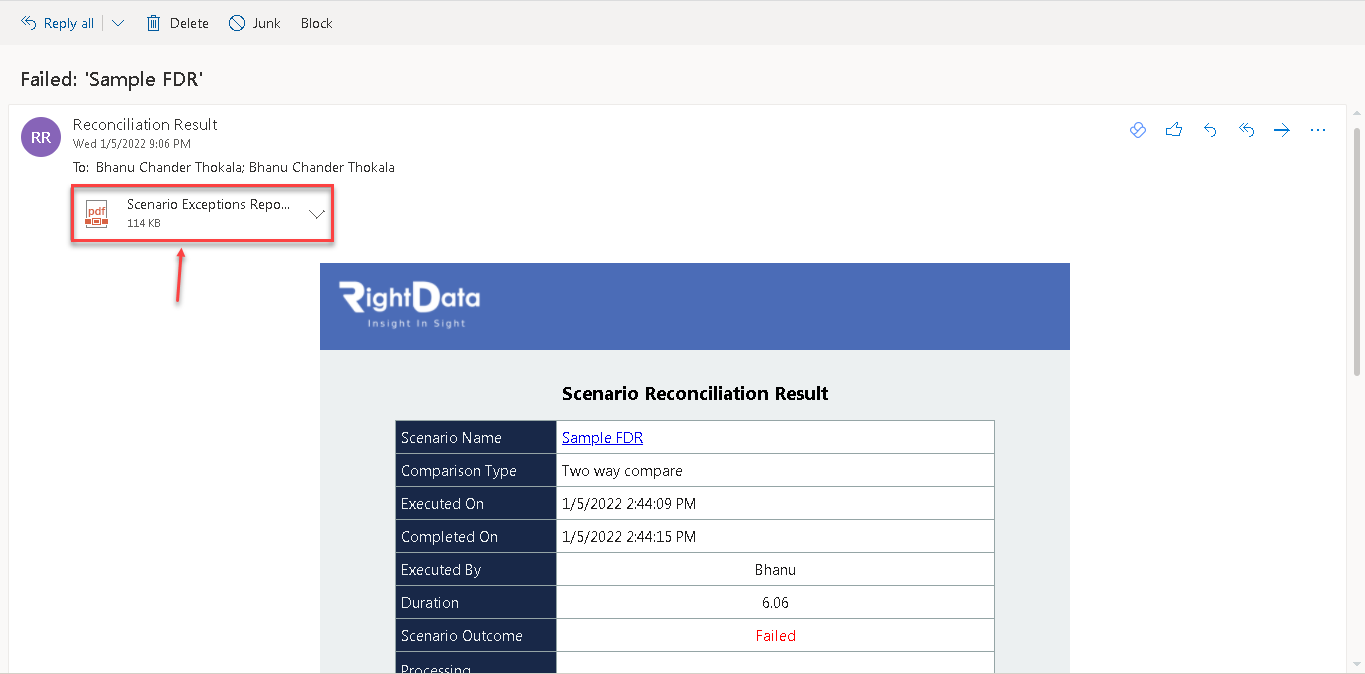
- A ‘Scenario Exceptions Report’ PDF is sent to the email address as shown here.
- Let’s click the timing ‘14:44:09’.
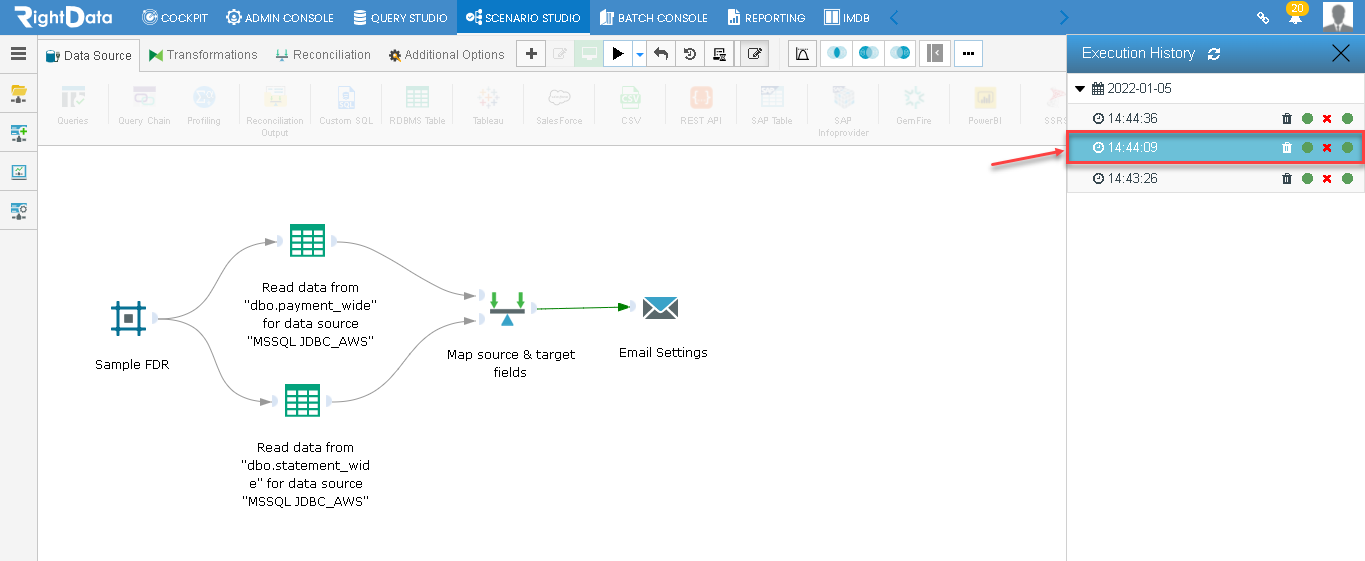
- This enables the monitor mode to perform the same execution specifying the above mentioned time.
- Click the count (35554) displayed on the ‘Map source & target fields’ widget.
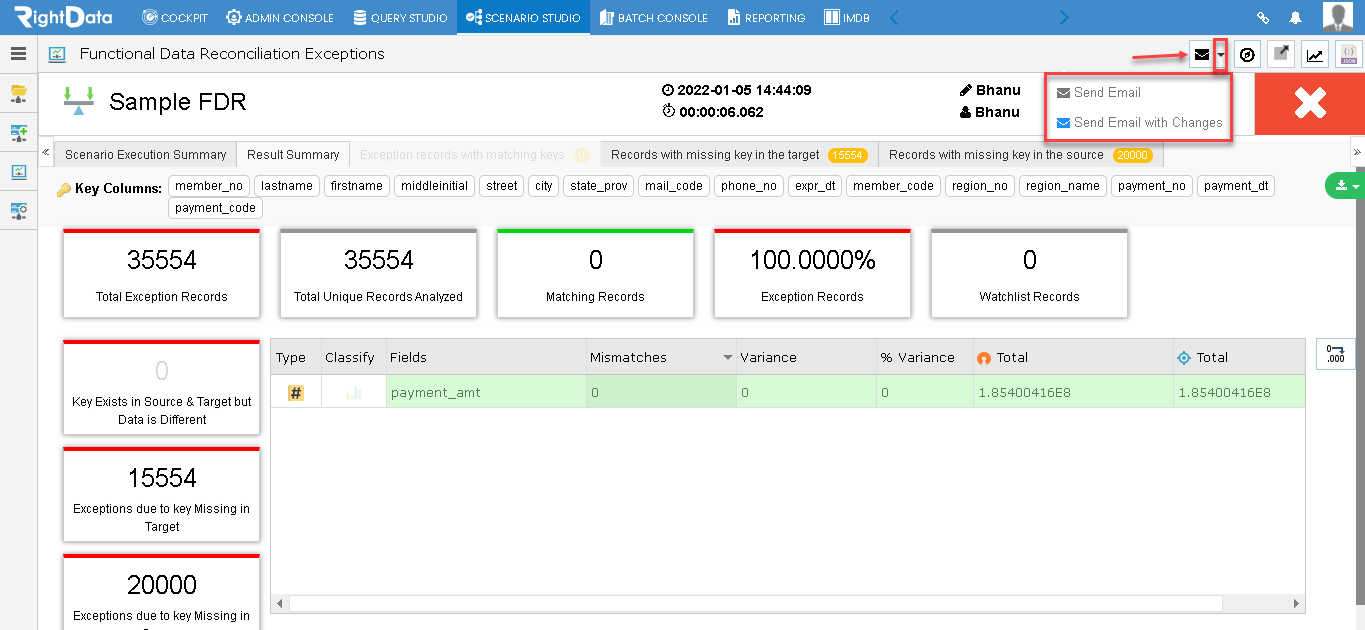
- The user is navigated to the ‘Scenario Execution Summary’ tab.
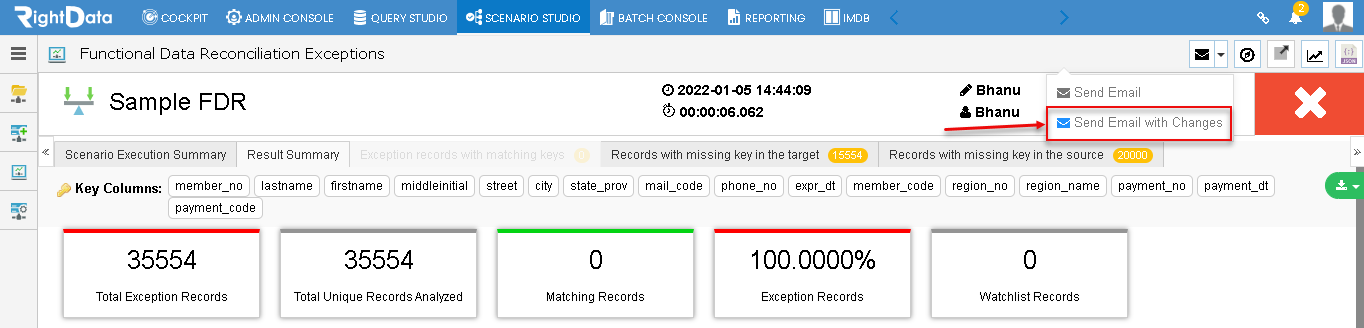
- In the scenario exceptions page, the user can view a similar Email icon as noticed in the ‘Execution History’ pop-up window with similar functionality.
Note: Clicking directly on the Email icon sends an email related to this scenario exceptions session page to the default email address. Apart from this, when the user clicks the drop-down list beside the Email icon displays a pop-up window with two options namely ‘Send Email’ and ‘Send Email With Changes’.
- Let’s suppose click the ‘Email’ icon.
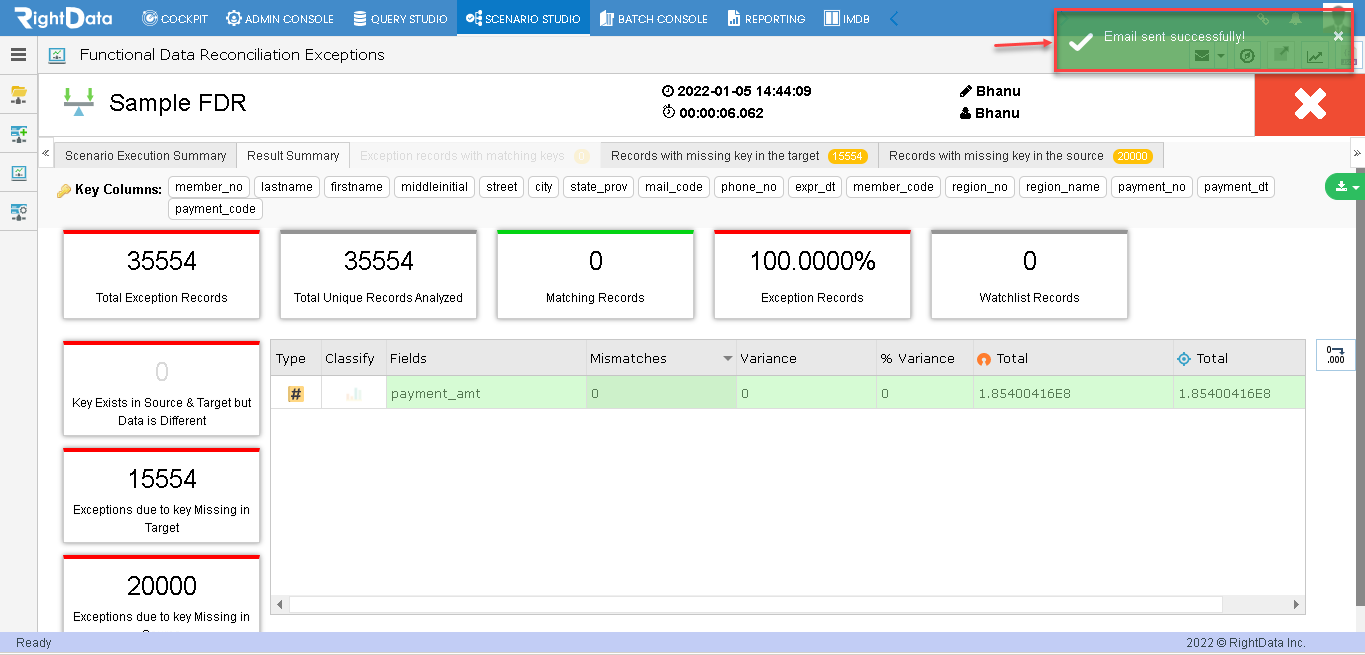
- A toaster message ‘Email sent successfully!’ is displayed on the top right corner of the page.
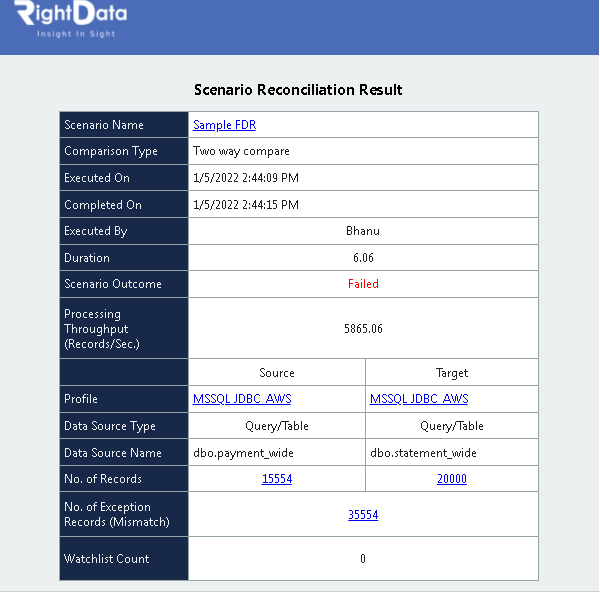
- A ‘Scenario Reconciliation Result’ report is sent to the email address as shown here.
- Similarly, the user can click the second option ‘Send Email With Changes’ and add the required modifications and send the email accordingly.
Note: Under the Execution History of a particular scenario, the user can either ‘Send Email’ or ‘Send Email With Changes’ related to a particular execution timing at one go but in the scenario exceptions page (Exceptions Summary page), the user can either ‘Send Email’ or ‘Send Email With Changes’ belonging to that particular scenario exceptions summary page only.
- Now, let’s click the second option ‘Send Email with Changes.’
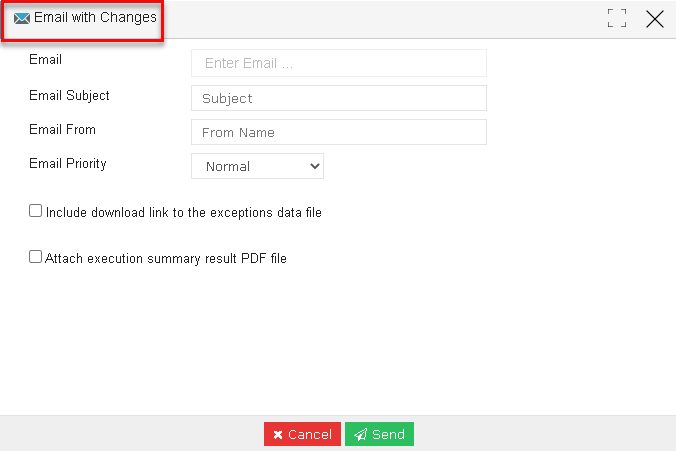
- An ‘Email with Changes’ pop-up window is displayed and has different text fields such as Email, Email Subject, and Email From. Email Priority (Low, Normal, and High) drop-down list option and two checkbox options (Incude download link to the exceptions data file and Attach execution summary result PDF file).
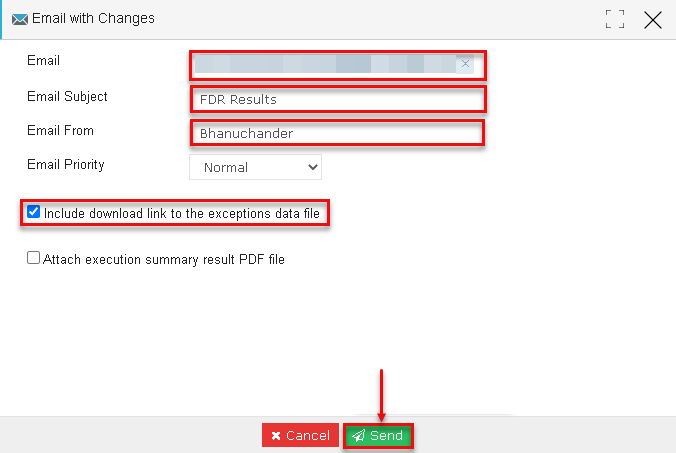
- Let’s add an email address under the ‘Email’ text field.
Note: Email is greyed due to confidential data.
- Email subject as ‘FDR Results’
- Email From as ‘Bhanuchander.
- Let’s checkbox ‘Incude download link to the exceptions data file.’
- Click the ‘Send’ button.
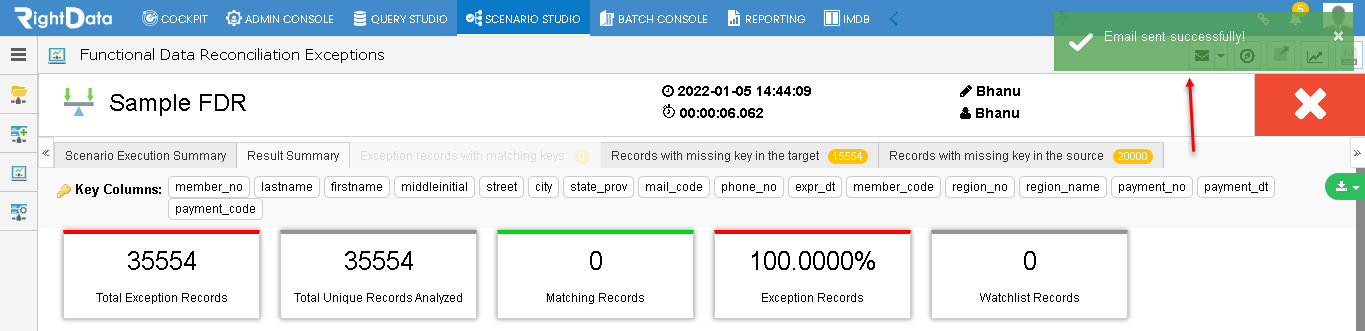
- A toaster message ‘Email sent successfully!’ is displayed on the top right corner of the page.
- The user can also check the sent email as shown here.