Single sign-on is one of the authentication methods that allows users to sign in using one set of credentials to multiple independent software systems.
Follow the below steps to setup SSO:
- Visit the link - https://portal.azure.com/#home
- Log in to the Microsoft Azure portal using your credentials.
- In the search text field, search for Microsoft Entra ID.
- Click this icon to navigate to the Overview page.
- From the left pane options, choose Enterprise Applications.
- This action navigates to the Enterprise applications | All applications page.
- To add a new application, click on the + New Application button.
- Browse Microsoft Entra ID Gallery page is displayed.
- Click the + Create your own application option.
- This action navigates to Create your own application page.
- Provide a name in the field What’s the name of your app? E.g.: DataTrustSSO
- Select the option Integrate any other application you don’t find in the gallery (Non-gallery) from the below screenshot.
- Click on Create.
- This action will take you to the application overview page - DataTrust SSO | Overview.
- Click the Single sign-on option from the left pane options.
- A DataTrust SSO | single sign-on page is displayed.
- Select SAML as the single sign-on method.
- SAML-based Sign-on page is displayed.
- Click on the Edit option for the Basic SAML Configuration.
- This action displays Basic SAML Configuration page.
- Provide the following URL as Identifier and Reply URL: https://<yourDomainURL>/rightdata/ServiceForSignalR.svc/LDAPService
Note: <yourDomainURL> is the domain name created for the RightData DataTrust application URL.
This URL must be https with the domain created for DataTrust application.
- Navigate back to the SAML-based Sign-on page.
- Click on the Attributes & Claims Edit icon.
- In the Attributes & Claims section, click on + Add New Claim option.
- Manage Claim pop-up window is displayed.
- Add the required UserName for the Name field.
- Provide the Source attribute.
Note: The Source attribute can be a combination of your first name and last name, your first name and phone number, your last name and first name etc.
- Click the Save option to save the claim.
- The added claim is displayed in the Attributes & Claims page.
- Close this window and navigate back to SAML-based Sign-on page.
- From the SAML Certificates section, download the Federation Metadata XML file and rename it to Metadata.xml.
- Put the Metadata.xml file in DataTrust's application root folder.
Path: You can find the path in the system environment variable, RD_APP (The default path C:\inetpub\wwwroot\Rightdata)
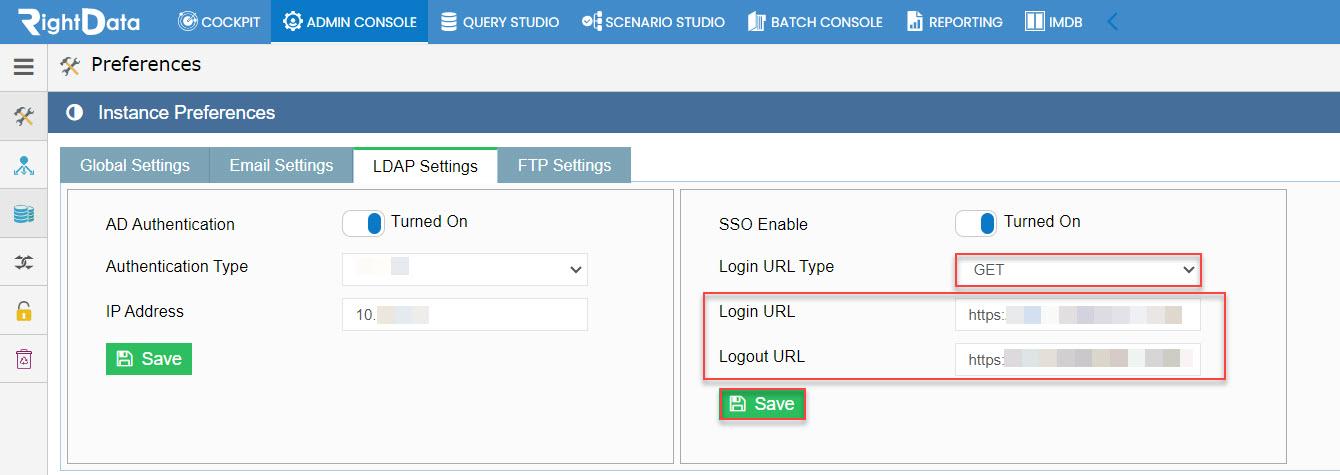
- The Login and Logout URLs must be added later in the SSO settings of DataTrust application. (The path- ADMIN CONSOLE > System Preferences > Instance Preferences > LDAP Settings > SSO Enable)
- Navigate to Properties from the left pane options and copy the User access URL.
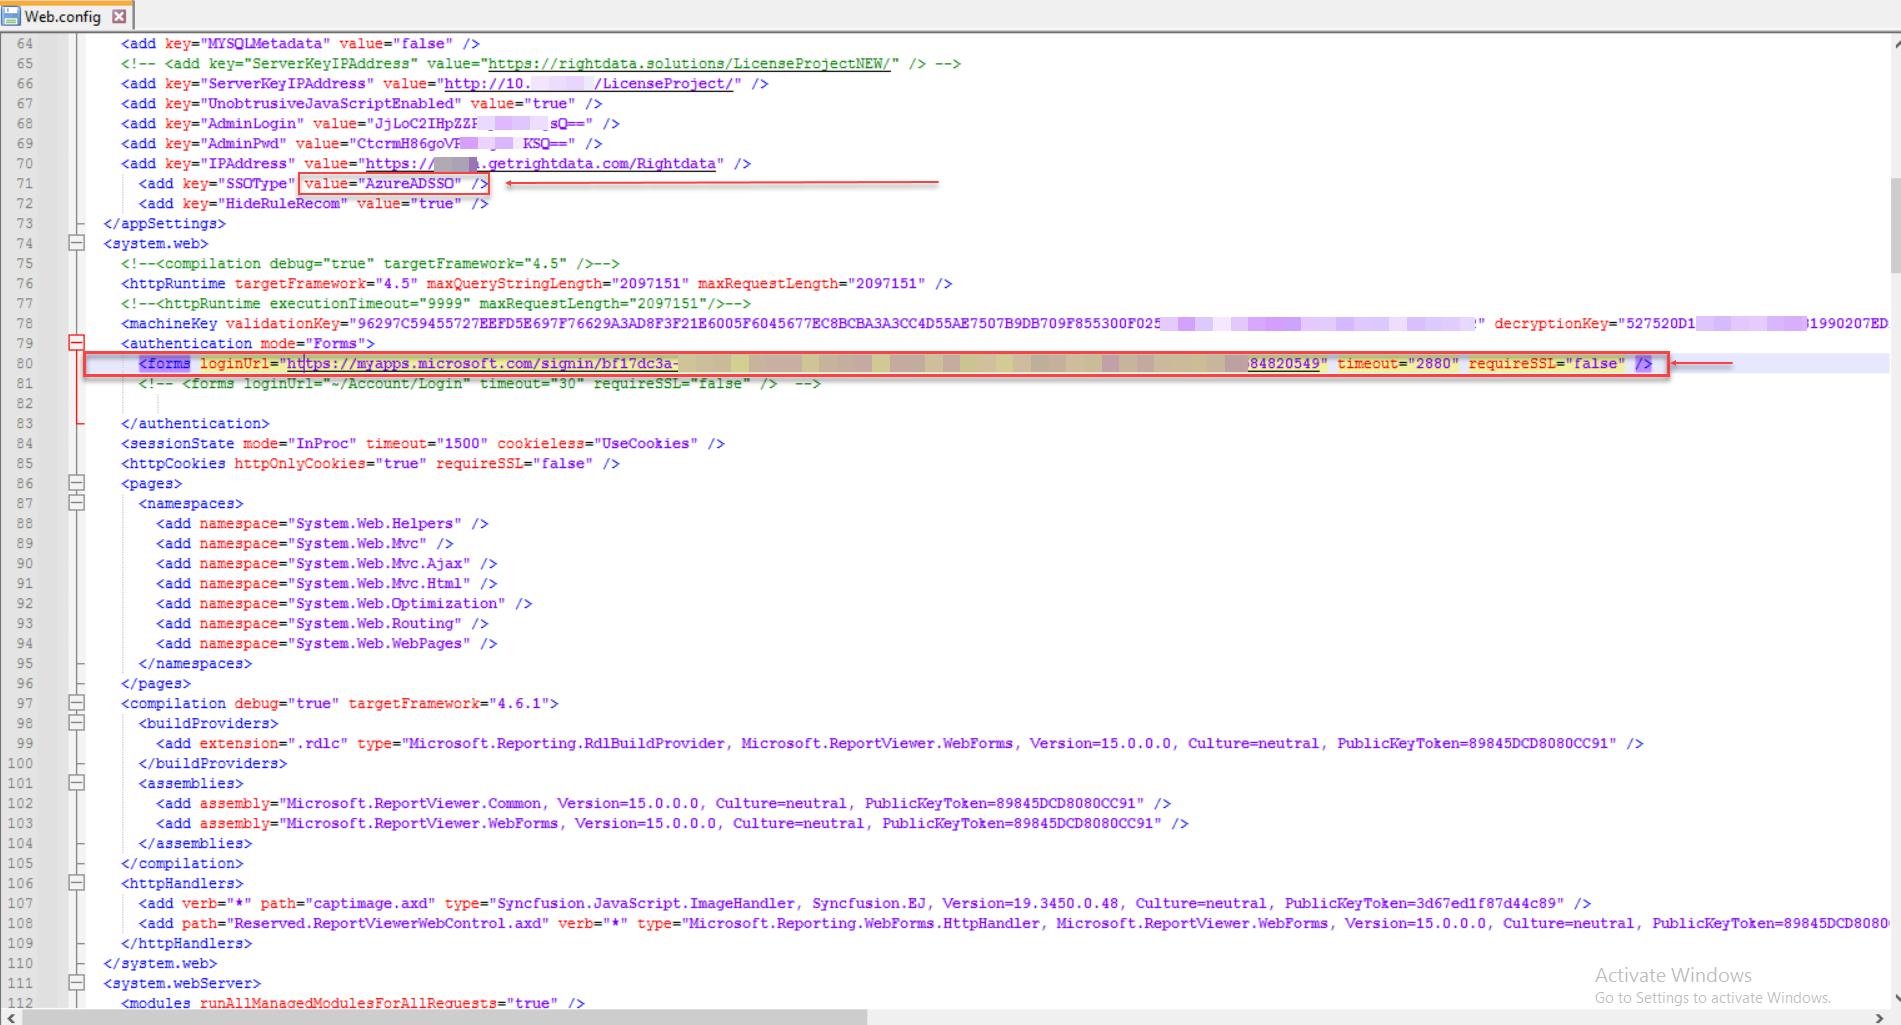
- Open the web.config file from the location in the system environment variable – RD_APP.
- Copy the User access URL and replace it in loginUrl attribute under authentication tag under system.web.
- Also, under appSettings tag, change the value of the SSOType key to AzureADSSO.
Azure AD SSO configuration within DataTrust application:
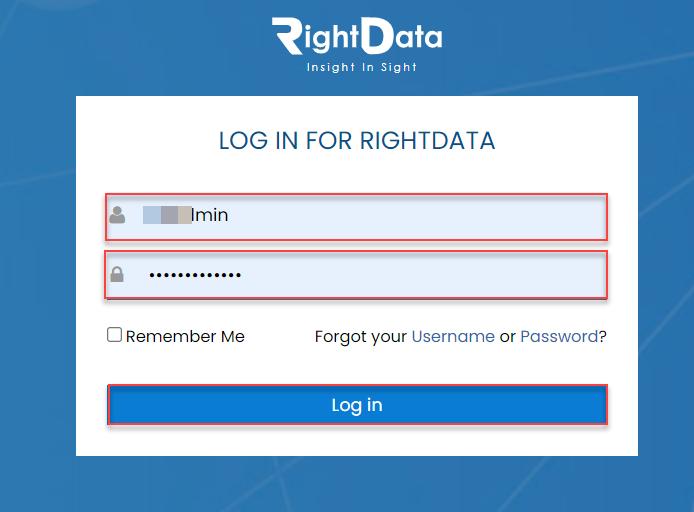
- Login to DataTrust application with your Admin credentials such as User name and Password.
- Click the Log in button.
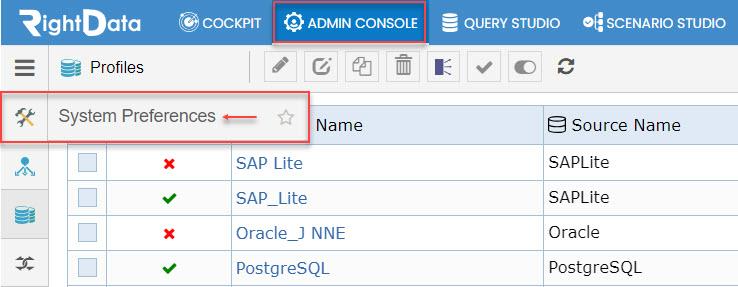
- Click the ADMIN CONSOLE module.
- Hover and click on the System Preferences snippet option.
- Select Instance Preferences.
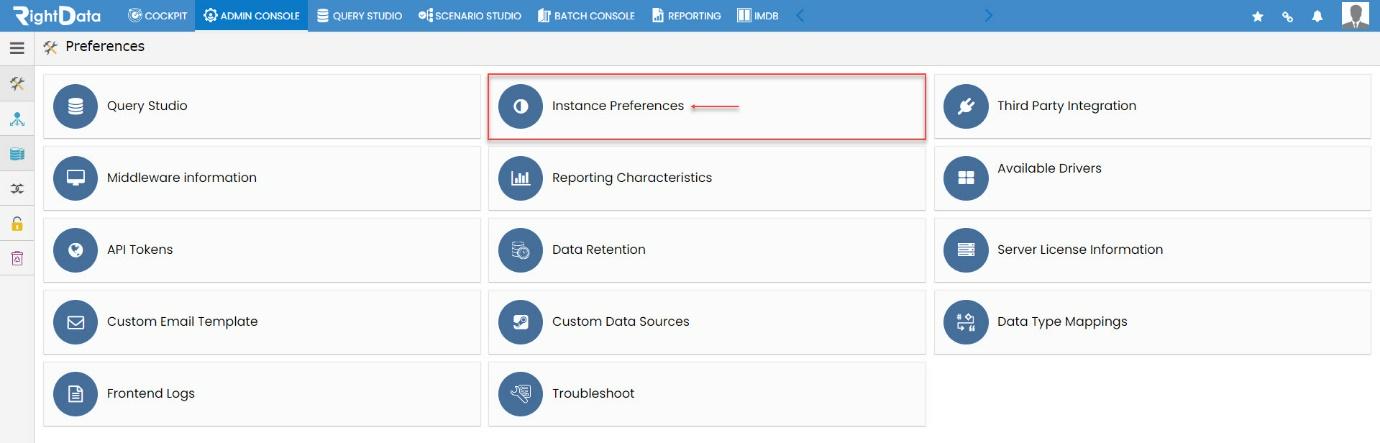
- This action navigates to the Instance Preferences session page.
Note: By default, Global Settings tab is selected.
- Select LDAP Settings.
- Turn on the SSO Enable toggle switch.
- Now, add the Login URL and Logout URL from the Set Up section discussed in the previous steps.
- Click the Save button to update the changes.